Make an Air-Dry Clay Pinch Bowl: A Calm First Hand-Building Session

Make an Air-Dry Clay Pinch Bowl: A Calm First Hand-Building Session

Make a small air-dry clay pinch bowl with tactile checkpoints, calm shaping guidance, safe workspace habits, drying advice, and easy variations.

0:00 / 12:11

What you'll make

You will make a small, shallow pinch bowl from air-dry clay. The bowl is useful for rings, paper clips, beads, or other dry objects. It does not need a pottery wheel or kiln.
Plan on about thirty to forty minutes of hands-on work, plus the drying time printed on your clay package. Many air-dry clays need a day or two, and thicker pieces can take longer. This audio guide uses tactile checks instead of a visual diagram, so keep the bowl small and the walls even. Treat the finished bowl as decorative unless your clay and sealer specifically say they are suitable for food or liquids.

Materials

  • About 250 grams of air-dry clay
  • A smooth, clean work surface
  • A small cup of water, used sparingly
  • A plastic card or blunt modeling tool
  • Wax paper, parchment, or another surface recommended on the clay label
  • A ruler, optional
  • A damp cloth for your hands and table
  • Optional: a wooden skewer, rubber stamp, leaf, or button for texture
  • Optional after drying: acrylic paint and a compatible sealer
Use the clay package as the authority for drying, painting, sealing, and cleanup. Do not mix products just because they look similar.

Prepare the table safely

Work in a clear, well-ventilated area away from food preparation. Read the label before opening the clay. If the clay is dusty or contains mineral powder, avoid stirring up dust, keep your face away from it, and wipe the table with a damp cloth instead of sweeping. Wear nitrile gloves if your skin is sensitive. Eye protection is sensible if you later sand a fully dry piece or use a dusty finish; follow the product label.
Keep the clay, tools, scraps, and finished piece away from children and pets. Wash your hands after working, even if you wore gloves. Air-dry clay does not belong in an oven unless the label specifically says it can be heated. Never add heat just to make it dry faster.

The do-along project

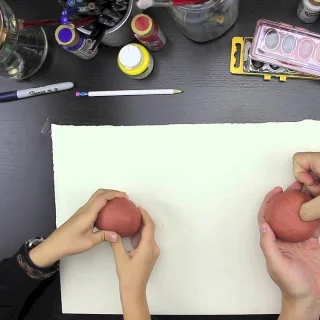
  1. Condition the clay until it feels even and flexible.
  2. Press a thumb into the center to make the hollow.
  3. Pinch and rotate to build the walls.
  4. Flatten the base and smooth the rim.
  5. Let the bowl dry slowly, then decorate it if you wish.
Pause whenever your hands need to reset. The goal is a sturdy little bowl, not a perfect circle.

Troubleshooting and variations

If the clay cracks, press the area closed with a fingertip and smooth it with a barely damp finger. If the clay feels sticky, stop adding water and let it rest for a few minutes. If the rim becomes wavy, support it from inside while you smooth one small section at a time.
If the bowl dries with a small crack, follow the clay label before repairing it. A little fresh clay slip may help with some products, while other clays need a commercial filler. If a piece breaks, do not assume glue will make it food-safe or water-tight.
Try a pressed leaf or a blunt stamp for texture. Make a ring dish by keeping the bowl very shallow. For a larger bowl, build the walls in stages and expect a longer drying time, but keep the first attempt small so the clay has less chance to warp.

Cleanup

Put reusable clay back in its sealed package. Collect scraps rather than washing them down the sink. Wipe tools and the table with a damp cloth, then wash your hands. Let the bowl dry on a stable, label-compatible surface, and do not use it for food or liquid unless the complete product system is explicitly rated for that use.

Este contenido lo produjo un canal automáticamente. Con una sola frase, Neodrop puede seguir produciendo para ti.

Contenido relacionado

More from this channel