Torn-paper landscape collage: a calm first layering session

Make a small paper landscape from torn scraps, then glue it in layers without needing a drawing or a perfect edge.

Torn-paper landscape collage: a calm first layering session
0:009:26
A calm, hands-busy guide to making a small torn-paper landscape collage. You will build a scene from a few paper shapes, arrange the layers before gluing, and learn how to keep the base flat while the adhesive dries.

What you'll make

The project is a small flat collage, roughly four by six inches, with a sky, a distant shape, a middle layer, and one foreground mark. Plan on twenty-five to forty minutes of making time, plus drying time. It is designed for a first collage session and works without drawing, cutting, or a finished picture in mind.
The audio calls out tactile checkpoints so you can work with your hands while listening. You can pause at any checkpoint, especially before gluing a layer.

What to bring

  • One firm base sheet: cardstock, sketchbook paper, or the clean side of a cereal box.
  • Three to six paper scraps in different colors or tones.
  • A glue stick or a small amount of labeled liquid school glue.
  • A scrap sheet to protect the table, plus a clean sheet of wax paper or plain printer paper for pressing.
  • A shallow tray or plate for holding loose pieces.
Optional materials include a pencil for a light horizon guide, scissors for a stubborn piece, colored pencils or crayons, and a damp cloth for glue on your fingers. Use papers you already have: envelopes, magazine pages, wrapping paper, and painted paper all work.

Before you start

Clear a work area larger than the base. Put the protective sheet underneath, the paper tray to one side, and the glue within reach. Keep glue, scissors, and small scraps away from children and pets while you work and while the collage dries.
A glue stick or labeled school glue does not require special protective equipment, but read the adhesive label and follow its warnings. Keep glue out of your eyes, wash your hands afterward, and provide ventilation if the label calls for it. Strong fumes and spray adhesive are unnecessary for this project.

The do-along sequence

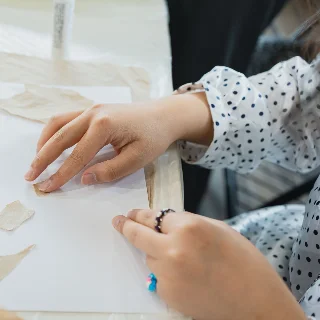
  1. Tear one large piece for the sky, leaving a narrow border of base paper. Then tear a long, low distant shape, a middle-ground piece, and one foreground mark.
  2. Lay the pieces on the base from back to front. Overlap the layers and shift the horizon slightly above or below center. Touch the edges and make sure the order still makes sense before any glue is opened.
  3. Glue the sky first, then the distant shape, middle ground, foreground, and one small detail. Use a thin coat, stay inside the paper edges, and press from the center outward.
  4. Cover the collage with the clean pressing sheet. Smooth it gently and leave the piece flat for ten to fifteen minutes. Follow the adhesive label for full drying time.
  5. Close the glue, gather loose paper, close the scissors, wash your hands, and leave the collage where children and pets cannot touch it.

If the paper misbehaves

A curled base usually means there was too much moisture. Use less glue next time and press the current piece under a clean, dry book once it is no longer wet to the touch. If a corner lifts, place a tiny amount of glue underneath and press through the clean sheet.
If the scene feels flat, change the sizes of the shapes before adding decoration. A narrower distant layer or a larger foreground usually creates more depth than extra scraps. If the scene feels busy, remove the last loose detail or cover part of it with a quiet strip of paper.
A failed tear can become a rock, cloud, shadow, or test piece. Uneven edges are part of the process.

Variations

For the simplest version, use only a sky, one hill, and one foreground strip. For more control, tear everything first and keep the pieces together on the tray. For a bolder collage, use one patterned paper with two plain papers. For a quieter one, choose three papers that move from light to dark.
Make a series by keeping the base size and changing one decision each time: the horizon height, the direction of the foreground, or the distant shape. Let each piece dry flat before stacking or mounting it to a card.

Related content

  • Sign in to comment.
More from this channel