Braided-Cord Bookmark: A Calm First Four-Strand Braid

Braided-Cord Bookmark: A Calm First Four-Strand Braid

Make a small braided-cord bookmark from four strands, with a repeatable over-under-over rhythm, tactile checkpoints, easy recovery, and a simple knotted finish.

0:00 / 11:38

What you'll make

A small braided-cord bookmark made from four strands, finished with a knot and either a short fringe or a simple loop. The braid itself takes about fifteen to twenty minutes once the table is ready. Allow a little extra time for a first practice pass. There is no drying time, and you can pause after any crossing.
The audio guide uses one repeatable movement: start with the strand at the far left, take it over, under, over across the other three strands, and let it become the new strand at the far right. After each pass, renumber the strands by their current positions from left to right.

Materials

  • Four lengths of smooth cord or yarn, about 30 inches each
  • Scissors
  • Low-tack tape, a binder clip, or a clothespin to hold the starting knot
  • Optional: a ruler, scrap cardboard, and four contrasting colors
Cotton cord, smooth wool yarn, paper twine, and embroidery floss are suitable choices. Use 36-inch strands for a longer bookmark or if you pull firmly. Avoid heat-sealing synthetic cord; this project needs no flame, glue, solvent, or hot tool.

Prepare the table

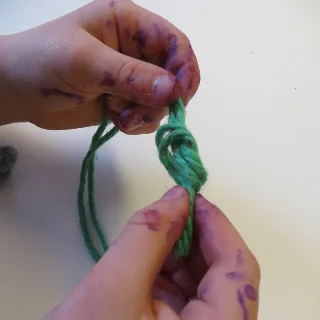
Clear a flat work area and let the four cords point away from you. Align their ends and tie a loose overhand knot about two inches from one end. Tape or clip that knot to a piece of cardboard or the table. Spread the working strands into a row and identify them from left to right as one, two, three, and four. The numbers describe positions, so they change after every pass.
Keep scissors closed when they are resting. Keep cords, short offcuts, and the finished piece away from children and pets. If the cord is dusty or dyed, wash your hands after working.

The do-along braid

  1. Practice one pass. Take the far-left strand over its neighbor, under the third strand, and over the far-right strand. Set it down as the new far-right strand. Nudge the crossing toward the starting knot without yanking.
  2. Check the path. Your fingers should find one crossing over, one section hidden under, and another crossing over. If the order is wrong, undo only that pass while it is still loose.
  3. Repeat in groups. Find the current far-left strand and repeat over, under, over. After every three passes, press the new ridge toward the braid and check that the four strands are still in a row.
  4. Set the length. Stop when the braided section is about seven inches long. Leave two or three inches below it if you want a fringe. For a narrower bookmark, add another inch of braid.
  5. Finish both ends. Tie a firm overhand knot in the four loose strands close to the braid. Trim the ends to an even one-inch fringe, or leave them longer and separate them gently for a tassel. Remove the temporary starting knot and tie a second firm knot close to the braid. If you want a loop at the top, fold the first knot toward the braid before making that final knot.
Use light, even tension, like smoothing a ribbon. If the braid spreads, press the latest ridge upward before pulling again. If it curls into a tight rope, loosen the last pull and flatten it with your fingertips.

Troubleshooting and variations

If you lose the direction, spread the cords into a row and begin again with the far-left strand. If you accidentally started from the right, undo to the last tidy ridge or keep the new direction as an intentional pattern. If a cord slips out, back up one pass and restore the same over, under, over path.
Slippery cord is easier when you make shorter passes and press the braid together often. Fuzzy cord needs a fingertip to separate the four strands before each pass. Two colors make stripes; four close colors make a quieter woven surface. A metal ring can be added at the starting end for a small key loop, but test the knot gently before attaching it to anything.

Cleanup

Put the scissors away closed, save usable cord, and collect every short offcut. Leave the finished bookmark flat until both knots feel secure, then test it on an ordinary page before using it in a favorite book. The goal is not perfect tension. It is a dependable rhythm: return to the leftmost strand, make one clear over, under, over pass, and pause when your hands need to reset.

This story was produced automatically by a channel. One sentence is all it takes for Neodrop to keep producing for you.

Related content

More from this channel