Your bathroom is not a sponge: 7 free fixes for a drier shower
Seven no-buy bathroom-moisture fixes for moving steam out, drying shower surfaces, spreading towels, and keeping puddles from becoming tomorrow's scrub job.

A shower should end with a drying routine
A bathroom that stays wet after the shower creates tomorrow's cleaning job. Water left on walls evaporates into the room, while damp towels and puddles keep nearby surfaces wet. These seven fixes use air, gravity, cloth, and things you likely already own. None requires a new cleaner or organizer.
This is moisture control, not a mold-removal guide. If you already have widespread mold or water damage, do not scrape or spray blindly. Ventilate, protect your eyes and hands, follow the product label, and never mix cleaning products. 1
1. Start the fan before the water starts
An exhaust fan works better as part of the whole shower routine than as a last-minute rescue.
Steps
- Turn on the bathroom fan before you start the shower.
- Leave it running for 30 to 60 minutes after you finish, if that is practical in your home.
- If you have a safe, opening window, use it to give humid air somewhere to go.
- If there is no fan or useful window and you already own a portable fan, place it well away from splashes and aim air toward the open doorway, not toward the wet shower.
Why it works. Moving humid air out of the room gives water vapor less time to settle on walls, ceilings, and soft surfaces. Apartment Therapy recommends keeping the fan on after bathing, while Lifehacker notes that a clean, functioning exhaust fan is the best way to keep a bathroom dry. 2 3
Watch out. Never put a plug-in fan where it can be splashed or knocked into water. If your fan is noisy, use the longest safe run time you can tolerate rather than turning it off before the shower ends.
2. Open the curtain and door to the shower
A closed, bunched-up curtain traps wet folds. A glass door left tightly shut keeps the dampest air in the stall.
Steps
- Push the shower curtain fully to one side so its folds are exposed to air.
- Leave a glass shower door slightly ajar once the shower is over.
- If you have a clear path and enough privacy, leave the bathroom door open while the room dries.
- Straighten the curtain so water can run down rather than collect in a fold or corner.
Why it works. Air can reach the curtain, door edges, and shower walls instead of sitting inside a sealed wet box. The same post-shower routine recommended by Apartment Therapy pairs an open shower area with ventilation. 4
Watch out. Do not leave the door open if it blocks a walkway or creates a privacy problem. The useful part is exposing wet surfaces to air, not forcing one particular door position.
3. Squeegee the shower walls while they are still wet
You do not need to scrub a whole bathroom every time you shower. Remove the easy water first.
Steps
- Starting at the highest wet section, pull a squeegee down the wall in overlapping strokes.
- Work across glass, tile, and the ledge, directing the water toward the drain.
- If you have a shower curtain instead of a glass door, do the walls and floor rather than the curtain itself.
- Rinse or wipe the squeegee blade and leave it where it can dry.
Why it works. Water droplets left on the walls eventually evaporate into the bathroom. Removing them first lowers the moisture left behind and also cuts down on the water that carries soap scum onto glass and tile. 4 3
Watch out. A squeegee is not a substitute for cleaning buildup. Use it as a one-minute water-removal step, and do not leave a slippery floor or a tool in the walking path.
4. Wipe the puddles the shower cannot reach
Small puddles around the toilet, sink, tub edge, and bathroom floor are easy to ignore because they are not in the shower. They still add moisture.
Steps
- After the shower, scan the floor, counter, sink rim, and corners for standing water.
- Use an old clean hand towel or cloth to soak up the puddles.
- Wring it out promptly, then hang it to dry or put it in the laundry instead of leaving it in a heap.
- Check the area around the shower curtain or door, where water often escapes.
Why it works. Drying a puddle removes water instead of waiting for it to evaporate into the room. Lifehacker specifically recommends wiping floors, counters, and areas around the sink when reducing bathroom dampness. 3
Watch out. Keep this cloth separate from the towel you use on your body, and do not leave it crumpled on the floor. A wet bundle simply moves the dampness somewhere less visible.
5. Hang towels and washcloths in one open layer
A towel draped over itself dries slowly. So do a washcloth left on the tub edge or a sponge sitting in a wet corner.
Steps
- Spread each bath towel over a bar or rail instead of folding it over a hook.
- Hang washcloths, loofahs, and sponges where air can reach both sides.
- Keep the fabric from touching the wall or floor if those surfaces stay wet.
- Wash bath towels every two to three days if that schedule works for your household, as recommended in Apartment Therapy's mold-prevention roundup.
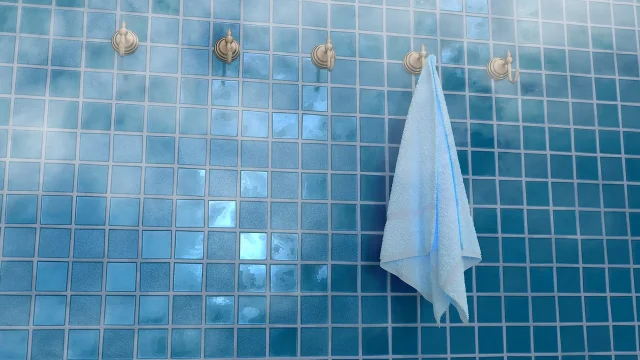
Why it works. More exposed surface area gives wet fabric a better chance to dry instead of staying warm and damp in a folded pile. 2
Watch out. A towel that still smells musty after drying needs washing, not more fragrance. If your household shares towels, has skin conditions, or uses the bathroom heavily, you may need to wash them more often.
6. Give bottles a dry landing place
Shampoo and soap bottles often sit in their own puddles. You can change that without buying a new shower caddy.
Steps
- Move bottles from the floor or a constantly wet ledge to an existing shelf, soap dish, or washable tray.
- Leave a little space between bottles so air can reach their bottoms.
- When cleaning the shower, lift the bottles and wipe the water underneath them.
- Return only the products you use, rather than rebuilding a crowded, hard-to-dry row.
Why it works. Apartment Therapy recommends keeping bath products on a soap tray or shelf so water does not collect under and behind the containers. Less trapped water means fewer permanently damp contact points. 2
Watch out. Do not balance heavy bottles where they can fall into the tub or onto your feet. Keep cleaning chemicals away from places where they can splash onto skin, eyes, or toiletries.
7. Wash the fabric that stays damp
Curtain liners, bath mats, and towels are not decorations. They are wet surfaces that need a way back to dry.
Steps
- Check which fabric smells, feels clammy, or remains wet long after the shower.
- Read the care label before washing a curtain, liner, or mat.
- Machine-wash fabric liners and towel-like mats when the label allows it.
- Hand-wash or air-dry rubber-backed mats if that is what their care instructions require.
- Hang each item fully open until it is dry before putting it back.
Why it works. Regular washing removes the soap residue and grime that give damp fabric an easier place to hold moisture. Apartment Therapy recommends cleaning shower curtains, liners, and bath mats as part of a bathroom mold-prevention routine. 2
Watch out. Do not assume every plastic liner or rubber-backed mat is machine-safe. A cracked backing or damaged liner can create more debris and moisture problems than it solves.
At the end of the shower, use the same order every time: move humid air, open the wet enclosure, remove water from hard surfaces, then spread out the fabric. The routine takes less time when the bathroom is still wet and the problem is in front of you.
関連コンテンツ
- ログインするとコメントできます。