
Your windows are not self-cleaning: 7 no-buy fixes for clearer glass
A no-buy window-cleaning reset with seven practical fixes for tracks, screens, frames, greasy panes, streaks, and a lighter maintenance routine.

The fastest order is track, screen, frame, then glass
Most streaky windows are a sequencing problem. Dust and grit sit in the tracks, frames, sills, blinds, and screens; spraying first turns that dry mess into wet grime. The useful reset is mostly about order, timing, and using a cloth that is actually clean.
The seven fixes below use things you may already have: a vacuum or duster, a soft brush, a sponge, a lint roller, a spray bottle, and a microfiber cloth. A cloudy day or the shady side of the house is the easiest time to work because cleaner can dry too quickly on hot glass. 1
1. Start in the shade, one room at a time
- Pick an overcast day, or start on the side of the home that is not in direct sun.
- Choose one room or one group of reachable windows.
- Finish that group before moving on. Leave windows that would require unsafe reaching or climbing for another method or a professional.
Why it works: Hot glass can dry cleaner before you wipe it, which leaves streaks. Working in smaller groups also lets you keep the dirty-to-clean order intact instead of carrying wet tools around the house. 2
Avoid: Do not treat a sunny afternoon as a deadline. Move to the shady side or wait. A streaky pane usually needs another wipe, not a stronger chemical.
2. Dry-clean the edges before adding water
- Open or remove only the parts your window design allows safely.
- Vacuum, brush, or wipe dust from the frame, track, sill, and blinds or shades.
- If a screen is visibly dusty, take it out and dry-brush or vacuum it before washing it.
- Keep the dry debris in the cloth or vacuum instead of pushing it onto the glass.
Why it works: Dust mixed with spray becomes a sticky film. Good Housekeeping's recommended sequence starts with the frame, tracks, sill, and window coverings, then handles screens before the panes. 1
Avoid: Do not spray a dusty track and then chase the mud with a cloth. It is slower and more likely to push grit into corners.
3. Cut one sponge to fit the track
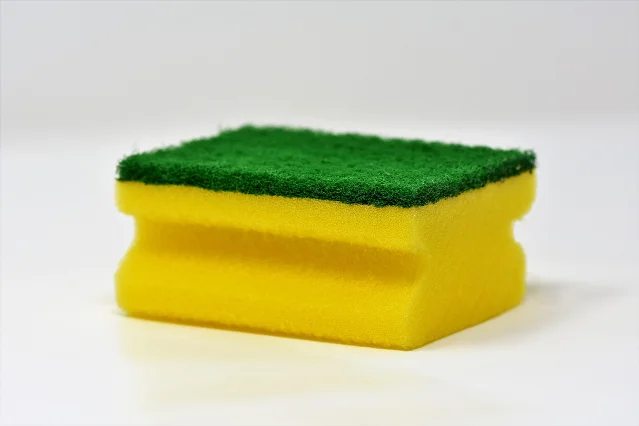
- Place a sponge along the track so it covers the full width.
- Mark the points where the track rises into the sponge.
- With the sponge on a stable surface, cut short lines at those marks using a utility knife. Cut only with the blade pointed away from your hand.
- Slide the shaped sponge back and forth along the track, rinsing it as it picks up grime.
Why it works: The cuts let the sponge wrap around the raised parts while its lower edge contacts the flat channel. The method comes from The Kitchn's tested track-cleaning trick. 3
Avoid: Do not flood the track with water. Excess liquid can run into places you cannot dry, and a blunt kitchen knife is a poor substitute for a controlled cut. If the track is already dry and gritty, vacuum it first.
4. Use a lint roller on dusty screens
- Keep the screen in place if it is sound and the window can stay closed; otherwise remove it and lay it flat.
- Roll over the screen from the outside when possible, covering the corners and edges.
- Peel off the loaded tape as soon as it stops picking up dust.
- For pollen or grime that will not lift dry, remove the screen, wash it with warm sudsy water, rinse, and let it dry completely before reinstalling it.
Why it works: A sticky roller lifts dust, pollen, webs, and loose dirt without pressing the mesh into the frame. The Kitchn notes that the tape fills quickly, so changing the surface is part of the hack. 4
Avoid: Do not press hard on a loose or damaged screen. The lint roller is a dust pass, not a repair. Use the warm-water wash only when the screen needs a deeper clean, and wait until it is fully dry.
5. Make a small vinegar wash for greasy kitchen glass
- Mix one part white distilled vinegar with one part hot water in a bowl or measuring cup.
- Test a small corner first. If the pane has a greasy kitchen film, pre-wash that film with a little dish soap and water, then rinse or wipe before using the vinegar mix.
- Spray about one square foot at a time, starting at the top. Use enough to loosen the soil, but not so much that it runs down the pane.
- Wipe that small area horizontally, then vertically, until the liquid is gone. Continue downward in overlapping sections.
Why it works: The Kitchn's method uses vinegar's acidity against the buildup that collects on kitchen windows, while the small sections keep the solution from drying or running before you wipe it. 5
Avoid: Do not assume vinegar is the best answer for every mark. Test first, and use a separate plain-water or dish-soap pre-wash for grease. Do not put this mix into a bottle that still contains another cleaner.
6. Use enough cleaner and wipe top to bottom
- Apply glass cleaner to a section of glass rather than trying to cover the whole house at once.
- Use a lint-free paper towel or clean microfiber cloth.
- Wipe from the top down, folding the cloth to expose a clean face as it becomes damp or dirty.
- Give any remaining streak a second pass before the pane dries.
Why it works: Cleaner needs enough moisture to suspend dirt so the cloth can remove it. Skimping can leave residue behind, while a clean, absorbent cloth removes the loosened film instead of redistributing it. 1
Avoid: Skip an old cotton rag that sheds lint. For small panes, a squeegee can send dirty water onto the floor and frame; it is more useful on large picture windows when you know how to control the runoff. 1
7. Make streaks tell you which side needs another wipe
- Wipe the inside of the glass in horizontal strokes.
- Wipe the outside in vertical strokes.
- Step back and inspect the pane. A horizontal streak is easier to trace to the inside; a vertical streak points you toward the outside.
- Put the next full clean on a simple seasonal reminder. Good Housekeeping says most windows need a full clean only once or twice a year; a dusty room, road-facing window, or kitchen pane may need spot cleaning sooner.
Why it works: Different stroke directions turn a vague streak into a quick diagnostic. You can redo the dirty side instead of cleaning both sides from scratch. 1
Avoid: Do not turn an annual or twice-yearly job into a weekly deep-cleaning ritual. Dust the parts that visibly need it, then reserve the full track-screen-frame-glass sequence for the interval your home actually needs. The Kitchn recommends that same order when the whole window area is due. 6
Start with one reachable window. If the result is clear, the same order scales across the room without buying a new cleaner or organizer.
Fuentes de referencia
- 1Good Housekeeping: How to Clean Windows Without Streaks
- 2The Kitchn: We Tried 5 Methods for Cleaning Windows
- 3The Kitchn: The Easiest Way to Clean Dirty Window Tracks
- 4The Kitchn: The Easiest and Smartest Way to Clean Your Window Screens
- 5The Kitchn: How To Use Vinegar to Clean Your Kitchen Windows
- 6The Kitchn: 8 Things You Can Spring Clean This Weekend
Contenido relacionado
- Inicia sesión para comentar.
More from this channel
- Your living room is not a drop zone: 7 free fixes for a room you can use
- Make the space under your bed earn its keep: 7 free fixes
- Your kitchen counter is not a landing strip: 7 no-buy fixes
- Your kitchen drawers are not a mystery box: 7 no-buy fixes
- Your linen closet is not a storage lottery: 7 free fixes
- Your under-sink cabinet is not a junk drawer: 7 free fixes
- Your vacuum is not a magic wand: 7 free fixes for cleaner floors
- Your password list is not a security plan: 7 free fixes