2026/6/27 · 10:23
Static-Cling Window Privacy Film: Your Saturday Renter Project
A beginner-friendly weekend plan for adding privacy to a rental window with non-adhesive static-cling film, including what to buy, how to install it, and how to remove it cleanly before move-out.
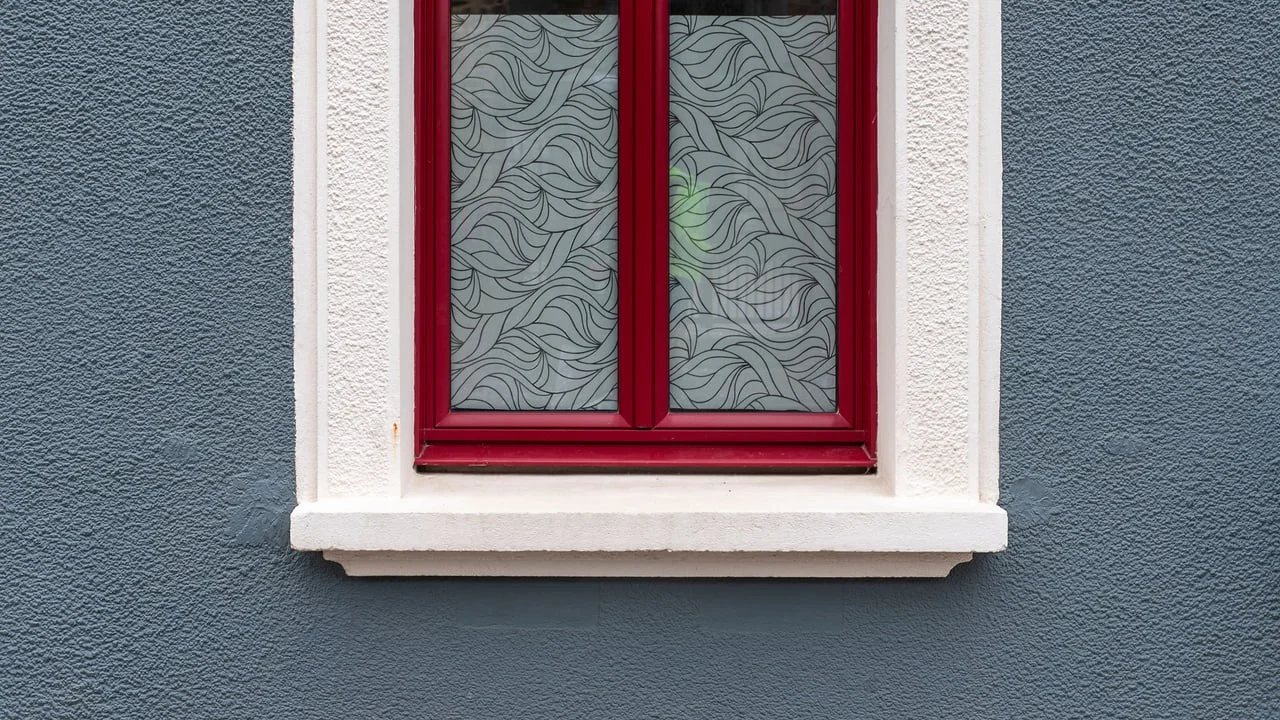
If your apartment window faces a sidewalk, a neighboring building, or a shared courtyard, static-cling privacy film is one of the rare upgrades that changes the room without touching the wall. Choose a non-adhesive film, install it on the inside of clean glass, and it can be peeled off when you move. Artscape describes its window films as phthalate-free static cling vinyl with non-adhesive backing that can be removed and replaced, while still adding privacy without blocking natural light. 1
For this Saturday, keep the scope tight: one bathroom window, one kitchen window, or the lower half of two street-facing windows. That keeps the cost comfortably under $150 and gives you time to redo a panel if the first cut is crooked.
The project at a glance
| Decision | Best renter-safe choice | Why it matters |
|---|---|---|
| Film type | Static-cling, non-adhesive privacy film | It avoids glue on the glass and can be peeled off later. 1 |
| Best surface | Flat, smooth interior glass | Decorative Films says film will not correctly adhere to textured glass and generally should be installed inside unless a product is specifically labeled for exterior use. 2 |
| Time needed | 2-4 hours for one or two windows | Most of the time goes into measuring, cleaning, trimming, and chasing bubbles, not sticking the film up. |
| Skill level | Beginner | The film floats on wet glass before you squeegee it down, so you get a short window to reposition it. 2 |
| Deposit risk | Low, if you use static cling on smooth glass | Static-cling films can be peeled off without damage to the film or glass surface, according to Decorative Films. 2 |
Materials and budget
A practical shopping list for one or two standard rental windows:
| Item | Quantity | Estimated cost | Notes |
|---|---|---|---|
| Static-cling privacy film, 24 in. x 36 in. | 1-3 sheets | $19.99-$26.97 each | Good for small bathroom windows, lower sash panels, or narrow panes; Artscape's 24 in. x 36 in. collection shows many privacy films in this range. 3 |
| Static-cling privacy film, 36 in. x 72 in. | 1-2 sheets | $37.97-$45.97 each | Better for a large window or sliding-door panel; Artscape's 36 in. x 72 in. collection lists large privacy films in this range. 4 |
| Application kit | 1 | $14.98 | Artscape's kit includes a spray bottle, soap, squeegee, and retractable blade for cutting static-cling film. 5 |
| Squeegee only, if you already have a spray bottle and knife | 1 | $1.99 | Artscape also sells a basic film squeegee separately. 6 |
| Low-lint cloth or microfiber towel | 1-2 | $0 if owned | Decorative Films recommends low-lint towels or microfiber cloths so lint does not get trapped under the film. 2 |
| Mild dish soap and clean water | Small amount | $0 if owned | For a 32 oz. spray bottle, Decorative Films recommends 8-10 drops of mild, non-moisturizing dish detergent in clean water. 2 |
Budget target: Most renters can do one window for about $35-$65 if they buy a film sheet and a kit. Two larger windows can still land around $95-$140 if you need two large rolls and one kit. If you already own a spray bottle, craft knife, and squeegee, the project cost is mostly the film.
Before you buy: check the window
Do this before ordering anything.
| Window condition | Go / no-go | Renter note |
|---|---|---|
| Smooth glass on the inside face | Go | This is the ideal surface. Clean it well and install on the room side. |
| Textured, bumpy, or patterned glass | Skip | Decorative Films says film only adheres correctly to flat, smooth surfaces. 2 |
| Plexiglass, acrylic, or polycarbonate | Caution | Decorative Films says many films can be installed on these materials, but temperature movement and off-gassing may cause bubbles. 2 |
| Exterior-facing installation | Skip unless the product says exterior | Film applied outside can fail from weather exposure unless it is specifically made for exterior use. 2 |
| Lease has rules about visible window coverings | Ask first | Some buildings care about exterior appearance. A quick message with a product link is safer than a move-out argument. |
If you are unsure, start with the smallest window. A bathroom window or a street-facing lower sash is enough to make the room feel more private without committing the whole apartment.
Step-by-step install
1. Measure the glass, not the frame
Measure the visible glass height and width. Add 1/2 inch to 1 inch on all sides when cutting the film; Decorative Films recommends leaving this extra margin so you can trim the edges cleanly after the panel is positioned. 2
For tall windows, decide whether you really need full coverage. Covering only the lower half often gives privacy from the street while keeping more sky and daylight.
2. Clean until the glass feels boring
Spray the glass and wipe it with a low-lint cloth. If there are paint specks, dried cleaner, or old tape residue, remove them before the film goes up. Decorative Films recommends cleaning away dust, grime, grease, and lint because anything left on the glass can get trapped under the film. 2
Renter caution: if the window is old, scratched, or coated, skip aggressive scraping. A clean glass-safe scrub pad is safer than attacking mystery glass with a loose razor blade.
3. Mix the wetting solution
Fill the spray bottle with clean water and add a few drops of mild dish soap. The 32 oz. ratio from Decorative Films is 8-10 drops of mild, non-moisturizing detergent. 2
Use more water than feels necessary. The wet layer lets the film slide into place before it clings.
4. Cut the film slightly oversized
Lay the film on a clean floor or table with the liner side up. Mark your cut lines on the backing, then cut slowly with scissors or the kit blade. If your window is not square, make a quick paper template first. Decorative Films specifically suggests a paper template if measuring feels uncertain. 2
5. Peel the liner and soak both sides that matter
Static-cling film has a liner, even when it is hard to see. Decorative Films warns that the liner must come off or the film will not adhere. 2
As you peel the liner, spray the cling side thoroughly. Then spray the glass again. Wet glass plus wet film is the whole trick.
6. Float the panel into place
Hold the top corners, place the film onto the wet glass, and slide it until the pattern looks level. The film should overhang the edges slightly. Decorative Films advises placing the wet film on the wet surface, repositioning as needed, then smoothing it with a squeegee. 2
If the panel folds onto itself, pull it back, spray again, and reset. Do not try to rescue a dry, crumpled corner.
7. Squeegee from the center outward
Spray the outside face of the film so the squeegee glides. Push water and bubbles from the center toward the edges. Work in overlapping passes, not random swipes.
The goal is not perfect-looking glass in the first five minutes. It is a flat panel with no large trapped bubbles.
8. Trim the edges
Use a sharp blade and a hard card or straight edge. Trim in one steady motion where the film meets the glass edge. Decorative Films recommends trimming after the film is flat, then wrapping the hard card in a paper towel to push remaining bubbles and water out to the edge. 2
Keep the blade away from rubber seals, painted trim, and your fingers. If you are nervous, leave a tiny gap at the edge rather than cutting into the frame.
9. Let it dry before judging it
Small haze, moisture pockets, or minor edge lift can settle as the film dries. Decorative Films says static-cling film fully clings to the surface within a few days. 2
If an edge keeps curling, wrap the squeegee in paper towel and press moisture out from just inside the edge. Avoid high heat near vinyl windows or painted trim.
Safety notes
- Lock the blade before cutting, and retract it before you put it down. The application kit uses a retractable blade that locks in and out of place for safer handling. 5
- Put a towel on the sill or floor. This is a wet install, and overspray can make tile or laminate slippery.
- Use a stable step stool for tall windows. Do not stand on a rolling chair.
- Keep the film away from candles, portable heaters, and stovetop splash zones unless the product specifically says it is made for that heat exposure.
- Do not cover egress labels, window locks, or any building safety notice.
Renter notes: landlord, deposit, and move-out
Do you need to ask the landlord? Usually, for removable interior static-cling film on glass, the risk is low. Ask first if your lease controls visible window treatments, if the building has a uniform exterior look, or if you live in a condo with HOA-style rules.
What should you say? Keep it simple: "I want to apply a removable, non-adhesive static-cling privacy film to the inside of one window. It peels off without glue and will not be installed on the exterior. Is that acceptable?" Attach the product page if you have one.
How do you remove it? Start at a corner and peel slowly. Decorative Films says static-cling films can be peeled off without damage to the film or glass, and can be stored clean and dry for reuse. 2 Wipe the glass with non-ammonia cleaner and a microfiber cloth afterward; Decorative Films recommends non-ammonia cleaner for film care. 2
What raises deposit risk? Adhesive-backed film, exterior installation, textured glass, old acrylic panes, and sloppy trimming near painted frames. If the listing says "adhesive," "semi-permanent," or "heat control tint" rather than static cling, treat it as a different project and read the removal instructions before buying.
Weekend plan
Friday night: Measure the glass and order or pick up film. Clean the window once so you can see old residue.
Saturday morning: Cut the film, mix the wetting solution, and install the first panel. If it goes well, continue to the second panel while the tools are out.
Saturday afternoon: Check edges, push out large bubbles, and clean the sill.
Sunday: Look at the window in daylight and at night with interior lights on. If the lower half gives enough privacy, stop there. If it still feels exposed, order one more sheet for the upper section rather than rushing a bad seam.
Next week
Next Saturday's renter project: a no-drill curtain upgrade for awkward rental windows, including tension rods, twist-and-fit rods, and when a freestanding room divider is the cleaner answer.
围绕这条内容继续补充观点或上下文。