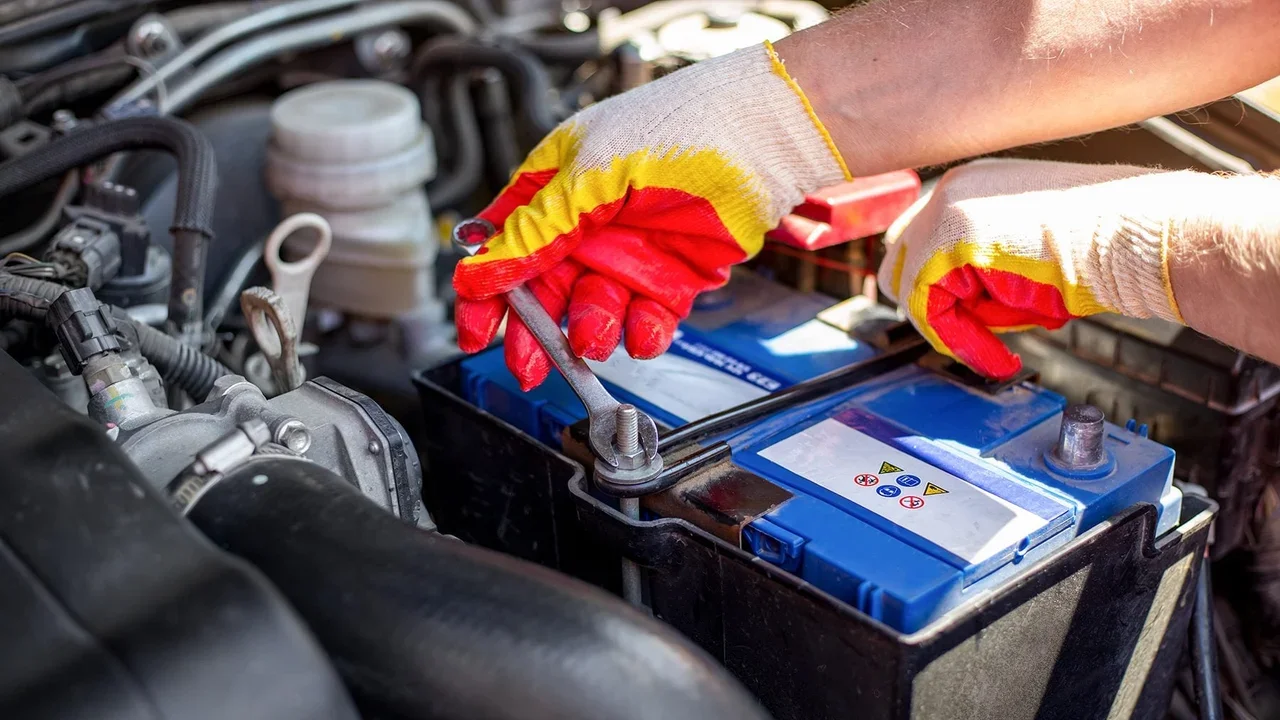
How to replace your car battery and save $25-$100 in labor
A beginner-safe guide to replacing a standard 12-volt car battery: how to test first, buy the right battery, disconnect and reconnect cables in the safe order, avoid common mistakes, and understand the realistic savings.

A weak battery usually announces itself with a slow crank, a clicking sound, or a car that only starts after a jump. The battery itself is the unavoidable cost: Kelley Blue Book puts a typical replacement battery at about $45-$250, depending on size, power, and quality 1. The DIY savings are mainly the labor and markup. Family Handyman cites AAA labor rates of $47-$215 per hour for auto repair work, so avoiding even half an hour of paid labor is roughly $25-$100 in savings 2.
One honest warning: some auto-parts stores install easy-access batteries for free when you buy the battery there. If that is available for your car, take the help. This guide is for the times when a shop wants labor, your battery is easy to reach, and you want to understand the job before anyone touches your car.
What you are replacing
This guide covers the regular 12-volt starting battery in a gas car or a conventional hybrid. It does not cover the high-voltage battery pack in an EV or hybrid. If your owner's manual says the replacement needs registration, programming, or a scan tool, stop and use a shop.
A starter battery has two posts: positive
+ and negative -. The positive side is usually red, and the negative side is usually black. Your safety rule is simple: negative cable off first, negative cable on last. Car and Driver and Family Handyman both give that order because it lowers the chance of shorting the battery with a metal wrench 34.Tools and materials
| Item | What it does | Typical cost |
|---|---|---|
| Correct replacement battery | Match the size, terminal layout, and cold-cranking-amp rating for your car; KBB says replacement batteries commonly run about $45-$250 1 | $45-$250 |
| Safety glasses and acid-resistant or work gloves | Batteries contain acid, and Family Handyman recommends eye and hand protection around battery work 2 | $10-$25 if you do not own them |
| 10 mm wrench or socket set | Many battery-cable clamps use 10 mm bolts, though your car may differ 3 | $0-$20 |
| Wire brush or battery-terminal brush | Cleans corrosion from the cable clamps and battery posts before the new battery goes in 5 | $5-$10 |
| Petroleum jelly, dielectric grease, or anti-corrosion grease | Helps slow new corrosion after the clamps are tight 4 | $3-$8 |
| Battery tester or multimeter, optional | Helps confirm whether the battery is actually bad. Family Handyman lists 12.6 volts or higher as fully charged and 12.0 volts or lower as a weak-battery warning sign 6 | $10-$60 |
| Battery memory saver, optional | Keeps some radio, clock, keyless-entry, and computer memory alive while the battery is disconnected 2 | $10-$25 |
If your budget is tight, do not buy every optional gadget. For a normal battery swap, the must-haves are the correct battery, eye protection, gloves, a wrench, and a way to clean the terminals.
Step 1: test before you buy
Do not replace a battery just because the car needed one jump-start. A low battery can come from leaving lights on, short trips, or a charging-system problem.
If you have a battery tester, test state of charge, cold-cranking amps, cranking voltage, and charging voltage. In plain English: cold-cranking amps are the battery's ability to deliver power in cold weather, and charging voltage tells you whether the alternator is recharging the battery while the engine runs. Family Handyman says a fully charged 12-volt battery should read 12.6 volts or higher, a reading around 12.0 volts or lower can mean weakness, cranking voltage should stay around 9-10 volts, and a running charging-system test should read about 14.2-14.5 volts 6.
No tester? Many parts counters and shops can test the battery. If the test says the battery is good but the car still dies, the problem may be the alternator, a loose connection, or parasitic draw. Parasitic draw means something electrical keeps using power after the car is turned off.
Step 2: buy the right battery
Use your owner's manual, the label on the old battery, or the parts-store fitment lookup. You are matching three things:
- Group size: the physical size and hold-down shape.
- Terminal layout: which side has the positive and negative posts.
- Cold-cranking amps: enough starting power for your engine and climate.
KBB tells DIYers to check the owner's manual for the proper battery size and location before replacement 1. Family Handyman also notes that the battery's CCA rating is usually printed on the battery case 6.
Step 3: set up safely
Park on a flat surface, turn the car off, remove the key, and shut off lights and accessories. Open the hood or the battery compartment. Some cars hide the battery in the trunk or under a seat, so check the owner's manual if you do not see it under the hood 3.
Put on safety glasses and gloves. Remove jewelry from your hands and wrists. A ring or watch can become a hot metal bridge if it touches the wrong parts.
Step 4: disconnect the old battery
- Find the negative terminal. It is marked
-and usually has a black cable. - Loosen the negative cable clamp with your wrench.
- Lift the negative cable off and tuck it away so it cannot spring back.
- Loosen and remove the positive cable.
Do not let the wrench touch both battery posts at once. Family Handyman warns that bridging the terminals with a wrench lets current flow through the tool 5. Car and Driver gives the same warning because a short can create sparks and may damage electronics 3.
Step 5: remove the hold-down and lift the battery out
Most batteries are held by a clamp, bracket, or strap. Remove that hold-down before lifting. Family Handyman's replacement guide says to remove the hold-down clamp, disconnect negative first, disconnect positive, then lift the battery out by the strap while watching for leaks 4.
Keep the battery upright. If you see cracks, wet acid, or heavy swelling, stop and get help. Battery acid is not a beginner-friendly mess.
Step 6: clean the cable ends and tray
Before the new battery goes in, look at the cable clamps. If they are green, white, crusty, or loose, clean them with a terminal brush. Family Handyman recommends cleaning the inner surface of the cable connectors and the battery terminals so the contact surfaces are smooth and free of corrosion 5.
If the cable ends are cracked, badly pitted, or will not tighten, replacing only the battery may not fix your starting problem. Corroded terminal ends can reduce voltage to the starter and stress the charging system 2.
Step 7: install the new battery
Set the new battery into the tray with the posts facing the same way as the old battery. Reinstall the hold-down clamp. This matters: a loose battery can move, crack, or shake its cable connections loose.
Now reverse the cable order:
- Connect the positive cable first.
- Tighten it until it cannot twist by hand.
- Add a thin layer of petroleum jelly or dielectric grease on the terminals.
- Connect the negative cable last.
Family Handyman's install order is hold-down first, grease for corrosion protection, positive cable first, negative cable last 4. KBB gives the same positive-then-negative reconnection order 1.
Step 8: start the car and finish the job
Start the engine. If it cranks normally, let it idle for a minute and check that the battery light is off. Reset the clock or radio presets if needed. Family Handyman notes that disconnecting a battery can erase the digital clock setting 5.
Take the old battery back to the store or a recycling center. Family Handyman says you can usually return the old battery where you bought the new one and receive credit for the old battery, often called a core charge 4.
Beginner mistakes to avoid
| Mistake | Why it causes trouble | Better move |
|---|---|---|
| Disconnecting the positive cable first | It raises the chance that a wrench can short the positive post to metal on the car 3 | Negative off first; negative on last |
| Skipping the battery test | A discharged battery may only need charging, and a bad alternator can make a new battery die again 7 | Test the battery and charging voltage before buying |
| Buying by price only | Battery size, terminal layout, and cold-cranking amps have to fit the car 1 | Match the old label, owner's manual, or fitment lookup |
| Leaving corrosion on the clamps | Dirty contact surfaces can keep the new battery from delivering full power 5 | Brush the inside of the clamps before installing |
| Forgetting the hold-down | A battery that moves can damage cables or the case | Reinstall the bracket before connecting cables |
| Tossing the old battery in the trash | Old lead-acid batteries are recyclable and may be tied to a refundable core charge 4 | Return it to the seller or a recycling center |
Savings math
| Scenario | What you pay | What you may save |
|---|---|---|
| DIY battery swap | Battery cost, usually about $45-$250, plus small tool costs if you are starting from nothing 1 | Mainly labor: roughly $25-$100 if the alternative is 0.5 hour of shop labor based on the $47-$215 hourly range cited by Family Handyman 2 |
| Parts store installs it free | Battery cost | Little to no money saved by doing it yourself, but you still learn the process |
| Shop or dealer replaces it | Battery cost, labor, and possible parts markup | Convenience and warranty handling may be worth it if the battery is hard to reach |
The realistic takeaway: this is not a $300 savings job for most people. It is a $25-$100 labor-saving job that also teaches you how the starting system is connected.
Best videos to watch first
Start with the ChrisFix guide if you want the full classroom version. His video covers testing a bad battery, cleaning corrosion, testing the alternator, checking for parasitic draw, load testing, and replacing the battery properly 8.
コンテンツカードを読み込んでいます…
If you want a shorter visual refresher before walking outside, The Home Depot's 2-minute battery-change video shows the basic order from tool setup through reconnecting cables 9. Scotty Kilmer's short battery-replacement video is useful if you are worried about memory-saver issues and computer resets 10.
When to call a pro
Call a shop if the battery is buried under trim, the hold-down is badly rusted, the terminals are damaged, the car requires battery registration, or you are working on a hybrid/EV high-voltage system. Also call a pro if the new battery dies again. That usually means the battery was not the root problem.
Next week: a no-drama tire-pressure check, including how to read the door-jamb sticker and why the number on the tire sidewall is not your target pressure.
参考ソース
- 1Car Battery Replacement Prices & Cost Estimates
- 2How to Replace Battery Terminals in Your Car
- 3How to Disconnect Your Vehicle's Battery
- 4How to Change a Car Battery
- 5How to Safely Disconnect a Car Battery
- 6How To Test a Car Battery
- 7How to Charge a Car Battery: Step-by-Step Guide
- 8How to Test and Replace a Bad Car Battery (COMPLETE Ultimate Guide)
- 9How to Change a Car Battery
- 10How to Replace a Car Battery (the Right Way)
関連コンテンツ
- ログインするとコメントできます。
More from this channel
- How to replace spark plugs and save at least $100 in labor
- How to rotate your tires and save $20-$50 per visit
- How to replace your windshield wiper blades and save about $20
- How to replace your cabin air filter and save $35-$70 in 20 minutes
- How to replace your engine air filter and save $25-$80 in 10 minutes
- How to replace your brake pads — and save $100–$350 every time you do