A $15 ESP32 board + one SOIC8 chip = 13-platform retro handheld
DynaMight1124's CYD Emulator Station upgrades the $15 Cheap Yellow Display (ESP32-2432S028) into a 13-platform retro game handheld by soldering a PSRAM chip onto an unpopulated SOIC8 footprint and running Retro-Go v1.46. $30–45 BOM, Intermediate difficulty, weekend-build.
The ESP32-2432S028 — universally known as the Cheap Yellow Display, or CYD — sells for around $15 on AliExpress. It ships with a 2.8-inch TFT touchscreen, an ESP32-WROOM, and exactly 4 MB of internal Flash. What it doesn't ship with is RAM. That was DynaMight1124's problem. 1
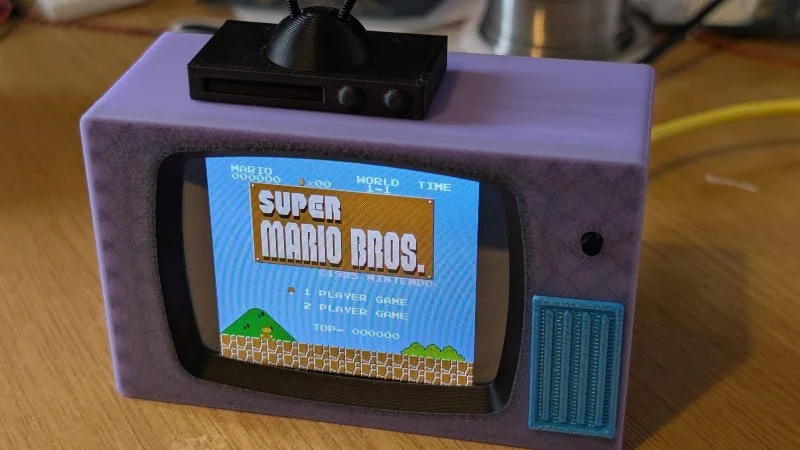
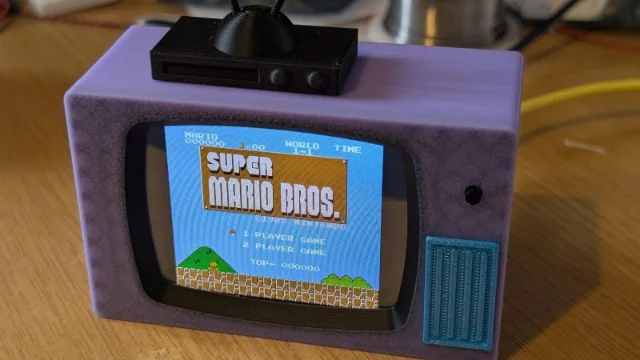
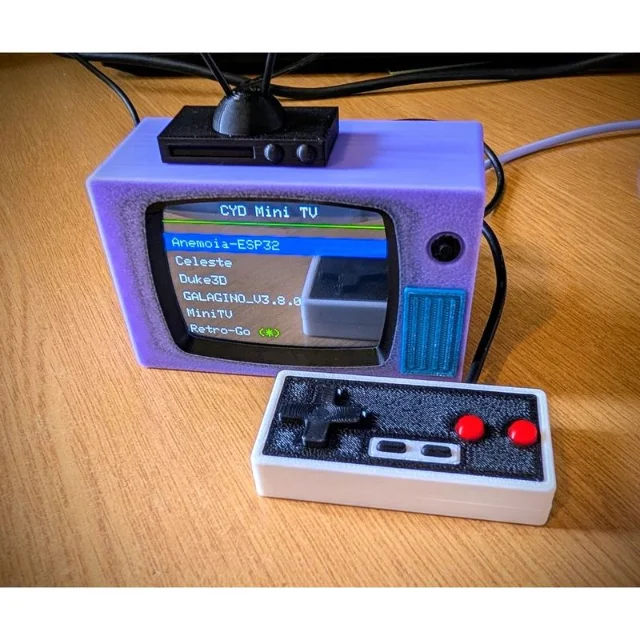
The solution was sitting on the board the whole time: an unpopulated SOIC8 footprint, originally intended for an extra Flash chip, that shares most of its pins with the PSRAM bus. Three bodge wires and one sacrificed RGB LED later, the CYD gains 4 MB of PSRAM — enough to run Retro-Go's full platform stack including Sega Genesis, SNES, and DOOM. The finished unit lives inside a 3D-printed Simpsons-style retro CRT television shell with a matching I2C gamepad. Hackaday featured it on May 30, 2026. 1
What it does and why it stands out
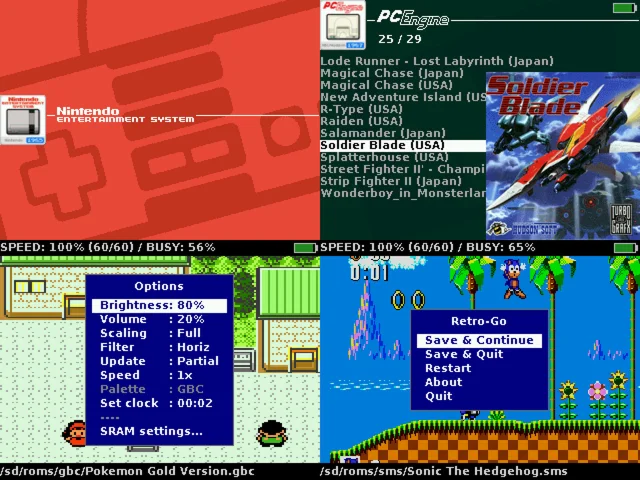
The CYD is already ubiquitous in the maker community — cheap, capable, display-included. Without a PSRAM mod it can run a basic NES emulator. With one, it runs Retro-Go v1.46, which supports 13 platforms: NES, SNES (marked slow in the firmware docs), Game Boy, Game Boy Color, Game & Watch, SG-1000, Master System, Sega Mega Drive/Genesis, Game Gear, ColecoVision, PC Engine, Atari Lynx, and DOOM. 2
As Hackaday put it: the PSRAM mod "opens up a lot more than just the standard NES emulator you can run on an unmodified CYD — including 16-bit systems like the SNES and Sega Genesis/MegaDrive or even DOOM." 1
Two design choices make this more than a software project. First, the PSRAM mod is a genuine SMD rework lesson — you're cutting a trace, resoldering a footprint, and flying a wire, on a production PCB. Second, the CYD-MiniTV-Launcher treats the microSD card as a "hard drive," using OTA partition switching to hot-swap between ROM sets without reflashing over USB. 3 That solves the 4 MB Flash ceiling without needing a different board.
Bill of materials
Total estimated cost: $30–45, including the CYD board, PSRAM chip, SD card, gamepad parts, and filament. Excludes 3D printing time and any tools.
| Part | Notes | Est. cost |
|---|---|---|
| ESP32-2432S028 (CYD) | Get the CYD2USB variant (dual USB) for easier flashing | ~$15–20 |
| APS6404L-3SQR-SN PSRAM (SOIC8, 8 MB) | Mouser p/n 878-APS6404L-3SQR-SN. Must be 3SQR (3.3 V). Non-3 variants are 1.8 V and will not work | ~$2–5 |
| MicroSD card (≥2 GB) | FAT32, any brand | ~$5 |
| MCP23017 I2C I/O expander | For the 8-button gamepad (SDA: GPIO22, SCL: GPIO27, addr 0x20) | ~$2 |
| Tactile push buttons × 8 | Up/Down/Left/Right + A/B + Start/Select | ~$3 |
| 3D printer filament | ~100–150 g for TV shell + controller halves | ~$3–5 |
| Misc wire, solder, flux | SMD rework grade | ~$2 |
STL and STEP files for 11 shell pieces (TV_Body, TV_Back, TV_Grill, TV_VCR, DPad, A/B button caps, Start/Select, and controller top/bottom halves) are published on Thingiverse and Printables. 4 5
An alternate backup chip — APS1604M-3SQR-SN (2 MB, Mouser p/n 878-APS1604M-3SQR-SN) — works but limits which platforms Retro-Go can run. The 8 MB chip is the practical choice for the full stack. 6
Circuit and PCB overview
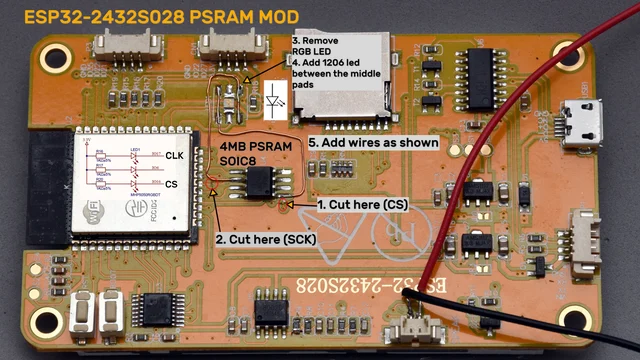
The CYD board has a pre-routed, unpopulated SOIC8 footprint intended for a secondary Flash chip. PSRAM shares all but two pins with Flash (SPI MOSI/MISO/WP/HD are the same). The two diverging signals are the chip-select line (CS → GPIO16) and the clock (CLK → GPIO17). Those GPIO pins are used by the stock CYD to drive its RGB LED — so the LED has to go. 6
The modification in four steps:
- Remove the RGB LED (hot air or wick + iron)
- Cut the PCB traces running to GPIO16 and GPIO17
- Fly a wire from the SOIC8 footprint's CS pad to the LED's former GPIO16 pad, and CLK to GPIO17
- Reflow the APS6404L-3SQR-SN onto the SOIC8 footprint
Both reworked GPIO lines have 1 kΩ pull-up resistors on the board. The CS pull-up (R16's companion) must stay. The CLK pull-up (R16 itself) can optionally be removed to reduce idle power draw, but it doesn't affect function. 6
Piotr Zapart (hexeguitar), who documented the footprint in detail, confirmed: "It has to be the 3SQR version. Models without 3 are 1.8V ones. Won't work in the CYD." 6
Optional audio fix: The stock CYD's 8002D audio amplifier runs at x14.5 gain, which causes heavy clipping on the ESP32's 8-bit DAC output. The simplest fix is bridging a 10 kΩ resistor across pins 3 and 4 of the 8002D IC — or stacking a resistor on top of the existing 0603 part. 7 This is optional for the emulator but makes game audio noticeably less harsh.
No KiCad files, Gerbers, or custom PCB — the entire circuit change happens on the stock CYD board.
Firmware and software
Retro-Go v1.46 is the emulation core. 2 The repo has 1.1k stars, 60 releases, and 2,155 commits as of May 2026; it's the most mature open-source retro firmware for ESP32 devices.
Critical caveat: Retro-Go does not ship a pre-built
.img file for the CYD. You must compile from source using esp-idf and PlatformIO, with the CYD board target configured via menuconfig. The repo's PORTING.md and BUILDING.md cover the process. If you've never built ESP32 firmware from source, budget an extra hour for toolchain setup.The CYD-MiniTV-Launcher sits on top of Retro-Go and handles multi-app management. 3 The 4 MB Flash partition scheme is:
nvs: 20 KBotadata: 8 KBLauncher: 768 KBApp slot: 3.125 MBSPIFFS: 64 KB
Any
.bin application (Retro-Go build, video player, etc.) under 3.125 MB can be dropped onto the SD card and launched without a USB cable. The launcher auto-boots the last-used app after a 5-second countdown. Two .bin variants are provided — one for the single-USB CYD and one for the CYD2USB (dual USB) board. 3GBA emulation is available in Retro-Go's
1.46-dev branch, but the 4 MB Flash device requires removing other emulators to fit. Treat GBA as experimental. 2Reproduction difficulty
Rating: Intermediate.
The PSRAM rework is the gating skill. It involves: reflowing a 1.27 mm pitch SOIC8 package, cutting two PCB traces cleanly without bridging adjacent copper, and flying wires to pads roughly 5–10 mm away. If you have hands-on experience with 0603 or SOIC components, this is straightforward. If your SMD experience is limited to through-hole and THT kits, practice on a donor board first.
Everything else scales down from there:
- The gamepad uses through-hole MCP23017 and standard tact switches — basic soldering
- The 3D-printed shell is designed to friction-fit and snap together, no glue required
- The launcher binary can be flashed over USB with esptool or the web-based esptool-js; no special programmer needed
Estimated build time: 4–8 hours, which includes 3D printing. Active hands-on time is closer to 2–3 hours: ~1 hour for the PSRAM rework and verification, ~1 hour for the gamepad assembly, and 30 minutes for firmware. A multimeter to verify the bodge wires before powering on is strongly recommended.
Special tools: Fine-tipped iron (preferably with a chisel or conical tip for SOIC work), flux, fine-gauge solder (0.3–0.5 mm), and a hot-air station if available (not required). Multimeter for continuity checks.
Soft gotcha: The CYD has hardware variants. DynaMight1124 used an ESP32-2432S028, and the CYD2USB (dual-USB port) variant is recommended for easier firmware flashing. Some boards have different display driver ICs (ILI9341 vs ST7789). Confirm your board matches before compiling firmware — the Retro-Go menuconfig and CYD community documentation on GitHub (witnessmenow) cover variant differences.
Community reception and builder notes
DynaMight1124 posted the project to Reddit's r/esp32 (189,000 subscribers) on May 21, collecting 201 upvotes and a 98% approval rate within days. 8 All six visible comments were positive. One commenter wrote: "Cool project and excellent write up! I booked marked this one and may have to build one for myself in the future." 8 The thread has no technical troubleshooting comments — which either means builders haven't started yet or the build guide covers the common failure modes.
Hackaday's framing summed up the PSRAM mod accurately: "Adding the PSRAM is just a matter of getting the little chip onto an unpopulated footprint on the board, cutting some traces, and adding a bodge wire." 1 That's accurate, if you read "just" generously. The project is documented across Instructables (step-by-step build guide, JS-rendered), Thingiverse, Printables, and GitHub. The Instructables page is the canonical BOM and photo walkthrough — worth pulling up on a phone while you solder.
Loading content card…
Build resources:
- Full build guide: Instructables — CYD Retro Mini TV (DynaMight1124)
- 3D files: Thingiverse thing:7350028 / Printables model 1715529
- Launcher firmware: GitHub: DynaMight1124/CYD-MiniTV-Launcher
- Retro-Go firmware: GitHub: ducalex/retro-go
- PSRAM mod detail: GitHub: hexeguitar/ESP32_TFT_PIO
- CYD variant guide: GitHub: witnessmenow/ESP32-Cheap-Yellow-Display
References
- 1Cheap Yellow Display With Boosted PSRAM Turned Snazzy Emulator Station — Hackaday
- 2GitHub: ducalex/retro-go
- 3GitHub: DynaMight1124/CYD-MiniTV-Launcher
- 4Thingiverse: CYD Retro Mini TV by DynaMight1124
- 5Printables: CYD Retro Mini TV by DynaMight1124
- 6GitHub: hexeguitar/ESP32_TFT_PIO — Adding PSRAM
- 7GitHub: witnessmenow/ESP32-Cheap-Yellow-Display Mods
- 8Reddit r/esp32: Heres a CYD RetroTV I made
Add more perspectives or context around this Drop.