19/6/2026 · 12:16
A carry-on packing reset: 7 free rules that stop overpacking
A practical carry-on reset for travelers who overpack before the suitcase is even open. The seven rules cover wardrobe caps, color coordination, first-outfit access, weight placement, rolling versus bundling, soft-core protection, and one planned laundry reset.

The carry-on problem this fixes
A carry-on usually fails before anything goes in it. You start with every possible outfit, then try to make the zipper forgive the plan. Today's stack flips the order: set a hard clothing limit first, pack by outfit access, and use the bag's shape instead of fighting it.
All seven rules below are free or near-free. You do not need packing cubes, compression bags, a new suitcase, or travel-size gadgets. If you already own those things, fine. If not, the method still works.
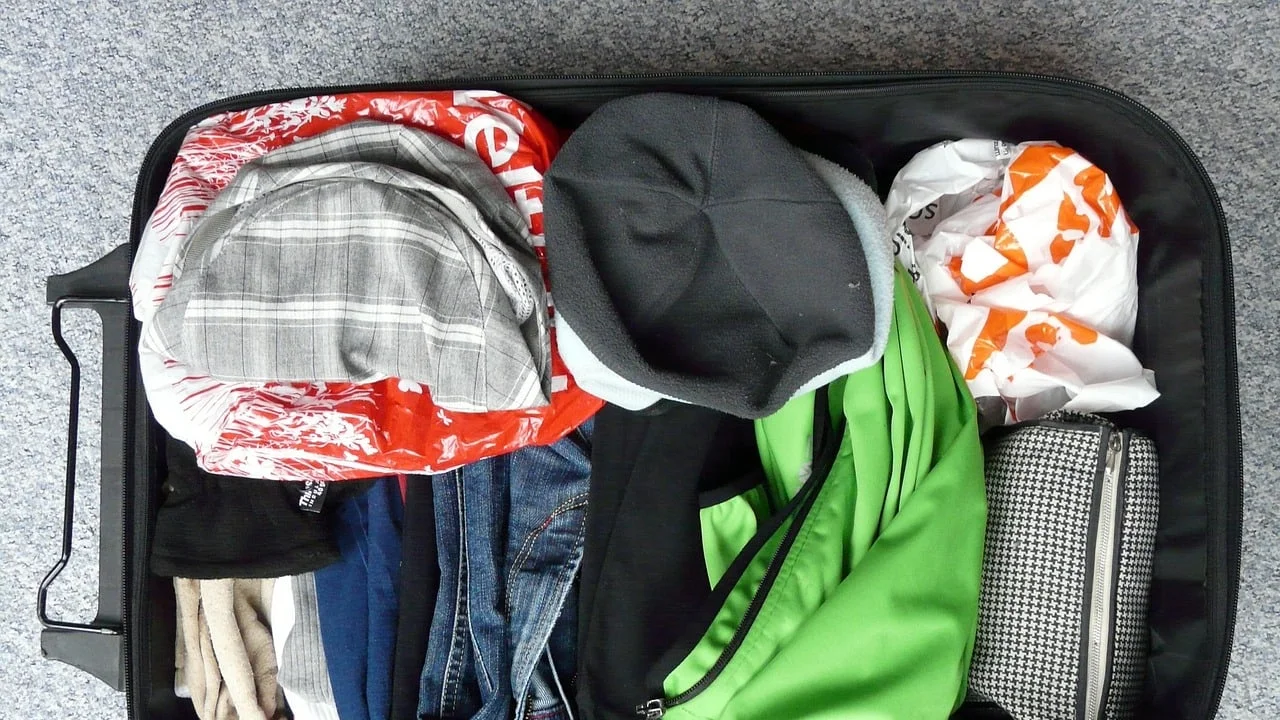
A simple carry-on guardrail starts with five tops, four bottoms, three shoe or outfit anchors, two flexible extras, and one accessory category, then adapts to the trip. 1
Cargando tarjeta de estadísticas…
1. Start with a 5-4-3-2-1 wardrobe cap
Apartment Therapy's carry-on version of the 5-4-3-2-1 method starts with a fixed clothing count, such as five tops, four bottoms, three dresses or rompers plus three pairs of shoes, two swimsuits plus two bags, and one hat, watch, and pair of sunglasses. The writer later adapted it to fit her own trips, which is the point: the formula is a cap, not a costume. 1
Steps
- Write your trip length at the top of a note.
- Set a clothing cap before opening the closet: for example, 5 tops, 4 bottoms, 3 shoes, 2 light extras, 1 accessory category.
- Add only true exceptions under the list: formal event, medical item, sport-specific gear, weather emergency layer.
- Stop packing when the cap is full. If you add one item, remove one.
Why it works: overpacking is usually decision debt. A visible cap forces tradeoffs while you are still thinking clearly, before the bag becomes a pile.
Watch out: do not treat the numbers as universal. A business trip, wedding, hiking route, or winter destination may need a different cap. The hack is the limit, not the exact digits.
2. Pick one color family before choosing individual outfits
The same Apartment Therapy carry-on method depends on mix-and-match clothing; the writer notes that sticking to one color scheme lets the packed items create many outfits from fewer pieces. 1
Steps
- Choose one base color: black, navy, denim, beige, gray, or another color you actually wear.
- Add one or two accent colors at most.
- Test every top against at least two bottoms.
- Remove any item that only works in one outfit unless it is for a specific event.
Why it works: the bag gets smaller because each piece does more work. A shirt that goes with two bottoms is two outfits, not one.
Watch out: color coordination should not beat the weather forecast. If the only matching jacket is too light for the destination, pack the warmer jacket and adjust the palette around it.
3. Put the first outfit on top, not wherever it fits
Good Housekeeping recommends packing the outfit you will want first on top, especially if you are going straight from arrival to dinner or a meeting. 2
Steps
- Decide what you need for the first six hours after arrival: sleepwear, dinner outfit, workout clothes, or tomorrow morning's clothes.
- Group that outfit together.
- Pack it last so it sits on top.
- If you will need documents, liquids, medication, or electronics in transit, keep those separate and more accessible than the outfit.
Why it works: the first rummage is the one that destroys a careful pack. If the first outfit is already on top, you do not have to dig through the bag when you are tired.
Watch out: do not bury anything you may need at security, on the plane, or during a gate-check surprise. Convenience after arrival should not create stress before arrival.
4. Put heavy items at the wheeled end
Good Housekeeping's travel experts advise putting weightier items, such as shoes and books, near the wheeled end of a suitcase so the bag stands more steadily and lighter items are not crushed. 2
Steps
- Stand the empty suitcase upright and notice which end becomes the bottom.
- Lay the suitcase flat again.
- Put the heaviest items closest to that wheeled end.
- Place softer clothing above and around them rather than underneath them.
Why it works: the bag behaves differently upright than it does on the bed. Packing for the upright position keeps the load from sliding, tipping, or crushing soft clothes.
Watch out: backpacks and duffels need a different version. Put dense items low and close to your back or center of gravity, not at the far outer edge where they pull on your shoulder.
5. Roll small basics, bundle wrinkle-prone outfits
Good Housekeeping suggests rolling clothes to prevent creases and use space well. Lifehacker's preferred variation is to roll related clothing around a small center item so the bundle protects the center and keeps outfit pieces together. 2 3
Steps
- Roll low-stakes basics first: T-shirts, sleepwear, workout clothes, leggings, socks.
- For an outfit you need to keep neater, make one larger bundle instead of many tiny rolls.
- Put the most wrinkle-sensitive piece toward the outside of the roll or bundle, where it bends less sharply.
- Line the bottom of the bag with these rolls before adding odd-shaped items.
Why it works: small rolls fill gaps. Larger outfit bundles reduce hard fold lines and keep related pieces together.
Watch out: do not bundle everything if you will live out of the suitcase day by day. A giant bundle may stay neat, but it is annoying if you must unwrap the whole thing for one pair of socks.
6. Build a soft core for fragile or awkward items
Apartment Therapy's bundle-wrapping test describes the method as wrapping clothes around a central core; it recommends a core that is firm but still somewhat soft and roughly 11 by 16 inches, stuffed with small soft items like socks and underwear. 4 Lifehacker uses a similar idea by placing fragile or valuable items in the middle of rolled bundles. 3
Steps
- Choose a harmless core: a soft pouch, empty glasses case, small tech pouch, or folded scarf.
- Add socks, underwear, or another soft layer around it.
- Wrap one outfit or a wrinkle-prone layer around that core.
- Place the finished bundle where it cannot be crushed by shoes or books.
Why it works: hard and awkward items create empty pockets in a bag. A soft core turns that awkward shape into a protected bundle and keeps clothes from shifting around it.
Watch out: never use this trick for leaking liquids, sharp objects, or anything you may need during the flight. A protected mess is still a mess.
7. Plan one laundry reset instead of packing extra outfits
The Apartment Therapy 5-4-3-2-1 writer handles longer trips by doing laundry halfway through and re-wearing everything at least once. 1
Steps
- For trips longer than four or five days, mark one laundry point before you pack.
- Choose quick-drying base layers when you already own them.
- Pack clothes you are willing to re-wear, not fantasy outfits that only work once.
- Keep one outfit out of the laundry plan so you are not waiting on your only clean clothes.
Why it works: one laundry reset replaces several extra outfits. It also makes the carry-on plan more realistic on longer trips.
Watch out: humidity, cold rooms, and thick fabrics slow drying. Do not wash your only warm layer, only dress shirt, or only pair of travel pants unless you know it will dry in time.
The 10-minute packing order
Use this when the closet starts arguing with you:
- Write the clothing cap.
- Pick the color family.
- Pull the first-arrival outfit and set it aside.
- Put heavy items at the wheeled end.
- Roll basics into the gaps.
- Bundle one or two wrinkle-prone outfits around a soft core.
- Add the first outfit on top.
- Close the bag without sitting on it.
If the zipper needs body weight, the plan is not finished. Remove the lowest-use item and keep the carry-on easy to repack on the way home.


Añade más opiniones o contexto en torno a este contenido.