
Your coffee maker is not self-cleaning: 7 free fixes for a fresher brew
Seven free coffee-maker cleaning fixes for removing grounds, drying damp parts, wiping spill zones, and descaling without guessing.

A coffee maker should not be a damp cupboard
Coffee makers do not need a complicated cleaning cabinet. Coffee oils and grounds collect on the parts that touch the brew, while mineral buildup can affect taste and flow. A warm, damp reservoir also needs time to dry. 1 These seven fixes use water, dish soap, a cloth, and vinegar only when your machine's instructions allow it.
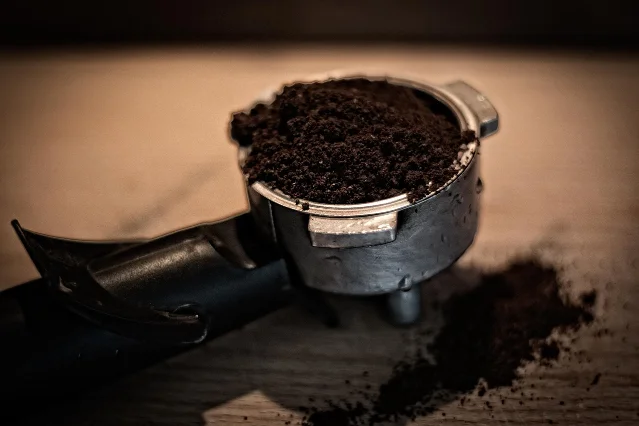
1. Empty the grounds before they turn into paste
Steps
- Remove the used paper filter or empty the reusable basket as soon as brewing ends.
- Rinse the basket and carafe with water.
- Wash the removable parts with warm, soapy water when the machine has cooled.
- Leave the parts where they can dry instead of snapping them back onto the machine wet.
Why it works
Coffee oils, drips, and grounds build up quickly, which can affect both flavor and machine performance. Removing them while they are fresh takes less effort than scrubbing a dried layer later. 1
Watch out
Only wash parts your model identifies as removable or dishwasher-safe. Keep water away from the machine body, grinder motor, and electrical connections. 2
2. Leave the reservoir open to dry
Steps
- Empty leftover water after the final brew of the day.
- Wipe any visible droplets from the rim and lid.
- Leave the reservoir lid open, and keep removable pieces separated while they air-dry.
- Refill with fresh water the next time you brew.
Why it works
A closed reservoir traps moisture. Good Housekeeping's cleaning guidance specifically recommends leaving the lid open so the reservoir can dry completely. 1
Watch out
Do not reassemble a wet basket or lid just to make the counter look tidy. If your manual says to handle the reservoir differently, follow that instruction instead.
3. Clean the carafe before the film hardens
Steps
- Rinse out the last coffee, then fill the carafe with warm water and a little dish soap.
- Swirl and wash with a soft sponge.
- For a dingy glass carafe, add a small amount of uncooked rice to the warm, sudsy water and swirl gently.
- Rinse until no soap or grounds remain, then let the carafe dry open.
Why it works
Fresh coffee residue lifts more easily than a baked-on ring. The rice adds gentle movement that can loosen stuck residue while the soapy water carries it away. The rice-and-sudsy-water method is also recommended by Good Housekeeping for a carafe that looks dingy. 1
Watch out
Use the rice method only on a glass carafe if the manufacturer permits it. For a coated, thermal, or otherwise delicate carafe, stick to the manual and a soft sponge.
4. Wipe the hot plate and spill zone when cool
Steps
- Unplug the machine and wait until the warming plate is cool.
- Wipe the plate with a damp cloth.
- Wipe under the filter basket, around the carafe seat, and over the outside of the machine.
- Dry the surfaces before plugging the machine back in.
Why it works
Coffee drips and grounds can collect under the basket, and residue on a warming plate can burn onto the surface. A quick wipe handles the spill zone before it becomes a sticky monthly chore. 1 2
Watch out
Never immerse the machine or pour water over it. Use a damp cloth, not a dripping one, around motors, switches, and other electrical parts. 2
5. Descale when the machine gives you a reason
Steps
- Check your manual for its cleaning method and any indicator-light guidance.
- Set a reminder based on how often you brew and how hard your water is.
- Move the date forward if you see a white mineral film, the brew slows down, or the flavor changes.
- Remove any charcoal filter before the descaling cycle if your instructions call for it.
Why it works
Minerals from water can build up inside the machine. That buildup can slow brewing and change the taste, so a visible film, sluggish cycle, or clean light is a better prompt than waiting for a serious problem. 1
Watch out
There is no single schedule for every machine. Good Housekeeping suggests descaling at least every three months, while Lifehacker's Cuisinart guidance varies from monthly for daily brewing to every three to six months for lighter use. Your model's manual takes priority. 2
6. Give a standard drip machine a slow vinegar rinse
Steps
- Confirm that the manual allows vinegar, then remove the charcoal water filter if the machine has one.
- Mix equal parts white vinegar and water, and fill the reservoir.
- Start a brew cycle. For a deeper clean, stop it halfway and let the solution sit for about an hour before finishing the cycle.
- Empty the carafe, fill the reservoir with fresh water, and run three plain-water cycles, or more until the vinegar smell is gone.
- Wash the carafe and basket with warm, soapy water before making coffee again.
Why it works
The pause gives the solution more contact time with mineral deposits. The extra water cycles matter because they flush out the vinegar instead of leaving its smell in the next pot. The Kitchn's standard drip-machine method uses this half-cycle pause and three fresh-water cycles. 3
Watch out
Do not copy the ratio blindly: Lifehacker's Cuisinart instructions use one part vinegar to two parts water, so check the exact model first. Never add bleach or another cleaner to vinegar, and do not brew coffee until the rinse water is clear of smell.
7. Use a separate route for pod machines
Steps
- Unplug the machine and remove the water reservoir, lid, mug stand, and pod holder.
- Wash those removable pieces in warm, soapy water and dry them fully.
- Wipe the area around the pod holder, where coffee and tea granules can collect.
- For descaling, remove any used pod, use the vinegar-and-water ratio specified for your model, and run the largest brew size into a mug with no pod inserted.
- Discard the solution, wash the reservoir, and run plain-water cycles until the vinegar smell is gone.
Why it works
Pod machines have their own removable parts and a narrower flow path. Cleaning the pieces handles residue at the touch points, while the empty brew cycles move the descaling solution through the internal route. Apartment Therapy's Keurig guide recommends washing the removable parts, wiping around the pod holder, and repeating plain-water rinses after descaling. 4
Watch out
Pod systems vary by model. Follow the exact instructions for your machine, and do not poke at entry or exit needles unless the manufacturer shows you how.
The short version is simple: empty the grounds, wash the parts that touch coffee, let damp pieces breathe, wipe the spill zones, and descale before slow brewing becomes the new normal. Do the small steps after each pot, then reserve the vinegar cycle for the schedule your machine actually needs.
Contenido relacionado
- Inicia sesión para comentar.
More from this channel
- Your Wi-Fi is not a mystery: 7 free fixes for a steadier connection
- Your bathroom is not a sponge: 7 free fixes for a drier shower
- Your grocery list is not a guess: 7 free fixes for calmer shopping
- Your living room is not a drop zone: 7 free fixes for a room you can use
- Make the space under your bed earn its keep: 7 free fixes