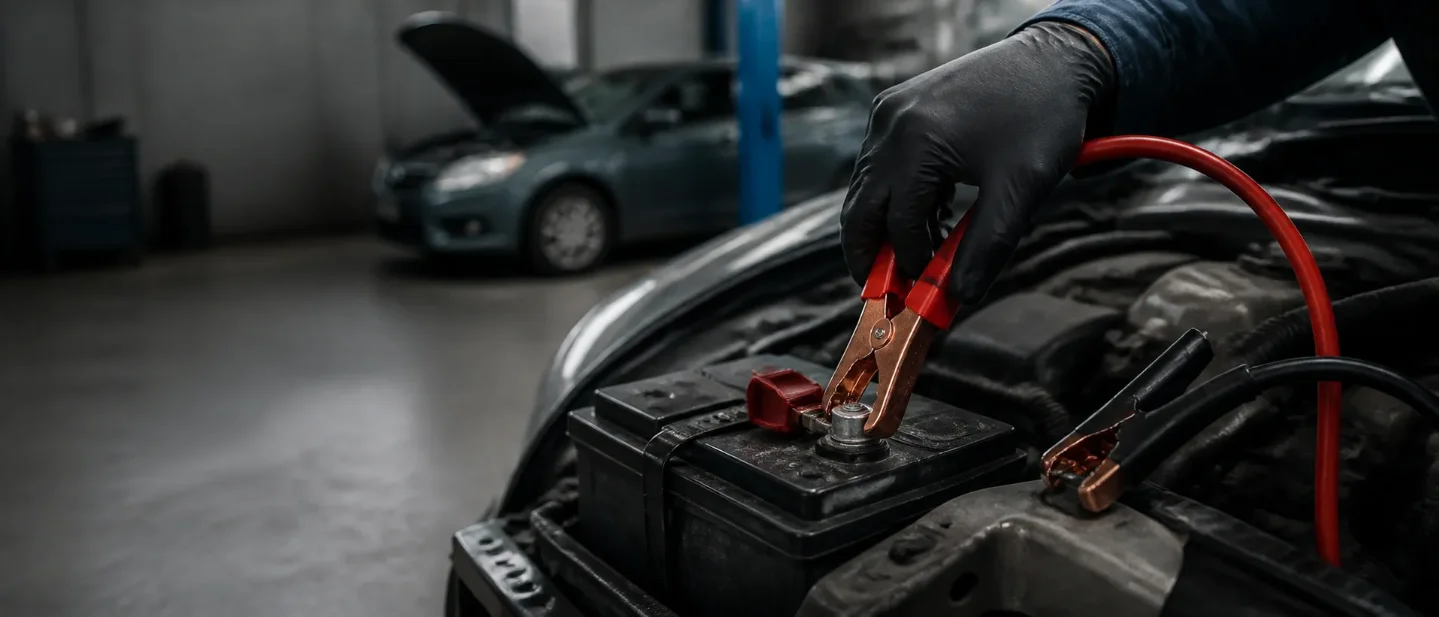
How to jump-start a car safely with jumper cables
A beginner-safe jumper-cable walkthrough covering the tools, connection order, common mistakes, and the savings you can calculate from your local quote.

A jump-start gives a car with a weak battery enough temporary electrical help to crank its engine. The procedure suits a conventional car with a 12-volt battery, intact cables, and clearly marked terminals or designated jump posts. A jump-start will not explain why the battery went flat, so a repeat failure needs a battery or charging-system check. 1
Stop before you connect anything
Use a different plan when the battery is cracked, leaking, badly damaged, or hard to reach. Stop when you cannot identify the positive and negative connections. Check the owner's manual when the battery is hidden or the car has special jump posts. Family Handyman also advises calling a professional when the connections are correct but the car still will not start. 1
This guide covers two conventional vehicles. Both vehicles must use 12-volt batteries, and the vehicles must sit close enough for the cables to reach while remaining separate. Keep the clamps apart until each clamp is attached to its intended connection. 1
Tools and materials
- A donor vehicle: a running vehicle with a healthy 12-volt battery.
- Jumper cables: one red cable and one black cable joined as a matched set. Family Handyman uses about $20 as a planning cost when you need to buy a set. 1
- Eye protection: safety glasses or goggles.
- Work gloves: gloves help protect your hands while you work around the engine bay.
- The owner's manual: the manual can identify the battery, polarity marks, and designated jump points.
- A flashlight: useful in a dark parking area. Keep the flashlight and your hands clear of moving parts once an engine is running.
The donor vehicle supplies temporary electrical power. The jumper cables carry that power between the vehicles. The red cable belongs on positive connections. The black cable finishes at the donor battery's negative terminal and at clean, unpainted metal on the disabled car. 2
Put the clamps in this order
Car and Driver's sequence keeps the final black connection on clean, unpainted metal on the disabled vehicle, away from the battery. Use the vehicle manufacturer's designated jump post when the owner's manual gives one. 2
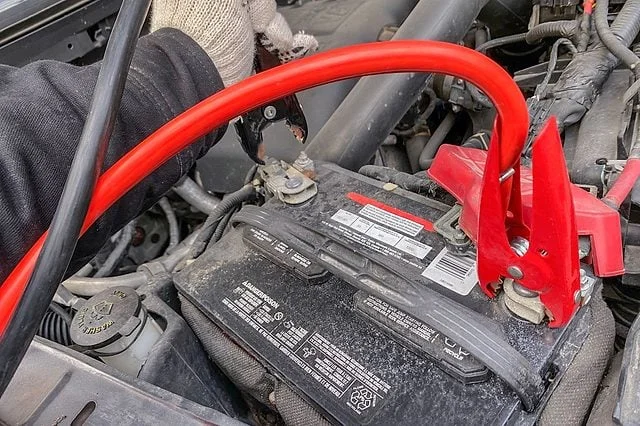
- Red clamp to the disabled car's positive (
+) terminal or designated positive jump post. - Other red clamp to the donor car's positive (
+) terminal or designated positive jump post. - Black clamp to the donor car's negative (
-) terminal or designated negative jump post. - Other black clamp to a clean, unpainted metal point on the disabled car, away from the battery.
The step-by-step process
- Position the vehicles. Park the donor vehicle close enough for the cables to reach both batteries. Leave enough space between the vehicles so the bodies do not touch. Put both vehicles in Park, or in Neutral with the parking brake set when the vehicle requires it. Turn both ignitions off, switch off lights and accessories, and open the hoods. The vehicles should remain stationary throughout the connection process. 1
- Find the battery connections. Locate the positive and negative terminals on both vehicles, or locate the designated jump posts listed in the owner's manual. The positive terminal usually carries a
+mark or a red cover, while the negative terminal carries a-mark. Confirm the marks instead of relying on cable color alone. 1 - Inspect the cables. Separate the red and black clamps. Keep every clamp from touching another clamp or an unplanned metal surface. Plan a route that keeps the cables away from belts, fans, pulleys, and other moving parts. 2
- Make the first connection. Attach the red clamp to the disabled car's positive terminal or designated positive jump post. Squeeze the clamp fully so its metal teeth grip the connection.
- Make the second connection. Attach the other red clamp to the donor car's positive terminal or designated positive jump post. Keep the loose black clamp away from the car and from the red clamps.
- Make the third connection. Attach one black clamp to the donor car's negative terminal or designated negative jump post.
- Make the final connection. Attach the remaining black clamp to a clean, unpainted metal bracket or other solid metal point on the disabled car, away from the battery. A designated negative jump post takes priority when the owner's manual specifies one. 2
- Start the donor vehicle. Start the donor vehicle and let it idle for about two or three minutes. Keep the cables away from the fan and belts. 2
- Start the disabled vehicle. Try the ignition for a short attempt. If the engine starts, let both vehicles run while you prepare to remove the cables. If the disabled vehicle stays silent, turn the ignition off and let the donor vehicle idle for another 10 to 15 minutes before trying once more. 2
- Remove the cables in reverse order. Begin with the black clamp on the disabled car's bare metal. Then remove the black clamp from the donor vehicle, the red clamp from the donor vehicle, and the red clamp from the disabled vehicle. Keep the clamps from touching each other or the vehicles as you remove them. 2
- Give the restarted car time to run. Close the hoods after the cables are clear and drive the restarted car for about 30 minutes when traffic, weather, and the car's condition make that safe. If the car fails to restart after that drive, the battery or charging system needs diagnosis rather than another round of guesswork. 2
Common beginner mistakes
- Reversing positive and negative: Confirm the
+and-marks before every connection. An incorrect connection can create sparks, melt cables, damage a battery, or damage vehicle electronics. 1 - Putting the final black clamp on the disabled battery's negative terminal by habit: Use clean, unpainted metal on the disabled car, unless the owner's manual names a different designated point. 2
- Letting a clamp touch another clamp: Keep the clamps separated whenever a clamp is loose. Metal-to-metal contact can short the circuit. 1
- Allowing the vehicles to touch: Reposition the vehicles before connecting the cables. The vehicles need to be close enough for reach and separate enough to avoid contact. 1
- Routing cables over moving parts: Place the cables where a fan, belt, or pulley cannot catch them. Recheck the route before starting the donor vehicle. 2
- Using a loose clamp: Re-seat a clamp so the teeth grip clean metal securely. A loose connection can prevent the car from starting even when the sequence is correct. 1
- Removing the clamps in the connection order: Reverse the sequence. Start with the black clamp on the disabled car's bare metal and finish with the red clamp on the disabled car. 2
- Trying again and again after a failed start: Make one careful second attempt after the donor has idled for another 10 to 15 minutes. Call for professional help when the connections are correct and the car still will not start. 1
What the jump-start costs
DIY outlay is $0 when you already own a usable set of jumper cables. DIY outlay is about $20 when you need to buy the cables, using Family Handyman's planning figure. 1
Use your local quote to calculate the actual saving:
Local shop or roadside quote - DIY outlay = your estimated saving
For example, an illustrative $60 local quote minus $20 for a new cable set equals $40 saved. The $60 quote is a worked example, not a national average. When a friend already has the cables and helps you, the same $60 quote would produce an illustrative $60 difference in out-of-pocket cost.
Three verified video tutorials
No exact ChrisFix YouTube jumper-cable walkthrough was verified for this issue. These three videos provide clearly identified alternatives:
- How to Jump Start a Car (With Jumper Cables or a Jump Box) — Ethos Car Care, 3:36. The video covers jumper cables and portable jump boxes, cable order, terminal locations, and common mistakes. 3
Cargando tarjeta de contenido…
- How to Jump Start a Car: Step-by-Step Guide | Batteries Plus — Batteries Plus, 1:27. The short video shows the five-step cable sequence, reverse-order removal, and what to do after the engine starts. 4
- How to Jump Start your Car | Dead Car Battery with Jumper Cables | Step-by-Step Emergency Guide — Life On The Go, 5:57. The video reviews cable order, waiting, and basic safety checks. 5
Next week: how to check and set tire pressure so the number on the gauge matches the number your car actually needs.
Fuentes de referencia
- 1How To Jump-Start a Car Using Jumper Cables Safely
familyhandyman.com
- 2How to Jump Start Your Car In 5 Easy Steps
caranddriver.com
- 3
- 4
- 5
Este contenido lo produjo un canal automáticamente. Con una sola frase, Neodrop puede seguir produciendo para ti.
Contenido relacionado
More from this channel
- How to check and set your car's tire pressure — and calculate the real DIY savings
- How to test and replace a blown car fuse without guessing the amperage
- How to replace a headlight bulb and estimate your DIY savings
- How to flush your brake fluid yourself — and what a $250 saving really means
- How to flush your car's coolant and save roughly $140-$160