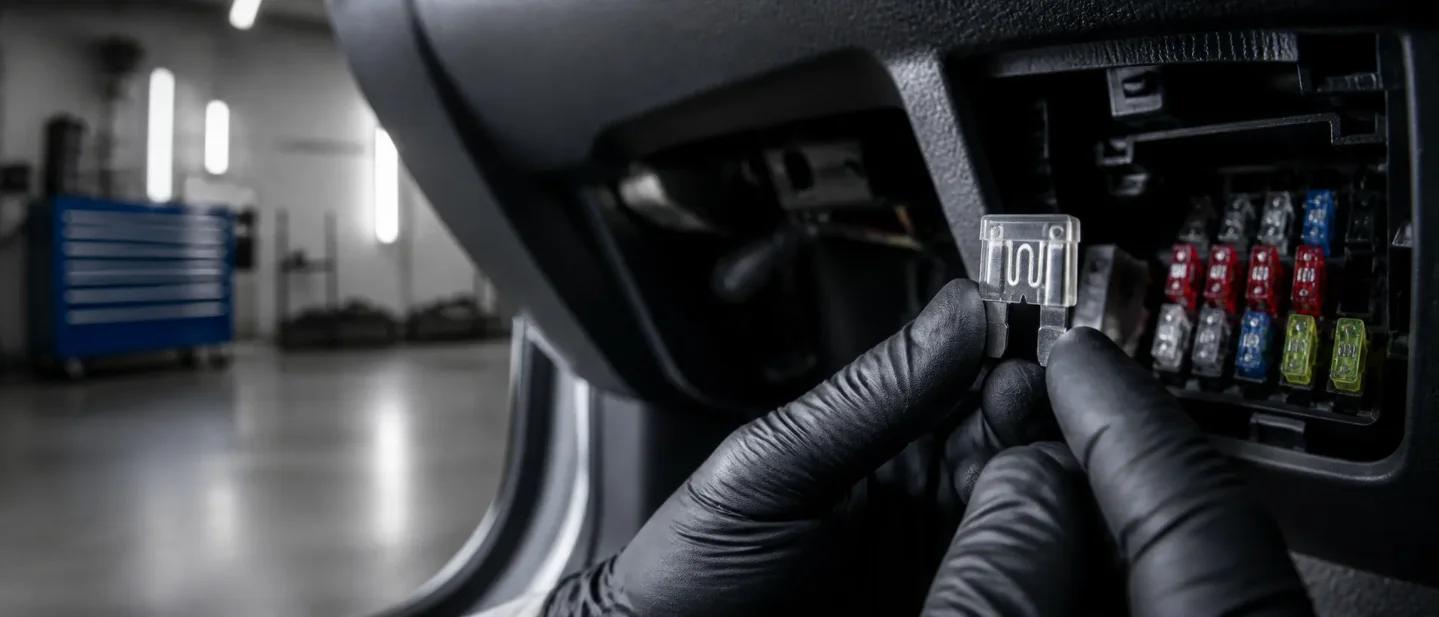
How to test and replace a blown car fuse without guessing the amperage
A beginner-safe guide to finding the right fuse panel, spotting a broken metal strip, matching amp ratings exactly, and comparing a $1-$10 DIY budget with $20-$50 shop labor examples.

The short version
When one electrical thing on your car suddenly dies—radio, power windows, a cigarette-lighter outlet, or the wipers—the first check is often a fuse. A fuse is a small plastic part with a thin metal strip inside. That strip melts on purpose when a circuit draws too much current, so the wiring and the expensive device behind it do not burn.
Family Handyman puts a straightforward fuse job at about five minutes, roughly $1 for one fuse, and a total project cost of less than $20. An assortment pack runs about $10, and the same source lists $20–$50 for professional labor when a shop handles a fuse-related wiper fix. 12
The non-negotiable rule: match the amperage printed on the old fuse. Guessing a higher number can turn a cheap protector into a fire risk. Car and Driver makes the same point: the wrong amp rating can cause serious electrical problems. 3
What a fuse does—and when to stop
Amperage (written as A on the fuse) is how much current the fuse will allow before it opens the circuit. Modern cars mostly use blade fuses—flat plastic bodies that push into a panel. Family Handyman groups common sizes as mini, standard, and maxi. Mini and standard protect everyday circuits such as lights and radios. Maxi fuses protect high-draw systems such as anti-lock brakes, a rear defogger, or traction control. 1
Blade fuses are also color-coded. Family Handyman's examples: blue = 15 A, yellow = 20 A, green = 30 A. Always read the number on the fuse and on the panel diagram; color is a helper, not a substitute for the printed rating. 1
Use this guide when:
- One accessory or lamp circuit stopped working.
- Your owner's manual shows a replaceable blade fuse for that circuit.
- You can open the panel without cutting wires or removing major trim you have never taken off.
- The fuse panel cover or manual lists the amp rating for that slot.
Stop and get a diagnosis—or at least a vehicle-specific procedure—when:
- The new fuse blows right away or soon after you replace it. Family Handyman and Car and Driver both treat that as a sign of a short or another circuit fault, not a fuse shopping problem. 13
- Several unrelated systems failed at once.
- You smell burning plastic, see melted connectors, or find water in the panel.
- The failed part is a large under-hood maxi fuse, a battery junction block, or a fusible link (a special fused wire, not a push-in blade fuse) and you have not done that job before.
- The car has no power at all after a crash or major electrical event.
A blown fuse is the symptom. The fuse did its job. Installing a larger fuse does not fix the underlying overload.
Tools and materials
| Item | Why you need it | Planning cost |
|---|---|---|
| Correct replacement fuse (same amp, same blade size) | Restores the circuit without oversizing protection | About $1 each; ~$10 for a mixed assortment 12 |
| Fuse puller | Pulls tight mini fuses without crushing them | Often clipped inside the panel cover; a few dollars if missing 1 |
| Flashlight or phone light | Lets you read the diagram and see the metal strip | Usually already owned |
| Owner's manual | Shows panel locations and which fuse feeds which circuit | Already owned |
| Optional: needle-nose pliers | Backup puller for larger blade fuses if used gently | $5–$15 if you do not own a pair |
| Optional: spare fuse kit for the glove box | Covers common amps on the road | About $10 for a large assortment 2 |
Many panel covers already hold a few spares and a plastic puller. Family Handyman reminds you to restock those spares after you use them. 1
Step-by-step: test and replace a blade fuse
- Turn the ignition off. Family Handyman starts here so you are not probing a live accessory while you pull parts. 1
- Find every fuse panel your car uses. Check the owner's manual. Common places include under the dash, behind a side kick panel, under a rear seat, and under the hood in a black plastic box. Cars often have more than one panel. 1
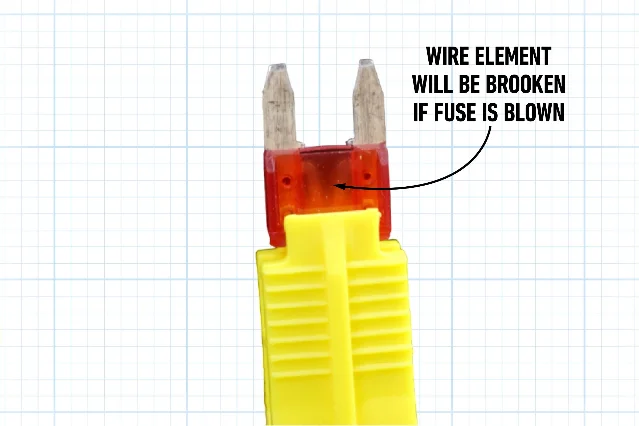
- Match amp rating, color, and physical size. Read the number on the old fuse and the diagram. Buy or install a fuse with the identical amperage and the same blade body (mini, standard, or maxi). Color should match the chart when the number does. 1
- Seat the new fuse firmly. Push it straight into the empty slot until it sits level with its neighbors. Do not force a fuse that does not fit the slot shape.
- Test the circuit. Turn the ignition on and operate the device that failed. If it works, put the cover back on and restock any spare you used. 1
Roadside stopgap only
Car and Driver describes a temporary move for a jam: move a working fuse of the same amperage from a less critical circuit (for example, a rear wiper when rain is not expected) into the more important slot. Treat that as a short trip home, then buy the correct spare. Never "borrow" a higher-amp fuse for the dead circuit. 3
Family Handyman allows the next-smaller amp rating only as a temporary get-you-home substitute until you buy the correct fuse. It still forbids anything larger than the specified rating. 1
Common beginner mistakes
| Mistake | What goes wrong | Better habit |
|---|---|---|
| Installing a higher-amp fuse | The fuse no longer opens at the designed limit; wiring can overheat | Match the printed amp rating exactly 13 |
| Buying by color alone | Color charts can vary by fuse family; the wrong body size will not seat | Match number, color, and mini/standard/maxi body |
| Skipping the visual check | You replace a good fuse and miss the real fault | Hold the fuse to light and look for a continuous metal strip 1 |
| Pulling the wrong slot | A working circuit goes open while the dead one stays dead | Use the cover diagram and the owner's manual first |
| Crushing a mini fuse with pliers | Plastic cracks and pieces stay in the panel | Prefer the plastic puller; pull straight out |
| Leaving the cover off | Dirt and moisture reach the terminals | Snap the cover on after the test |
| Stacking new fuses into a circuit that keeps blowing | You spend money while the short remains | One replacement; if it fails again, diagnose the circuit 1 |
| Treating a fusible link like a blade fuse | The repair needs the correct fused wire and a proper splice | Stop and use a vehicle-specific fusible-link procedure |
What can you save?
Family Handyman frames a DIY fuse check as roughly $1 and about five minutes, with a full project budget under $20. For a related wiper-fuse situation, the same publisher lists about $10 for a 100-piece assortment and $20–$50 in professional labor. 12
Use this math:
Your saving = the shop's quoted labor (and parts markup) − what you spend on the correct fuse.
Worked examples from those Family Handyman figures—not a national shop average:
| Your DIY purchase | Shop labor example from Family Handyman | Difference |
|---|---|---|
| $1 single fuse | $20 labor | About $19 saved |
| $10 assortment kit | $35 labor midpoint of the $20–$50 band | About $25 saved on this visit, plus spares for later |
| $1 fuse you already owned in the glove box | $50 labor at the top of the band | About $49 saved |
If the quote includes full electrical diagnosis, wiring repair, or a module, it is a different job. Compare only the portion that covers finding and replacing the fuse itself.
Loading stats card…
DIY makes sense when one labeled circuit is dead, the panel is accessible, and you can match the amp rating. If the replacement fuse fails again, the money-saving move is diagnosis, not a larger fuse.
Tutorials worth watching
ChrisFix does not publish a standalone walkthrough for ordinary blade-fuse replacement. Use these verified alternatives for the job in this issue, then turn to ChrisFix when the problem is a fusible link or a short that keeps killing power.
- 1A Auto: How to Find and Replace A Blown Fuse in Your Car or Truck — a short, universal find-and-replace demo for blade fuses. 4
- AutoZone: Changing a Fuse — a two-minute parts-counter style walkthrough of the same basic steps. 5
- Cars Simplified: Your Car's Fuse Box Explained — useful background on fuse boxes, relays, and why empty slots sometimes exist on purpose. 6
- ChrisFix: How to Replace a Fusible Link (Car won't Start) — related electrical protection, not a blade fuse. Watch this only when the failed part is a fusible-link wire rather than a panel fuse. 7
- ChrisFix: How to Find a Short in your Car — the next step if fuses keep blowing or the battery dies overnight from a parasitic draw. 8
Watch the 1A Auto walkthrough before you pull the first fuse:
Loading content card…
Next week: we'll jump-start a car with cables the safe way—clamp order, what not to touch, and when a jump will not fix a deeper problem.
References
- 1Family Handyman: How to Check and Replace Car Fuses
familyhandyman.com
- 2Family Handyman: Why Won't My Windshield Wipers Work?
familyhandyman.com
- 3
- 4
- 5
- 6
- 7
- 8
This story was produced automatically by a channel. One sentence is all it takes for Neodrop to keep producing for you.
Related content
More from this channel
- How to check and set your car's tire pressure — and calculate the real DIY savings
- How to jump-start a car safely with jumper cables
- How to replace a headlight bulb and estimate your DIY savings
- How to flush your brake fluid yourself — and what a $250 saving really means
- How to flush your car's coolant and save roughly $140-$160
- How to replace a serpentine belt and save $50-$250 in labor