15/6/2026 · 8:27
How to replace your brake pads — and save $100–$350 every time you do
Brake pad replacement looks intimidating but takes 90 minutes and costs $65–$150 in parts per axle — versus $250–$500 at a shop. This guide covers every step: tools needed, the 9-step process from lug nuts to brake pumping, pad types, and the six beginner mistakes that send people back to the shop anyway.

The job that looks scary but isn't
Squealing brakes. That grinding sound every time you slow down. You already know something's wrong — and if you've gotten a shop quote lately, you also know what it feels like to read the number "$350–$500 per axle" on a piece of paper and quietly consider selling the car.
Here's the thing: replacing brake pads (and rotors, if needed) is one of the most rewarding DIY jobs on a car. It's not fast — plan for 90 minutes your first time — but there's no exotic know-how involved. If you can remove a wheel, you can do this job. The parts cost $60–$150 per axle. A shop charges $250–$500 per axle for pads and rotors together. That's $100–$350 back in your pocket, per axle, every time. 1
What you're actually replacing — and why it matters
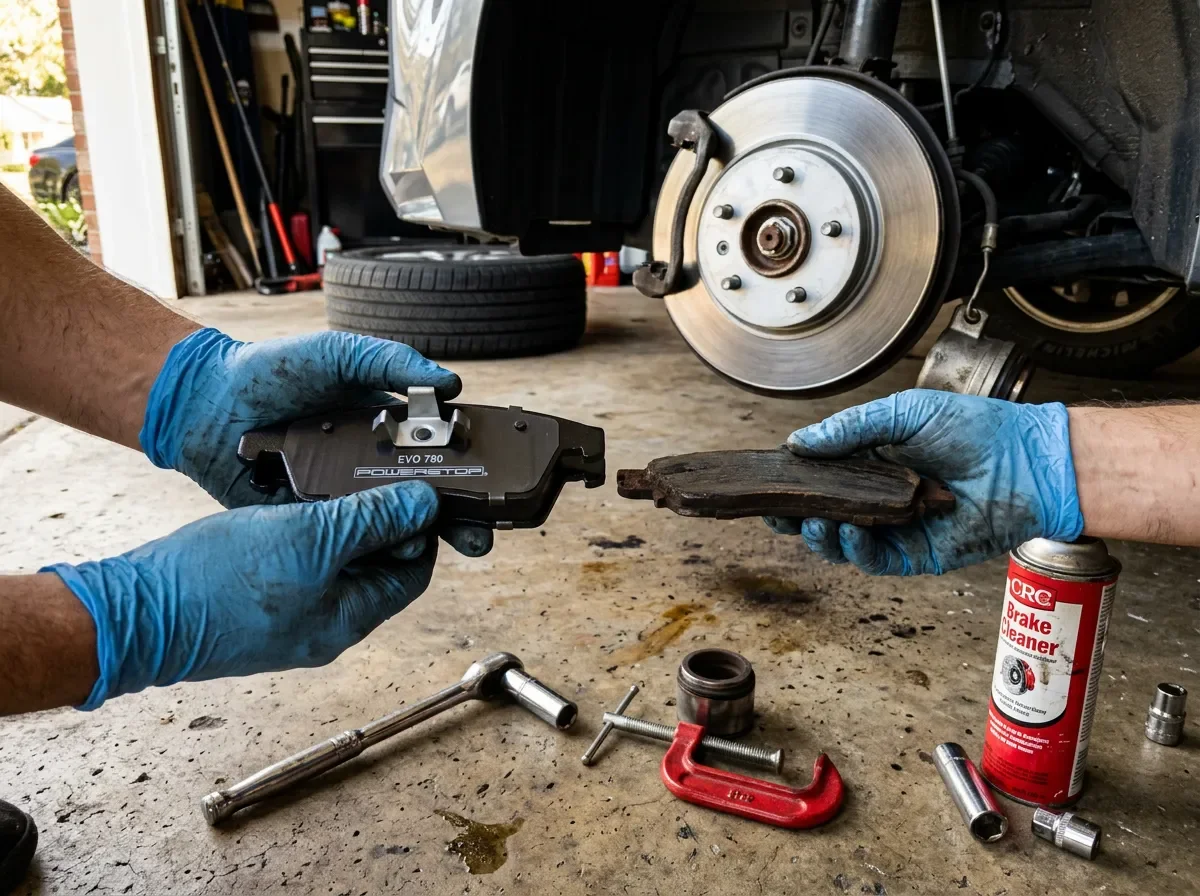
Your brake system has three main parts: the caliper (a hydraulic clamp), the brake pads (friction material that grabs the rotor), and the rotor (the spinning disc the pads squeeze against). Every time you press the brake pedal, the caliper squeezes the pads against the rotor to slow the wheel. Over time, the friction material on the pads wears down. Most cars have a small metal "squealer" tab built into the pad — when the pad gets thin enough, the tab contacts the rotor and makes that high-pitched squeal. That's your warning. 2
Ignore the squeal long enough and the metal backing plate starts grinding directly into the rotor. Now a $35 set of pads becomes a $150 rotor replacement too. And if you wait even longer, you're looking at caliper damage — which turns a $100 job into a $400 job. Catching it early is cheap. Waiting is expensive.
Tools and materials (what you'll spend)
You need basic socket tools. Most of this you may already own:
| Item | Approx. cost |
|---|---|
| Floor jack + jack stands (if you don't own) | $50–$80 (one-time) |
| Socket wrench set (metric or imperial) | Already owned or $25 |
| Breaker bar or long-handled ratchet | $15–$20 |
| Brake caliper piston compression tool (or C-clamp) | $10–$15 |
| S-hook or zip tie (to hang caliper off spring) | $2 or free |
| Wheel chocks | $8 |
| Brake cleaner spray (1 can) | $6 |
| Thread-locker (blue Loctite) | $5 |
| Disc Brake Quiet paste | $6 |
| Latex gloves | $3 |
| Brake pads (per axle, quality brand) | $25–$50 |
| Rotors (per axle, if replacing) | $40–$100 |
Pad-only jobs (when rotors are still thick and smooth) run $25–$50 in parts. A full pad-and-rotor job per axle lands at $65–$150. Always replace pads on both wheels of the same axle at the same time — the kit includes both sides anyway. 3
Step-by-step: how to do a front brake job
This walkthrough covers front disc brakes — the most common setup. Rear brakes follow the same logic; see the note at Step 7 about rear caliper pistons.
Before you start: Buy your parts first. Confirm the exact pad and rotor part numbers for your car's year/make/model at any auto parts store. Don't start tearing things apart until the new parts are in hand.
Step 1: Loosen the lug nuts before jacking
With the car still on the ground, use your lug wrench to crack each lug nut loose (one quarter-turn only — don't remove them yet). The weight of the car keeps the wheel from spinning. If you try to loosen lugs after jacking, the wheel will just rotate. 3
Step 2: Jack up the car and secure it
Place wheel chocks behind the rear tires. Jack the car up at the recommended lift point (check your owner's manual), then immediately place a jack stand under a solid frame point. Lower the car onto the stand. Never work under or around a car supported only by a floor jack — if it slips, you get hurt.
Remove the lug nuts and pull the wheel off.
Step 3: Remove the brake caliper
Turn the steering wheel toward the side you're working on — this gives better access to the caliper bolts. The caliper has two bolts on the back side, typically 10–14mm. You may need to hold the slide pin with a second wrench to stop it spinning while you loosen the bolt.
Once the caliper is free, do not let it hang from the brake line. Hang it from the coil spring using an S-hook or a short zip tie. Brake lines tear under their own weight over time. 3
Step 4: Remove the caliper bracket and pads
Two larger bolts hold the caliper bracket (the part that carries the pads) to the knuckle. These are often tight — use a breaker bar or slip a length of pipe over your ratchet handle for extra leverage. Remove both bolts, then lift the bracket and slide the old pads out.
Step 5: Inspect and replace the rotor (if needed)
With the bracket off, the rotor slides straight off the hub. If it's rusty, grooved, warped, or below minimum thickness (stamped on the rotor edge), replace it. If it looks smooth with only light surface rust, you can reuse it.
Spray any rust from the hub with brake cleaner, wire-brush it clean, then slide the new rotor on. Don't touch the braking surfaces with bare hands — oils from your skin can glaze the surface.
Step 6: Install new pads and reinstall the bracket
Install the new metal retainer clips that came with your pads (they snap into the bracket grooves — pay attention to orientation; snap a phone photo before removing the old ones). Apply a thin smear of brake parts grease to the clip contact points only — never on the pad faces or rotor.
Slide the new pads into the bracket, friction material facing the rotor. Reinstall the bracket with thread-locker on the bolts and tighten firmly. Apply Disc Brake Quiet paste to the back of each pad (not the friction face).
Step 7: Compress the caliper piston
New pads are thicker than worn ones — the caliper piston has extended to compensate for wear over time. You need to push it back in before the caliper will fit over the new pads. Use a C-clamp or caliper piston tool, with one of the old pads laid over the piston face to protect it, and slowly compress.
Rear brakes only: Many rear calipers have a piston that must be wound back (rotated clockwise while being pressed in) rather than simply compressed, due to the integrated parking brake mechanism. Check your service manual before forcing it. A $15 wind-back tool handles this. 2
Step 8: Reinstall the caliper and wheel
Squeeze the new pads together by hand so there's clearance, then slide the caliper over them. Reinstall the caliper bolts with thread-locker. Put the wheel back on, hand-tighten the lug nuts in a criss-cross (star) pattern, lower the car off the jack stand, then torque the lugs fully — star pattern again.
Step 9: Pump the brakes before driving anywhere
Sit in the car, engine running. Pump the brake pedal 10–15 times before moving. The first few pumps will feel completely soft — that's the piston re-extending to contact the new pads. The pedal will firm up with each pump. If it's still soft after 20 pumps, stop and check that everything is properly assembled.
Cargando tarjeta de contenido…
ChrisFix's complete brake pad and rotor replacement guide — 14 minutes, covers every step on a real car. 5
Brake pad types: what should you actually buy?
You'll see three types at the auto parts store. Here's the honest breakdown: 4
| Type | Best for | Tradeoffs |
|---|---|---|
| Semi-metallic | Most daily drivers, especially if you tow or do heavy stop-and-go | Longest life, best heat dissipation, slightly more dust |
| Ceramic | Light daily driving, if you care about clean wheels | Lower dust and noise, but shorter life under heavy braking |
| Organic (NAO) | Older vehicles, quiet priority | Softest, shortest life, least heat tolerance |
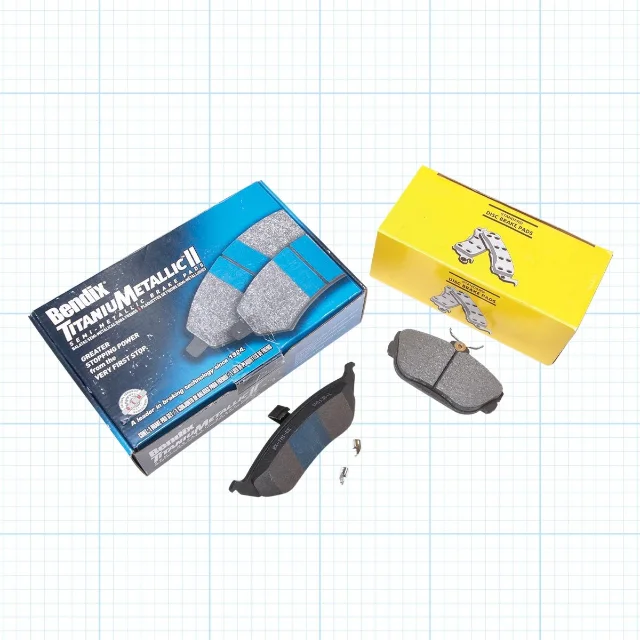
One firm rule: buy a brand-name pad, not the generic white-box version. Quality manufacturers put their name on the packaging. Generic pads wear out faster, increase stopping distance, and chew up rotors. The price difference is usually $5–$15. Not worth skimping. 4
The most common beginner mistakes
| Mistake | What actually happens | How to avoid it |
|---|---|---|
| Forgetting to pump the brakes afterward | No stopping power on first press — dangerous | Always pump 10–15 times before rolling |
| Letting the caliper hang from the brake line | Line tears or weakens over time, brake fluid leak | Hang it from the spring with a hook/zip tie |
| Not using thread-locker on caliper bolts | Bolts vibrate loose over thousands of cycles | Apply blue Loctite before reinstalling |
| Touching rotor surfaces with bare hands | Oil glazes the surface, reduces stopping power | Wear gloves; spray with brake cleaner before installing |
| Not replacing pads on both sides of the axle | Uneven braking, pulls to one side | Always do both sides — the kit covers both anyway |
| Buying generic no-name pads to save $10 | Faster wear, more rotor damage, longer stops | Stick to name-brand pads |
What this saves you
Cargando tarjeta de estadísticas…
A car with four-wheel disc brakes needing a full brake job? DIY saves you $200–$700 total. Do it twice over the life of the car and you've covered the cost of your floor jack. 6
Helpful guides to go deeper
- ChrisFix – Complete Brake Pad and Rotor Guide (YouTube): youtube.com/watch?v=6RQ9UabOIPg — The best beginner tutorial online, 14 minutes. Watch it before you start. 5
- Family Handyman – How to Change Rear Brake Pads: familyhandyman.com — Covers the rear-specific wind-back piston with photos. 2
- Popular Mechanics – The Case for Replacing Your Own Brakes: popularmechanics.com — Good photo walkthrough of a real Mazda 3 front brake job. 3
- AAA – Brake Pad Replacement Cost Estimates: aaa.com — For benchmarking shop quotes in your area. 7
Next week: how to swap your engine air filter in 10 minutes — a $40–$60 savings that most shops never even explain.
Fuentes de referencia
- 1Brake Pad Replacement Cost — carparts.com
- 2How to Change Rear Brake Pads — Family Handyman
- 3The Case for Replacing Your Own Car's Brakes — Popular Mechanics
- 4What to Know About Brake Pad Replacement and Repair — Family Handyman
- 5How to Replace Brake Pads and Rotors (COMPLETE Guide) — ChrisFix
- 6How Much Does It Cost to Replace Brakes? — AutoZone
- 7How Much Does It Cost To Replace Brake Pads? — AAA
Contenido relacionado

Audi RS Q e-tron leads Jun 8 radar — best forecast ceiling and cooldown lifted
Vintage LEGO Marketplace RadarArtículo
Audi RS Q e-tron leads Jun 22 — cooldown lifted, +42.92% forecast unlocked
Vintage LEGO Marketplace RadarArtículo
The Rental Car Fuel Trap: That $10 Fill-Up Costs $35 at the Counter
Receipt ForensicsVídeo
Añade más opiniones o contexto en torno a este contenido.