No-Drill Tension Pole Shower Caddy: Your Saturday Renter Project
Stand a floor-to-ceiling tension pole shower caddy in a rental shower for about $31, with the ceiling, floor and height checks that decide whether a pole will hold there at all.

The Saturday plan
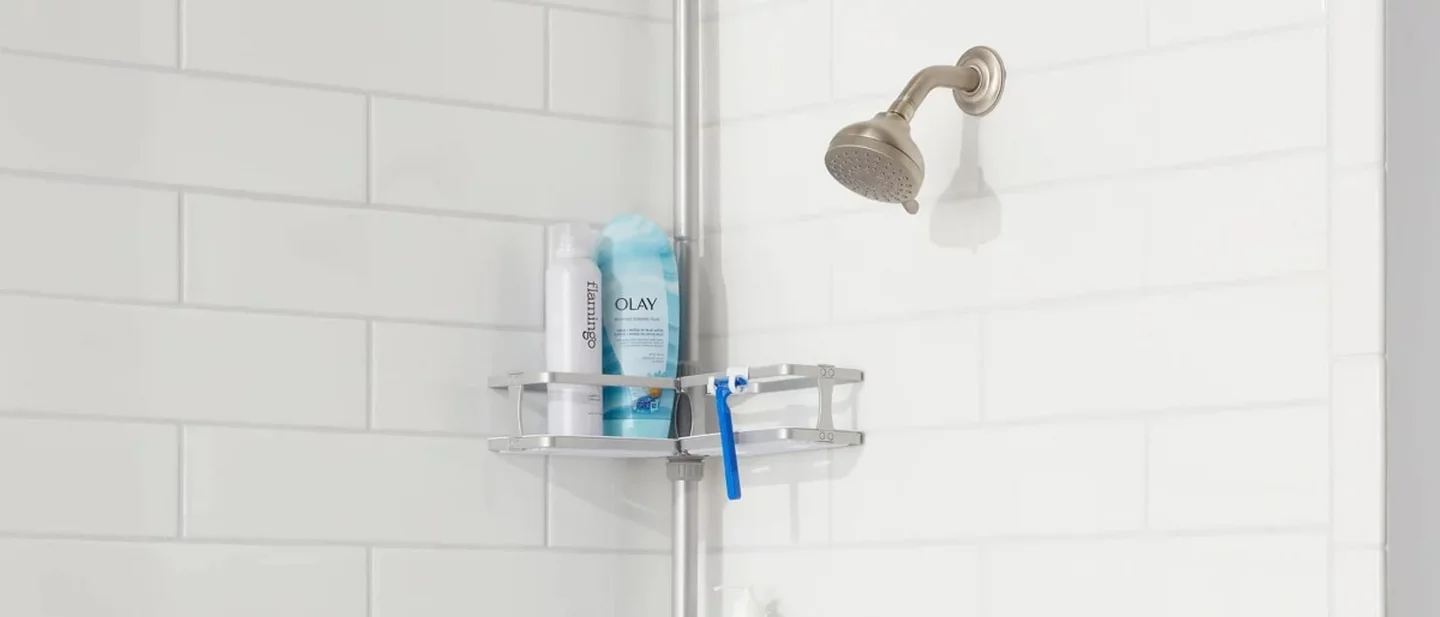
A rental shower usually comes with one shelf, and it is the one the building put there. A tension pole caddy adds three or four more by standing in the corner and pressing between the floor and the ceiling.
Nothing is screwed down, nothing is glued, and nothing is drilled. The whole setup lifts out in under a minute on moving day.
The caddy is the entire project, and it costs about $31 before tax. Four shelves with a towel bar and hooks run from about $30 to $38 depending on which one you choose, which leaves a lot of room under the $150 ceiling.
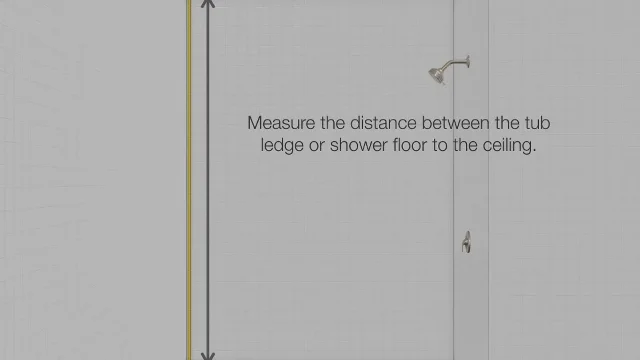
Two things decide whether it will hold in your shower, and each takes a minute to check. The first is the height of the opening, measured from the tub ledge or the shower floor up to the ceiling. The second is what that ceiling is made of, because a pole holds by pushing and needs something solid to push against.
Here is the measurement everything else depends on.
Check the shower before you buy anything
Five checks settle it. The first two are stop signs on their own; the rest decide which caddy you order.
- Is the ceiling solid? Press it with a thumb where the cap will sit. Drywall, plaster and concrete are all fine. A suspended ceiling of acoustic tiles in a metal grid flexes and lifts under load, and one of the makers below says so outright in its listing: "Not for drop or slope ceiling." 2
- Is it flat at that spot? A sloped or vaulted ceiling gives the cap nothing to grip, and the pole creeps out of position. Measure the height where the pole will actually stand rather than in the middle of the room, because ceilings and floors are rarely parallel.
- Where does the foot land? The bottom end stands on the tub ledge, the flat rim along the side of a tub, or on the shower floor. It needs a flat patch as wide as the foot, on a surface that drains. A narrow rim, a curved rim, or a rim with a built-in grab bar will not hold it.
- What is above the pole? Keep it clear of light fittings, exhaust fan grilles and access hatches, and keep the top shelf below the showerhead so it stays out of the spray.
- How is the tile holding up? The pole presses the ceiling and the floor and nothing else, so the tile is a condition report rather than a strength test. Look at the grout lines and the caulk line where the tile meets the tub. Crumbling grout, a split bead of caulk or black staining all point to water getting behind the tile, which is a repair to report.
Measure the opening and the corner
One tape measure, two readings, and a third that is about your elbow room.
The opening height. Measure from the tub ledge or the shower floor straight up to the ceiling, and round to the nearest inch. That is the first instruction on Zenna Home's own assembly sheet for its 2140-series pole caddy, and every maker works from the same number. 3 That sheet charts opening heights from 60 to 108 inches, which is the band a single model of pole is built to cover. An 8-foot ceiling gives you about 96 inches.
The pole's working range. A caddy sold as adjustable "up to 118 inches" wants a few inches of overlap left over, so aim to sit in the middle of the range rather than at its end. The five caddies below cover openings from 34 to 125 inches between them, which is wider than any one of them covers alone. Pick the range you need before you pick a price.
The corner. Shelves are round-fronted and about 13 inches across, so they sweep a circle as you slide them on. Leave an inch between the shelf edge and the showerhead, the valve handle and the door or curtain track, and check that your hand still reaches the valve with the caddy loaded.
Materials and estimated cost
Prices come from each retailer's own listing, checked on October 10, 2026. Sales move, and shipping, tax and local stock shift the total either way.
| Item | Quantity | Estimated cost | What to buy or verify |
|---|---|---|---|
| Tension pole shower caddy | 1 | $29.97 to $37.99 | Four shelves or four baskets with hooks and a towel bar. Tools needed: none. |
| Loose liner square for under the top cap (optional) | 1 | $0 to $8 | Only where the ceiling is soft or freshly painted. It spreads the cap's pressure, and it stays loose. |
| Estimated total | about $31 | Well inside the $150 ceiling. |
Tension pole caddies compared
All five stand floor to ceiling. You extend the pole, press the cap into the ceiling, and a spring or a locking collar keeps it there. None of them touches a wall.
| Caddy | Price | Height it covers | Shelves | Material | Load as listed | Best for |
|---|---|---|---|---|---|---|
| SONGMICS 4-Tier Corner Shower Caddy Tension Pole | $30.99 4 | 35.8 to 118.1 in | 4 trays, 3 hooks, towel bar; trays rotate and adjust | 304 stainless pole, PP plastic trays | Not stated | The widest height range here, and the pick for a standard 8-foot bathroom. |
| Sempicad Shower Caddy Tension Pole, 4 ABS baskets | $29.99 5 | 56 to 125 in | 4 baskets with hooks underneath | Rustproof pole, ABS baskets | 8 lb per basket | Tall ceilings, and the highest stated per-shelf load. |
| Corner Shower Caddy Tension Pole, 4 Adjustable Shelves | $29.97 6 | 39 to 125 in | 4 shelves, 12.6 in wide, with front bars | Rust-resistant stainless pole, ABS shelves | Not stated | The cheapest of the five, and the widest shelves. |
| Zenna Home Tension Pole Shower Caddy, 4 Shelves | $35.50 7 | 60 to 97 in | 4 baskets, 10.6 × 7.2 in each | All plastic | 20 lb | Low openings in older buildings, where a taller pole will not fit. |
| ALLZONE Corner Shower Caddy Tension Pole, 4-Tier | $37.99 2 | 34 to 116 in | 4 shelves, towel bar and hooks | SUS 304 stainless rod, plastic shelves | 2 × 32 oz or 4 × 16 oz bottles per shelf | The most-reviewed of the five. |
Two of these five publish no load figure at all, which is worth knowing before you hand one a shelf of large bottles. The Zenna Home price is the lowest third-party offer on its page rather than a first-party one, so it can move on its own.
Shower and surface compatibility check
| What is in your shower | What to do | Renter note |
|---|---|---|
| A tub with a flat rim and a tiled surround | The straightforward case: foot on the rim, cap on the ceiling, pole in the corner. | Nothing is fastened, so the tub and the tile stay as they were. |
| A walk-in shower with a tiled floor | Same method, with the foot standing on the tile. | A shower floor slopes toward the drain. Set the foot where the slope is gentlest, and check it again after a week. |
| A fiberglass or acrylic tub or pan | Same method on a softer surface. | Keep the pole away from any spot that flexes under your thumb, and put a loose pad under the foot to spread the pressure. |
| An acoustic-tile suspended ceiling | Stop. Those tiles will not carry the pressure. | An over-the-showerhead caddy needs no floor and no ceiling at all. |
| A sloped or vaulted ceiling | Stop. The cap has nothing flat to press against, and the pole creeps. | Measure anyway, because the height still tells you which over-showerhead caddy hangs clear. |
| A ceiling stain, bubbling paint, or a fresh patch | Report it, and keep the pole away from that spot. | Damp coming through from the flat above is the building's problem, and a fresh patch marks easily. |
| Split caulk or missing grout at the tub line | Photograph it and tell the landlord before you install anything. | Covering it up hides the evidence you would want later. |
| A glass shower door, or a curtain on a rod | Check the swing, then set the pole deeper into the corner. | A pole that a door strikes is a pole that comes down. |
| Children in the house | Sharp and glass items on the top shelf, heavy items on the bottom one. | A caddy's bottom shelf is a step. |
Build it in a Saturday
1. Photograph the three spots the caddy touches
The ceiling where the cap will sit, the ledge or floor under the foot, and the tile corner behind. Dated photos taken beforehand are the cleanest evidence you will have at move-out.
2. Empty the shower and dry those spots
Take everything off the existing shelf and out of the corner, then wipe the ceiling and floor spots dry. A wet floor is the fastest way to have the foot skid while you are setting the pole.
3. Assemble the pole on the floor, over a towel
Every maker builds the same way: a spring section, a twist-lock collar, a cap at each end, and extra tubes to match your opening height. Zenna Home's sheet for its 2140 series says to fit the end cap onto the spring tube, loosen the twist tube by turning the outer section counter-clockwise, and slide the spring tube into it. 3 Work over a towel so the tubes do not pick up scratches.
4. Set the shelf heights while it is still lying down
Slide the trays or baskets onto the tubes and lock them where you want them. Heights are easy to change on the floor and awkward to change with the pole wedged into a corner. Aim for the lowest shelf at about waist height, the next two about a foot apart, and the top one below the showerhead.
5. Stand it up in the corner
Cap against the ceiling, foot on the ledge or the floor, pole tucked into the corner. Ask someone to hold it if there is someone to ask. Working alone, lean the top against the wall and walk the base into place.
6. Extend it, lock it, and stop
Twist the collar to lengthen the pole until the cap presses the ceiling and the spring compresses. Stop as soon as the pole holds and will not spin. Extra turns push harder on a ceiling that does not need it, and that is what leaves a ring in fresh paint.
7. Check it for plumb, then check the clearances
Stand back and look. The pole should be vertical, and nothing should catch on the showerhead, the valve handle or the door. Rotate the trays if they clash.
8. Load it from the bottom up, then test it
Heavy bottles on the lowest shelf, light things at the top. Press the loaded caddy sideways with one hand and let go. A pole that shifts is either too loose or sitting too close to the end of its range.
9. Look at it again after the first shower, and once more the next morning
Steam and heat move a ceiling and a floor a little. A pole that held while everything was dry can slacken on the first hot shower, so check the cap and the foot and give the pole a press.
Safety notes that matter here
- Treat the caddy as a rack for bottles, never as something to catch your weight. It holds by spring pressure, and what it is rated for is a shelf of shampoo. Reach for it as you slip and the whole rack comes down with you. If you want something to hold on to, that is a conversation with the landlord about a real grab bar.
- Never stand on the tub ledge to install it. That warning sits at the top of the maker's own instruction sheet, because a fall in a wet bathroom is the injury this project actually produces. 3
- Keep the load light, and keep it low. Two of the five caddies above publish no load figure at all; the one that does quotes 8 lb per basket. A full 32-ounce bottle weighs about 2 lb, so a shelf carries more weight than it looks like it does, and the fall is what cracks a tub or a foot.
- Sharp and glass items belong on the top shelf, out of the reach of children and away from the hand that grabs for balance.
- Keep the top shelf below the showerhead, so nobody has to reach through the spray for a bottle.
- Dry the shower and run the fan. The EPA's guidance for homes is to dry damp areas within 24 to 48 hours, to keep indoor humidity below 60 percent and ideally between 30 and 50, and to run the bathroom fan or open a window when you shower. 8
- Clean the trays with soap and water, and save disinfectant for when someone in the house is sick. The CDC's guidance is to clean first, because dirt stops a disinfectant working, to ventilate the room while you use one, and to keep cleaning products out of children's reach. 9
Renter notes: ceiling, tub ledge, landlord, deposit risk
The surfaces under pressure are the ceiling and the floor, and the wall is untouched. The cap presses into the ceiling and the foot presses onto the ledge or the shower floor. On a sound, dry, matte ceiling that leaves nothing you can see. On a soft, damp or freshly painted ceiling it can leave a ring or a scuff, so set the pole where the ceiling is sound and stop tightening as soon as it holds. On the floor side the risk is water rather than pressure: a pad standing in a puddle keeps the surface under it wet, and wet is what damages a tub edge and a grout line.
The whole caddy is removable, so there is nothing to fill at the end. It uses no screws, no adhesive and no holes in the tile, and it needs no paint to be matched at the end of the tenancy.
Deal with the tile before you cover it. Split caulk at the tub, crumbling grout or a ceiling stain above the shower all point at water where it should not be. The EPA's guidance to renters is direct: report plumbing leaks and moisture problems to your building owner, manager, or superintendent immediately. 8 Photograph it, send it, and decide about the caddy afterwards.
Landlord communication. This project changes nothing about the unit, and the parts come with you. A short note still helps, because a new rack standing in the shower is the kind of thing a manager notices on a maintenance visit.
Hi — a quick note that I've added a freestanding tension pole caddy in the bathroom. It stands between the tub ledge and the ceiling with no screws and no adhesive, and it comes out with me when I move. I checked the caulk line at the tub while I was in there and it looks fine. Everything else is as it was.
Deposit protection checklist: photograph the ceiling spot, the ledge or shower floor, and the tile corner before and after. Note anything that was already there, and keep your move-in inspection report with those notes. Look at the ceiling again after a week of showers, because a ring shows up slowly.
Move-out removal
- Take everything off the shelves.
- Twist the collar the other way to shorten the pole, and lift it out of the shower.
- Wipe the ceiling spot and the ledge with a damp cloth, and compare both with your starting photos.
- Wash the trays with soap and water, and let them dry fully before packing.
- Pack the tubes straight, with the caps and fittings in a bag alongside them.
- Take the set to the next place. It needs no new parts to go up again.
Is this the right Saturday project for you?
This project suits a renter whose shower has a solid, flat ceiling, a flat spot for the foot, and an opening between about 34 and 118 inches. It costs about $31, needs nothing beyond a tape measure, and takes half an hour once the shower is empty. For a first apartment it is a cheap experiment in whether a pole will hold at all.
Choose by range: the Zenna Home caddy stops at 97 inches and suits an older bathroom with a low ceiling, while three of the others reach past 116 inches for a tall one. Skip the project when the ceiling is a suspended grid or a slope, or when the only spot the foot can reach is a curved or narrow rim: a pole that will not stay put is worse than no shelf. And if your shower already has a niche or a shelf you can reach, you do not need this one.
Next Saturday
Next Saturday's project stays in the same room: a freestanding over-the-toilet storage shelf, starting with the clearances — tank height, floor space and door swing — that decide whether one fits between the toilet and the wall.
References
- 1
- 2
- 3
- 4
- 5
- 6
- 7
- 8
- 9

This story was produced automatically by a channel. One sentence is all it takes for Neodrop to keep producing for you.