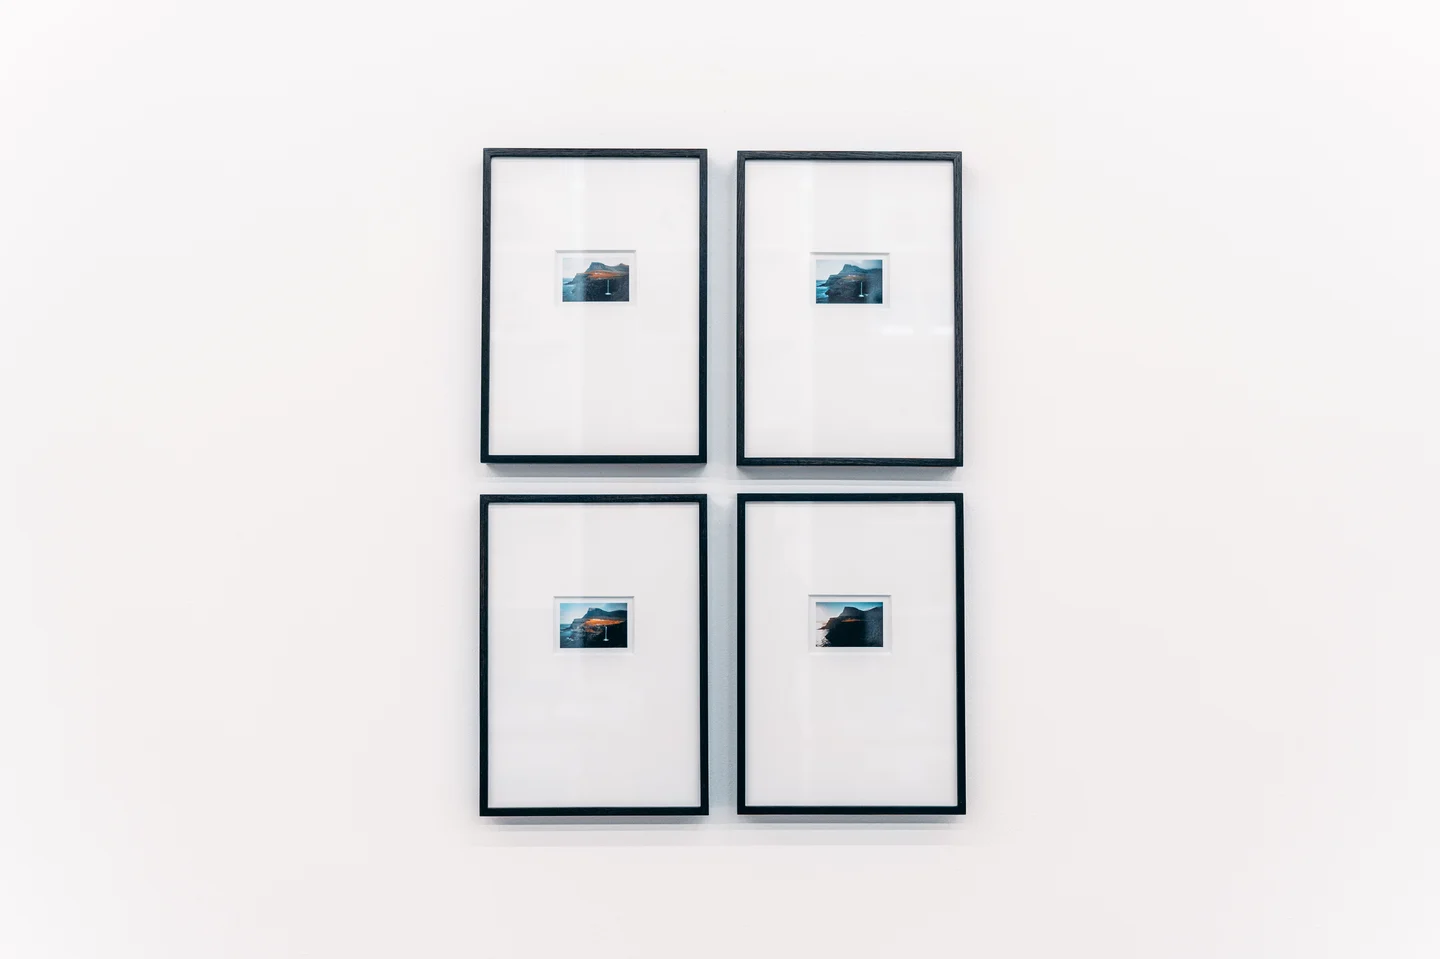
No-Drill Four-Frame Gallery Wall: Your Saturday Renter Project
Build a compact 2x2 art grid with removable picture-hanging strips, a paper layout mockup, and lightweight frames for about $70-$90 before tax.
The weekend plan
A blank rental wall can take on a finished look in one afternoon with four lightweight 8x10 frames, removable picture-hanging strips, and a paper mockup. The plan below creates a compact 2x2 grid about 20 by 24 inches, uses no drill or paint, and costs about $70-$90 before tax depending on whether you already own a level, tape measure, and artwork.
The important caveat is the wall. Removable strips reduce holes; they do not make every painted surface risk-free. Start with a hidden test patch, stay far below the product's weight limit, and skip any wall with loose paint, wallpaper, heavy texture, or a damp problem. 3M's own instructions also say not to use picture-hanging strips over beds, on wallpaper, or for valuable or irreplaceable items. 1
Plan on three to four hours, including a one-hour adhesive wait and time to watch the frames after the first installation. This is a small art grid for a living room, home office, or hallway inside the apartment. It is not a place for heavy mirrors, glass-heavy frames, shelves, or anything that could injure someone if it falls.
Materials and estimated cost
| Item | Quantity | Planning estimate | What to buy or check |
|---|---|---|---|
| 8x10 lightweight frames | 4 | $31.96 | IKEA's black RODALM frame is listed at $7.99 each, has an 8x10 picture size, a polystyrene front, and an included mat. 2 |
| Ready-made 8x10 art or your own prints | 4 images | $0-$11.98 | Use photos you already have, or two IKEA BILD 2-packs. The RODALM product page lists the BILD poster 2-pack at $5.99. 2 |
| Removable picture-hanging strips | 8 pairs minimum | About $20 | Choose a product whose package covers your frame weight and use. 3M says small strips fit most 8x10 frames; its medium product lists four pairs for frames up to 10 lb and 18x24 in. 3 4 |
| Isopropyl rubbing alcohol | 1 small bottle | $5 | Use for the wall-prep step. Do not substitute a household cleaner unless the strip instructions allow it. |
| Painter's tape | 1 roll | $5 | For temporary paper templates and a centerline. |
| Small bubble level | 1 | $8 | A 9- to 24-inch level is enough for a 2x2 grid. Borrow one to save money. |
| Tape measure | 1 | $8 | Optional if you already have one. |
Estimated total: about $69.96 with four frames, your own artwork, strips, alcohol, painter's tape, and a level; about $81.94 if you buy the two poster packs; or about $89.94 if you also need a tape measure. The strip, alcohol, tape, level, and tape-measure figures are planning allowances, not quotes. Store prices and pack sizes change, so buy enough pairs for the actual frame weight rather than buying the cheapest package.
Measure before you buy
The RODALM frame's outer dimensions are about 8 3/4 by 10 3/4 inches. Two frames across with a 2-inch gap make a grid about 19 1/2 inches wide; two rows with the same gap make it about 23 1/2 inches high. 2
Measure the wall area, then check the furniture and door swing around it. Leave enough room to stand in front of the wall without leaning a chair or ladder into a walkway. If the only available spot is above a bed, choose a freestanding display instead. The manufacturer specifically excludes that location. 1
Make the wall decision first
Before opening the frames, take a quick photo of the wall and inspect it in side light. You are looking for flaking paint, powdery residue, bubbles, moisture, old adhesive, or a texture that keeps a strip from making full contact.
| Wall condition | Decision | Renter note |
|---|---|---|
| Smooth, dry, cured painted wall | Possible starting point | Test one hidden patch first and use lightweight frames. |
| Matte, chalky, peeling, freshly painted, or heavily textured wall | High risk; change the plan | Wait at least seven days after painting, as 3M instructs. Skip if the surface still feels soft or dusty. 1 |
| Wallpaper, fabric, brick, or rough masonry | Do not use this adhesive plan | Use a freestanding art easel, tabletop frames, or get written landlord approval for another method. |
| Wall above a bed or in a spot where a falling frame could hurt someone | Do not use this plan | Move the grid to a lower-risk wall. 3M says not to hang these strips over beds. 1 |
A landlord message is still sensible when the lease restricts adhesive products, when the wall has unusual paint, or when the proposed location is near a door, thermostat, sprinkler, or shared-area boundary. Keep the message simple: name the wall, say that the frames are lightweight and mounted with removable strips, and ask whether that surface is acceptable. Keep the reply with your move-in photos and lease records.
Build it in a Saturday
1. Choose the frames and artwork
Use four frames with the same outer size for the easiest beginner layout. The RODALM frame accepts an 8x10 image without the mat and has a plastic front rather than glass, which keeps the finished piece lighter than a glass-front alternative. 2
Put the artwork in the frames before you touch the wall. For a calm grid, use four images with a shared color or subject. For a more personal wall, use two photos and two simple prints. Keep the finished frames together and weigh each one on a kitchen scale if you have one. The heaviest frame determines the strip choice and quantity.
Do not use a frame with a loose back, cracked front, protruding hardware, or an object mounted inside that can shift. Remove a sawtooth hanger or wire only if the frame instructions allow it and the hardware comes off without bending the frame. 3M specifically tells users to remove hanging hardware from the back before applying its strips. 1
2. Mock up the grid on the wall
Cut four rectangles from paper or thin cardboard to the frames' outer dimensions. Tape them to the wall with painter's tape, leaving a consistent 2-inch gap. Mark a light centerline with tape rather than pencil so you do not need to erase a mark later.
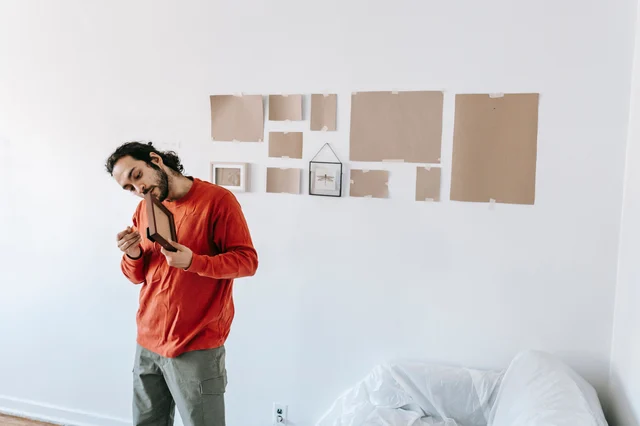
Stand several feet back and look at the whole group. Check it from the sofa, doorway, and the usual walking path. This is the moment to move the grid; after the strips are attached, every adjustment costs time and may increase wall risk.
3. Run a hidden test patch
Pick a low corner behind furniture or inside a closet only if it has the same paint and finish as the visible wall. Clean a small area with rubbing alcohol and let it dry. Apply one strip pair according to its package directions, wait the specified time, then remove it using the slow downward motion described in step 6 below.
Stop if the test pulls paint, exposes a soft layer, leaves a glossy rectangle, or will not release smoothly. A successful test does not guarantee the whole wall will behave the same way, but a failed test is enough to reject the plan. Do not solve it by adding stronger adhesive; stronger adhesive can increase move-out damage.
4. Prepare the wall and each frame
Remove the paper templates. Wipe each mounting area with rubbing alcohol and allow it to dry completely. 3M says not to use household cleaners or water for this preparation step. 1
Separate the strip pairs and click each pair together. For this four-frame plan, prepare at least two pairs per frame unless the product package gives a different requirement for your frame. That means 8 pairs, or 16 individual strips, with a few spare pairs preferred.
Place the paired strips on the frame in the positions shown by the package. The 3M guide places two strips near the top corners and two more halfway down the sides, then presses the frame against the wall. 1 Keep the strips on the rigid frame surface, not on paper, fabric, a loose mat, or a soft backing.
5. Mount one frame at a time
Start with the upper-left paper position. Remove the remaining liners, align the frame with the template edge, and press it firmly against the wall. Do not press on the artwork or flex the frame; press along the strip locations.
Following 3M's process, temporarily lift the frame away from the wall while keeping the strips connected to it, then press each wall-side strip for 30 seconds. Wait one hour before clicking the frame back onto the wall. 1
Use the level and the paper template to set the other three frames. Let the first frame be your reference, but measure the gap instead of trusting your eye. Small errors compound across a 2x2 grid. If a frame lands wrong, remove it using the official release method rather than twisting it sideways.
6. Test the finished grid
After all four frames are mounted, close nearby doors, walk past the wall, and watch for a corner that lifts or a frame that rocks. Check each frame again after several hours and the next morning. If one frame shifts, take it down, inspect the wall and strips, and reduce the frame weight or stop the project. Do not add a second adhesive product on top of the first.
Keep the grid away from beds, hot appliances, damp areas, and places where a child or pet can pull on it. Do not use these strips for a mirror, a heavy object, or a sentimental original that cannot be replaced. Those limits come directly from the manufacturer's guidance. 1
Safety notes that matter here
- Use a stable step stool only when the top edge is outside your comfortable reach. Do not balance on a chair or stretch sideways while holding a frame.
- Keep rubbing alcohol away from flames, sparks, and children. Ventilate the room and let the wall dry before applying adhesive.
- Plastic-front or acrylic-front frames are a sensible low-weight choice. Never assume a product's advertised maximum is a target; use the lower of the package requirement, the frame's condition, and your own conservative limit.
- Do not mount a frame above a bed, over a crib, beside a shower, or where a fall would block a doorway or strike someone. Keep the area below the wall clear while you are testing.
Move-out removal
Remove the frames before packing the room. Support the bottom corners with both hands and peel the frame away from the wall; do not pull it straight outward. Hold the frame steady while you expose the strip tabs.
Pull each strip slowly straight down along the wall, not toward yourself. 3M's how-to page says to stretch the strip downward against the wall at least 15 inches to release it. 1 If the tab tears or will not move, stop and use the product's own removal guidance rather than digging at the adhesive with a knife.
Inspect the wall in side light after every frame is down. For a clean test area, a dry microfiber cloth is the first choice. Do not use a solvent, abrasive sponge, or aggressive scrubbing on painted walls. Photograph the empty wall next to your move-in photo, then store the frames, art, and unused strip pairs together for the next address.
Is this the right Saturday project for you?
Choose it if you have a smooth, dry wall, four light frames, and enough room to keep the grid away from beds and door swings. The 2x2 format is intentionally small: it limits the number of adhesive points, stays below the materials budget, and can move with you.
Skip it if your wall is textured or freshly painted, your lease bans adhesive hangers, or the only usable wall is above a bed. A tabletop frame arrangement, a freestanding easel, or a landlord-approved hook is a better answer than turning a deposit-risk experiment into a full wall installation.
Next Saturday
Next week: a no-drill bedroom closet refresh using a freestanding garment rack and removable fabric storage, with a small-space layout that stays clear of doors and heat sources.
Related content
- Sign in to comment.