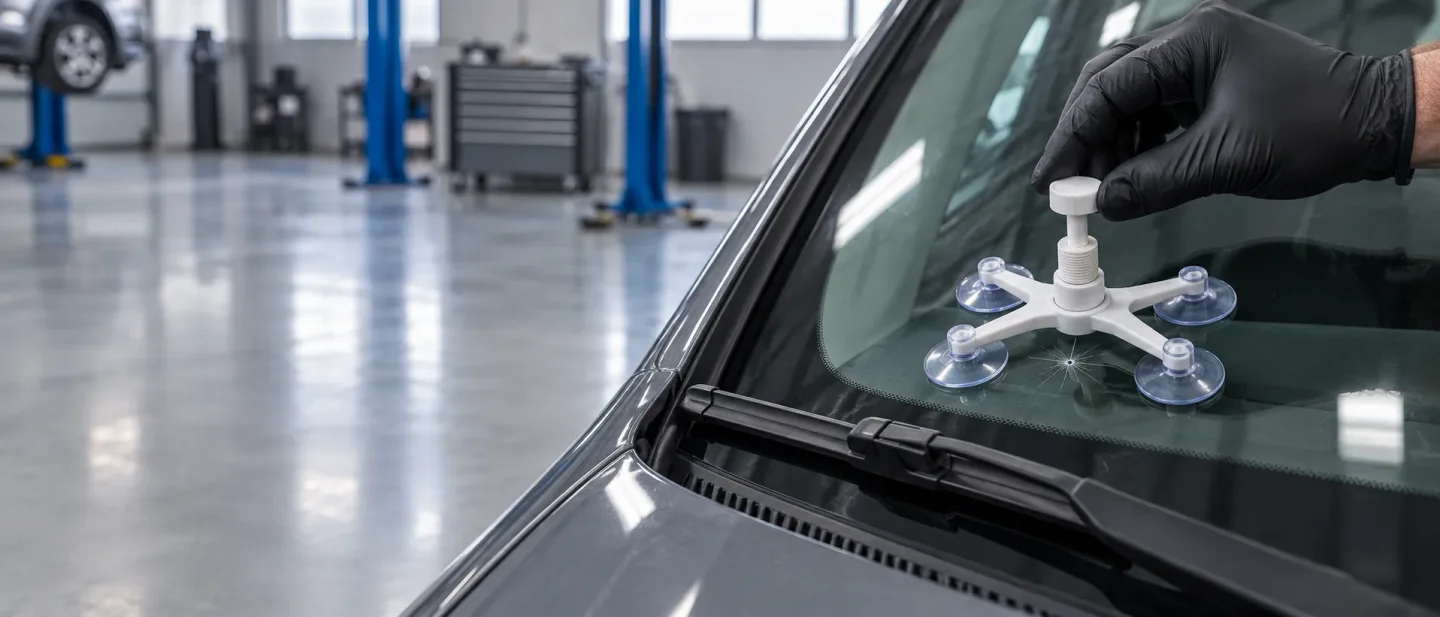
How to repair a windshield chip with a resin kit — and how to tell a $15 fix from a new windshield
A beginner's walkthrough for sealing a rock chip in your windshield with a resin kit — how to tell damage you can fix in the driveway from damage that needs a glass shop, the ten steps, and what it saves against the shop.

Windshield damage announces itself with a sound you learn to recognize: a sharp tick somewhere on the glass, and then nothing, which is the trouble. A rock chip is easy to live with. It stays small until the morning it becomes a crack running clear across the windshield, usually with the defroster humming. 1
The two prices on either side of that change sit far apart. A resin repair kit costs less than $15 and does the work in your own driveway. 2 Once the chip has spread, replacing the glass on a modern car can run over $1,000, because a camera behind the rearview mirror feeds the lane-keeping and automatic-braking systems, and that camera has to be recalibrated to the new windshield. 3
An hour in the driveway is what the job asks of you. What decides whether your damage is a driveway job at all is its shape, its size, and where on the glass it sits, so that is where we start.
The four shapes of damage, and which ones a kit can close
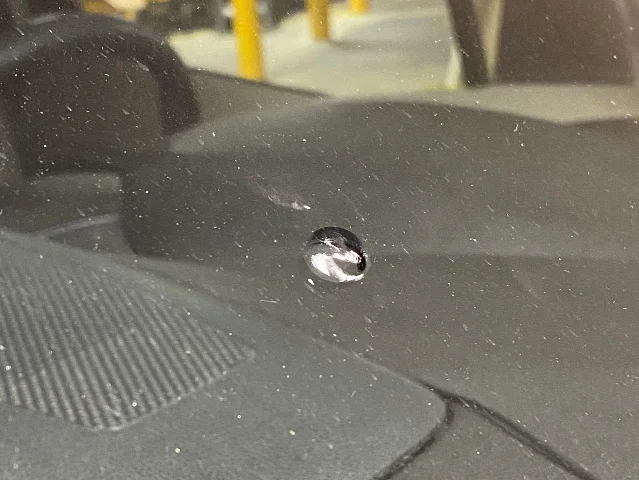
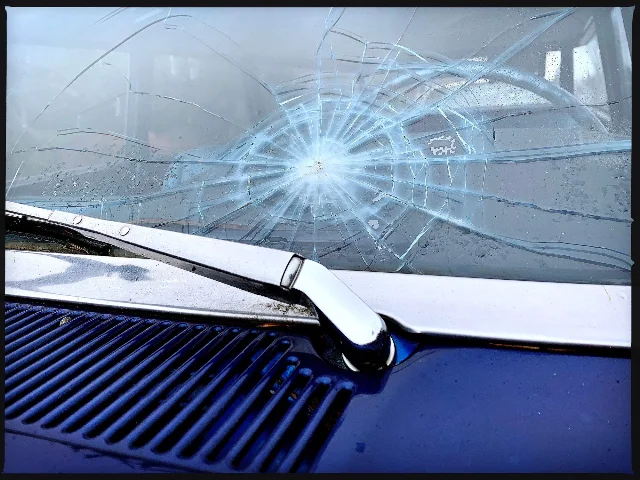
Look at the chip in good light and match it to one of four shapes. A chip is a plain divot, a small crater with no lines running from it. A bullseye is that crater with a ring around it. A spider has fine cracks radiating out from the impact point. A crack is a long split in the glass, which often began as one of the other three. 2
Chips, bullseyes and spiders all take the same repair, and any kit will do them. A crack takes a slightly different technique, which comes at the end. 2
What a kit can seal is a shallow chip that has not broken away several layers of glass, and a crack shorter than about three inches. 2 A chip that enters the glass roughly perpendicular to the surface, or at a shallow angle, is a candidate for repair; a long crack is beyond any kit and belongs to a glass shop. 4
Position matters as much as size, and this is the check people skip. Damage in the driver's direct line of sight should be a replacement windshield whatever its size, and a deep chip or a large crack is a replacement too. 2 A crack inside that field of view has to be replaced, and a chip there can fail a state inspection even after a tidy repair. 15
Why the clock is running
Water gets into a chip before you notice it, pulled in by surface tension even when the glass looks dry. 4 Moisture that reaches as deep as the windshield's inner plastic layer can separate the glass from it, and dirt carried in with the water has no way back out. 4
Freezing finishes the job. Water sitting in the chip expands when it turns to ice and pushes the glass apart from inside. 4 The defroster adds thermal shock on cold mornings, because it heats the glass quickly and unevenly from the bottom up, and the tension that builds is what turns a chip into a windshield-wide crack in seconds. A hard hit from a pothole loads the same glass from another direction. 1
That is the whole case for doing this repair on the next dry afternoon rather than the next dry month.
What you need
| Item | What it does | Required? | Cost basis |
|---|---|---|---|
| Resin repair kit | Everything the repair runs on — the resin, the fixture that holds it against the chip, the curing strip and the razor blade | Yes | A basic kit runs about $10; Family Handyman puts DIY kits under $15 and lists the Permatex kit at $15.99. 26 |
| Paper towels or rags | Wiping the glass around the damage, and catching resin that runs down the windshield | Yes | Already in the garage. 2 |
| A shaded place to park | Resin cures on ultraviolet light, so the resin goes in out of the sun | Yes | Free — a garage, a carport, or the shadow side of a building. 2 |
| Direct sunlight, or the UV lamp some kits include | Cures the resin once the curing strip is on | Yes | Free, if the weather cooperates. 1 |
| A hair dryer | Dries the glass first if the windshield is wet, since water trapped under the resin ruins the fill | Only if the glass is wet | Whatever one costs at a thrift store. 4 |
| A shop vacuum | Pulls dust and loose glass fragments out of the crater before the resin goes in | Optional | The one in the garage. 2 |
The kit itself is the tool list. The Permatex kit, for instance, ships with an alcohol prep pad, a push pin for picking loose glass out of the chip, a syringe that pulls a vacuum and then pressure inside the crater, a plastic pedestal that isolates the chip, a two-sided adhesive disc that holds the pedestal to the glass, the UV resin, a clear curing strip, and a razor blade for the cleanup. 1
One number on the box is worth reading before you start. Some resins have a working temperature range — the Permatex kit is rated between 50 and 73 degrees Fahrenheit — so a repair done in a freezing garage in January can behave differently from the same repair in June. 6
The repair, in order
- Identify the damage and decide it is repairable. Chip, bullseye or spider, no bigger than the limits above, and out of the driver's line of sight. If it fails any of those, stop here and call a glass shop. 2
- Clean the damage out, and keep the glass dry. Use the pin or the corner of the razor blade from the kit to lift loose glass and grit out of the crater, then wipe the glass for a few inches around it with a rag. 2
- Leave the glass cleaner in the cupboard. A commercial glass cleaner that runs into the crack can be trapped there, and resin cannot seal a channel that is already wet with something else. 2
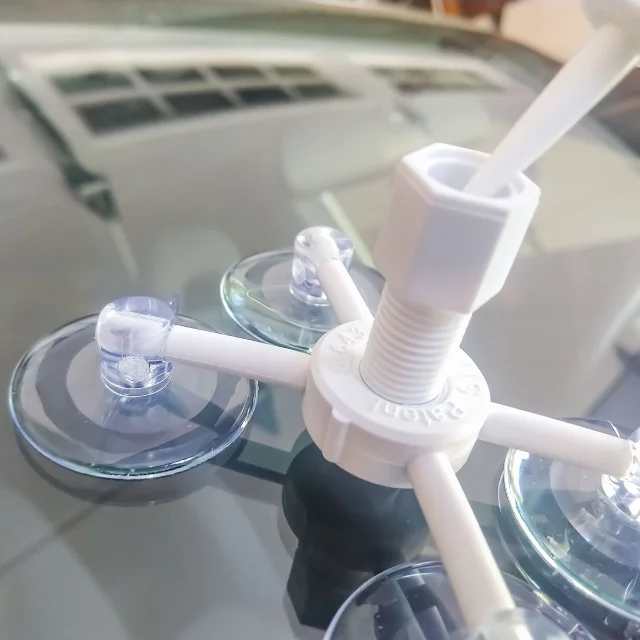
- Seat the fixture over the chip. Center the suction-cup base on the impact point and check the alignment from both the outside and the inside of the car, so the seal sits where the crater actually is. 2
- Screw in the resin chamber and stop at the washer. Tighten the lower section down until the rubber washer is flat against the glass, and go no further. Extra pressure can misalign the seal or spread the damage you are trying to contain. 2
- Get into the shade before the resin comes out. With the sun off the glass, add a few drops of resin to the chamber, insert the plunger, and tighten it almost all the way. The pressure behind that seal is what drives resin deep into the cracks. 2
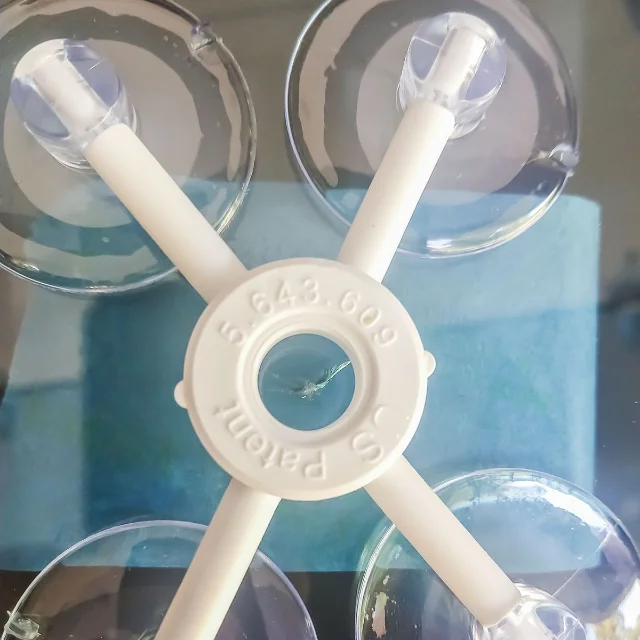
- Wait five to ten minutes, then look at the chip from both sides. Press gently against the glass from inside if you can see air bubbles. If cracks are still visible, unscrew the plunger, add a few more drops of resin, and tighten it again. On stubborn damage the base may have to be re-centered on a crack that did not fill. 2
- Take the fixture off and apply the curing strip. Wipe away the resin that ran down the glass, and leave the resin sitting on the chip itself alone. Lay the clear plastic strip over the repair; it sticks to the resin by itself, so it needs almost no pressure. Then move the car into direct sun for as long as the kit's instructions say. 2
- Scrape the hardened resin flush. Hold the razor blade at a right angle to the glass — it feels wrong and sounds worse, but the angle is what keeps the blade from cutting into the fresh repair — and shave the excess resin off in one pass. 12
- Top off a divot, if there is one. Should the repaired spot still sit low in the glass, add another drop of resin, lay on a fresh curing strip, and put the car back in the sun. Otherwise the job is done. 2
A crack takes one change from that sequence: with no crater to pressurize, the resin goes on top of the crack and gravity draws it down into the split, helped by gentle pressure on either side of the crack from inside the car. Curing strips go along its whole length, and the cure and cleanup are the same. 2
What doing it yourself is worth
| What you would be paying for | Doing it yourself | Paying someone |
|---|---|---|
| Sealing a chip, bullseye or spider | Under $15 in parts, and under an hour of your time. 2 | A professional chip repair of $35 to $120. 2 |
| The same chip, priced by the person who made the best-known how-to | About $10 for the kit. 7 | About $50 to $75 for a repair shop to fill it, and $500 or more for a replacement windshield. 8 |
| A windshield replaced after a chip spreads | — | Over $1,000 on a car whose glass carries a camera for lane-keeping and automatic braking; ten years ago the same crack cost under $300. 3 |
| The camera recalibration inside that bill | — | One Ford Bronco owner's quote went from $400 to $850 once the driver-assist recalibration was added. 3 |
| Covering the damage through insurance | — | Comprehensive coverage is the part of a policy that pays for glass, several states bar a deductible on windshield repair, and a glass-only claim generally leaves premiums alone. A crack in your line of sight is a replacement either way. 5 |
Read those figures as source-specific examples rather than a national price list. The kit prices and the $35-to-$120 shop range are what the publishers quoted on the dates they updated their pages; the $1,000-and-up replacement figure is Car and Driver's June 2026 estimate for a car whose windshield carries driver-assist cameras, and it climbs with the trim and the glass. 3 The older the car, the smaller the gap: a plain windshield with no camera behind it is a far cheaper part. 4
A quick word on the insurance row, because it changes the arithmetic. A resin repair that costs you $12 is worth doing whether or not you have coverage, and glass claims are handled differently from collision claims: many policies keep glass-out repairs free of the deductible, and some states require it. 5 If the damage is a crack in your line of sight and a replacement is coming anyway, that is the moment to read your policy rather than a moment to reach for a kit. 5
Beginner mistakes to avoid
- Adding resin with the car in the sun. The resin cures on UV light; start it in sunlight and it can set before it has filled the crater. Shade first, sun last. 2
- Using glass cleaner on the chip. Cleaner that gets into the crack stays there and keeps the resin from sealing. 2
- Over-tightening the chamber onto the glass. Tighten only until the rubber washer is flat. More pressure can shift the seal or spread the damage. 2
- Wiping the resin off the chip after the strip is on. Wipe the drips on the surrounding glass and leave the repair itself alone. 2
- Scraping the cured resin at an angle. The razor goes at a right angle to the glass to skim the surface instead of digging into it. 2
- Starting on a wet windshield. Work on dry glass at roughly room temperature; if the glass is wet, dry it with a hair dryer first, because water trapped under the resin defeats the repair. 4
- Trying to fill a long crack. A kit handles small damage only; a long crack is a glass-shop replacement. 4
- Repairing damage in your line of sight. That one is a replacement, and it may fail inspection repaired or not. 1
- Assuming every windshield costs the same to replace. On a car with a forward camera, the recalibration is a bill of its own and a shop without the equipment may skip it. 3
- Waiting. Water, grit, frost and the defroster all work on a chip while it sits there. The cheapest day to fix it is the day you find it. 4
Three verified tutorials
ChrisFix has this one covered, and more than once. His current walkthrough films the whole resin-kit process, chip and crack, from the kit's contents to the final scrape and the result, in about twelve minutes. The earlier video it credits is shorter and he rates its finish higher.
- How to Fix a Chipped or Cracked Windshield (Like Brand New) — ChrisFix, 12:12, published 16 June 2017. The complete process on film: laying out the kit, cleaning the damage, seating the pedestal, the vacuum-and-pressure cycle, curing and scraping. Watch this one first. 9
- How to Repair a Windshield Chip or Crack — ChrisFix, 6:01, published 17 January 2014. A shorter run through the same job with a different kit and a notably clean result, which is why his later video links back to it. 8
- Best Way To Fix a Cracked Windshield - EASY DIY — AmplifyDIY, 8:03, published 20 September 2025. A recent beginner walkthrough with chapter markers for each stage, useful as a second angle on the setup and the vacuum-and-pressure cycle. 10
Loading content card…
Next week: your headlight lenses have gone cloudy and yellow, and a $20 polishing kit and an afternoon bring the light back — which cars can be done in the driveway, and which need a new lamp instead.
References
- 1Permatex Windshield Repair Kit Review
popularmechanics.com
- 2How to Repair Cracks and Chips in Your Windshield
familyhandyman.com
- 3Your Car Is Smarter, But Fixing It Will Cost You
caranddriver.com
- 4From Chips to Clear: DIY Windshield Repair Made Easy
popularmechanics.com
- 5Does Car Insurance Cover a Cracked Windshield?
caranddriver.com
- 6The 6 Best Windshield Repair Kits to Avoid a Trip to the Shop
familyhandyman.com
- 7How to fix a Chipped Windshield
youtube.com
- 8How to Repair a Windshield Chip or Crack
youtube.com
- 9
- 10
This story was produced automatically by a channel. One sentence is all it takes for Neodrop to keep producing for you.