Neodrop
Create
FeedDiscoverMy ChannelsAuto-publishJoin Our Discord
Neodrop
A smoother experience in the app
FeedDiscoverCreateMy Channels
How to clean a carbon-caked throttle body for $10 to $21 — and when the ten-minute version leaves the worst of it behind
2026-11-04

How to clean a carbon-caked throttle body for $10 to $21 — and when the ten-minute version leaves the worst of it behind

A beginner's walkthrough for cleaning a carbon-ringed throttle body with one can of cleaner — how to tell whether a rough idle is even this part, when the ten-minute spray job is enough and when the part has to come off, and what each route saves against a shop.
DIY Car Maintenance Weekly
DIY Car Maintenance Weekly@Alex M
A car that shakes at a red light, drops its revs when you stop, or stalls once on the way home usually has one thing in common: the plate at the front of the intake is not closing cleanly. That plate lives in the throttle body. 1
Family Handyman, in a guide updated in August 2024, calls cleaning it a ten-minute job. 2 The shop version of the same idea, a fuel-induction cleaning, starts at $80. 2
If the plate is damaged rather than dirty, a replacement throttle body runs $500 to $800 fitted, and Family Handyman's average of $150 an hour is why. 1 That price sits on the same guide, updated in May 2024.
That gap is the whole reason this job is worth learning. It is also the reason the same job goes wrong in driveways: the throttle body has a coating, a sensor and two seals inside it that a spray can and a hard brush can ruin in five minutes.
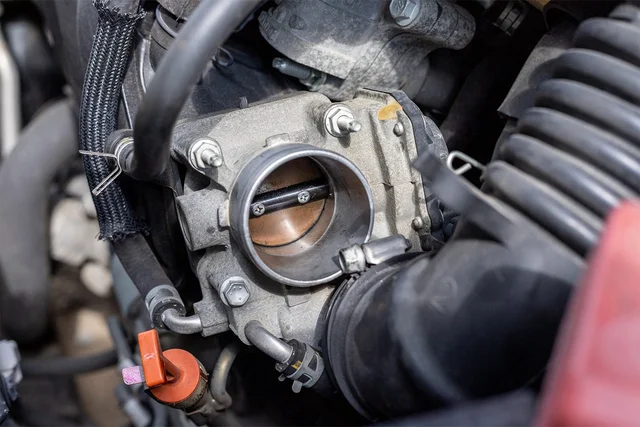
A cast-aluminium throttle body in an engine bay, its round bore face-on with the throttle plate sitting closed inside, an intake boot and coolant hoses around it
The part sits between the air filter and the engine, and the bore in the middle is the engine's air door. The plate you can see across the opening is what the pedal moves. 1

What the part does, and where the carbon comes from

An engine runs on about fifteen parts of air to one part of fuel by weight, and the throttle body is the valve that decides how much of that air gets in. 3
The round bore holds a pivoting plate on a spring-loaded shaft. Your foot on the pedal opens it; lift your foot and it springs shut, leaving only a small bypass to keep the engine idling. 3
The dirt on it comes from two places. Some is airborne grit that got past the air filter or through a crack in the intake duct. 3 Most of it, though, is oil and combustion gas pushed forward from the crankcase ventilation system, which lands on the bore and bakes on. 3
A film there narrows the gap the plate is meant to leave when it is nearly shut. That is why the damage shows up at idle and off the line rather than at full throttle: the same small opening now passes less air than the computer expects. 3
Family Handyman's list of what a badly dirty throttle body does to a car: reduced engine power, a rough idle, poor acceleration, and in the worst case a throttle that sticks or stops responding. 1

Check that the throttle body is your problem before you buy anything

A rough idle has a long list of causes, and the throttle body is one of the cheapest ones to rule in or out. Family Handyman's rough-idle guide works down the same list a shop does.
Start with the air filter and the PCV valve — the small valve that vents crankcase fumes back into the intake. A clogged filter starves the engine of air, and a stuck PCV valve feeds it too much. 4 Then listen for a hissing or sucking noise that would point at a cracked or loose vacuum hose. 4
Worn spark plugs or a bad coil will shake an engine too, and so will fuel pressure problems. 4 If the check-engine light is on, read the code first — last week's issue covers that with a $27 reader.
Then look at the bore itself. Popular Mechanics' test is a flashlight and a look past the plate: a coating of dirt and oily film on the inside wall or the edge of the plate means you have found it. 3
A throttle body with a clean bore and a plate that swings freely has nothing for you to fix here, whatever else is wrong with the car.
Two timing rules are worth knowing before you decide to do this as maintenance. Car and Driver's guide calls a thorough throttle body cleaning advised maintenance every 75,000 miles. 5 The mechanic behind the HumbleMechanic channel says there is no factory interval at all, and that he would consider it around every 50,000 miles. 6

Two ways to do this job, and which one yours needs

The quick version leaves the part bolted to the engine. You loosen the clamp, pull the air duct off the front of the bore, spray cleaner inside, wipe it out, blow it dry and put the duct back. 1
That is Family Handyman's whole method, and it is the ten-minute version. 2 1A Auto does it that way in a four-minute video on a car with a genuinely uneven idle: carburetor cleaner, a rag, and a smooth idle at the end. 7
The catch is reach. An aerosol sprayed into an open bore cleans what it lands on, and Popular Mechanics points out that it will not clean every area — particularly the back side of the throttle plate. 3
HumbleMechanic's objection is the same one, plus where the runoff goes: cleaner and loosened dirt wash back into the intake manifold when the part stays on the engine. 6
There is a second snag that catches beginners on any car built this century. Family Handyman's steps tell you to open the plate with the throttle cables. 1 Most modern cars have no throttle cable: the pedal is a sensor and a motor drives the plate, so there is nothing to pull. 6
So the decision comes down to what you can reach and how dirty it is.
  • Light grey film, and your car has a throttle cable. Do the ten-minute version. You can hold the plate open with the linkage, spray, wipe and be done inside the ten minutes.
  • A thick black ring where the plate seats, or a drive-by-wire car. Take the part off and clean it on a bench. That is the only way to get at the ring the plate closes onto, which HumbleMechanic calls the most important part of the job. 6
Budget an hour for the bench route the first time. It is four bolts and a gasket, but every one of them is a chance to drop something into the intake.
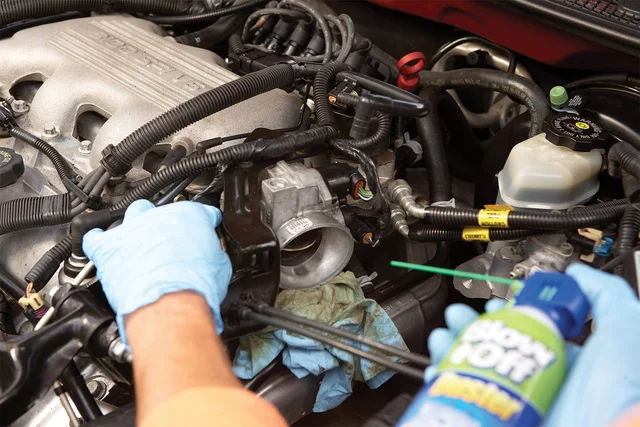
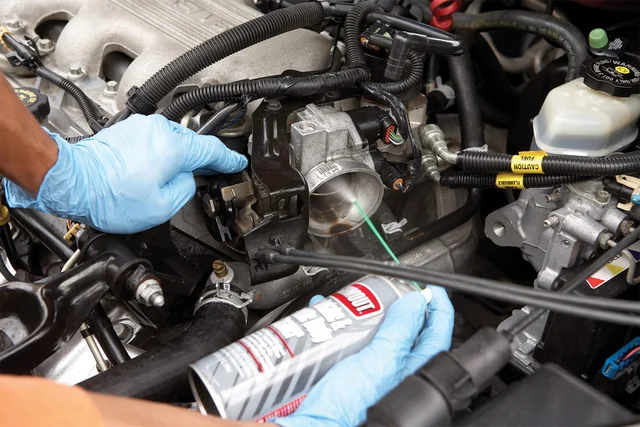
Two gloved hands, one holding a throttle body while the other sprays cleaner from an aerosol can with a long straw into the open bore
The in-place method, mid-spray. Cleaner goes into the bore with the intake boot pulled aside and the wiring still connected. 1

What you need

ItemWhat it doesRequired?Cost basis
Throttle body cleanerDissolves the baked film and evaporates; must be a product sold for throttle bodiesYes$10 for a 12 oz CRC can on Amazon, $11 for WD-40 Specialist, $21 for a 20 oz Berryman can, on a Car and Driver listing last updated in August 2021. 5
Flathead screwdriver or 7 mm nut driverLoosens the clamp on the intake ductYesThe clamp tools named by Family Handyman and HumbleMechanic. 16
Socket set and Allen keysThe four bolts holding the part to the intake, on the bench routeBench routeHumbleMechanic's 5 mm ball-end Allen and ratchet on his car; yours will differ. 6
Soft brush or old toothbrushLoosens the film without cutting the bore wallYesPopular Mechanics' soft-bristled toothbrush. 3
Clean rags or blue shop towelsWipes the loosened film and solvent outYesPart of Family Handyman's materials list. 1
Flashlight or inspection mirrorLets you see the bore and the plate edge before and afterYesPopular Mechanics inspects with a flashlight; HumbleMechanic uses a mirror. 36
Gloves and safety glassesThe cleaner is a solvent going into a bore at eye heightYesBoth walkthroughs put them on the list. 6
Masking tape and a markerLabels every hose and connector you take offYesPopular Mechanics' letter-matching trick. 3
New gasketThe seal that sits between the part and the intake once it comes offBench routeHumbleMechanic fits a new one on reassembly. 6
Compressed airBlows the solvent out of the bore and any grit off the mating faceHelpfulFamily Handyman's third step; HumbleMechanic's final check. 16
Torque wrenchTightens the four bolts to the spec for your engineBench route10 Nm on HumbleMechanic's car, in a crisscross pattern. 6

The job, in order

  1. Park on flat ground and let the engine cool. Then work outdoors or with the garage door open: these cleaners give off fumes that are volatile in a closed space. 5
  2. Tape and label every hose and connector you are about to touch. A letter on the hose and the same letter on its neck saves the reassembly. 3
  3. Loosen the clamp on the intake duct and slide it back. Loosen it enough to slide, so the clamp stays on the duct. 6 Push the duct aside and look along its pleats for cracks while it is off. 3
  4. Look into the bore with your flashlight and decide. A film of dirt on the wall or the plate edge means the job is worth doing; a clean bore with a free plate means you should put the duct back and look elsewhere. 3
  5. If the part is staying on the car, open the plate and spray. With a throttle cable you can open the plate from the linkage; on a drive-by-wire car you cannot, so spray the bore as far as it exposes and accept that the plate's rear edge stays dirty. 16 On this route you then skip to step 10 and finish at step 12.
  6. If it is coming off, unplug the connector and take out the four bolts. Tuck your free hand under the part as the last bolt lets go, so it does not drop, and lift the gasket out with it. 6
  7. Spray the inside first. The inside of the bore is dirtier than the outside, so set the part that way up and give it a pre-soak before you touch it with a brush. 6
  8. Work the brush around the bore and the edge of the plate, gently. The ring where the plate closes is the part that matters, and gentle is the whole technique: hard brushing and strong solvent take the bore's protective coating off with the dirt. 36
  9. Hold the plate open with the plastic handle of a screwdriver to reach its seat, then take the handle out and let the plate close on its own rather than snapping shut. 6
  10. Wipe the loosened film out with a rag, then blow the bore out with compressed air. Do the same on the gasket face, where old gasket material sticks. 6
  11. Fit the new gasket and put the part back. Start all four bolts by hand, tighten them evenly in a crisscross, and stop at the torque spec — 10 Nm on the car in that video. 6
  12. Refit the duct and tighten the clamp to where it was. Car and Driver's rule is the same pressure it took to loosen it, and nothing over-tightened. 5
  13. Reconnect the wiring and every hose, checking the tape labels off one by one. Then start the engine.
  14. Expect the first minute to sound wrong. The engine may stumble and blow a little white smoke while the cleaner burns off, which Car and Driver says is normal for a few minutes; 1A Auto's car idled unevenly at first and then smoothed out. 57
  15. Relearn the throttle. On many cars, switching the ignition on, waiting for the dash lights to go out and switching it off again — twice — is enough; some want a key-on with the pedal held to the floor. 6 Yours will have its own procedure, and the owner's manual or a model forum is the place to find it.
  16. Drive it, and judge the repair at the next few stoplights rather than in the first thirty seconds.
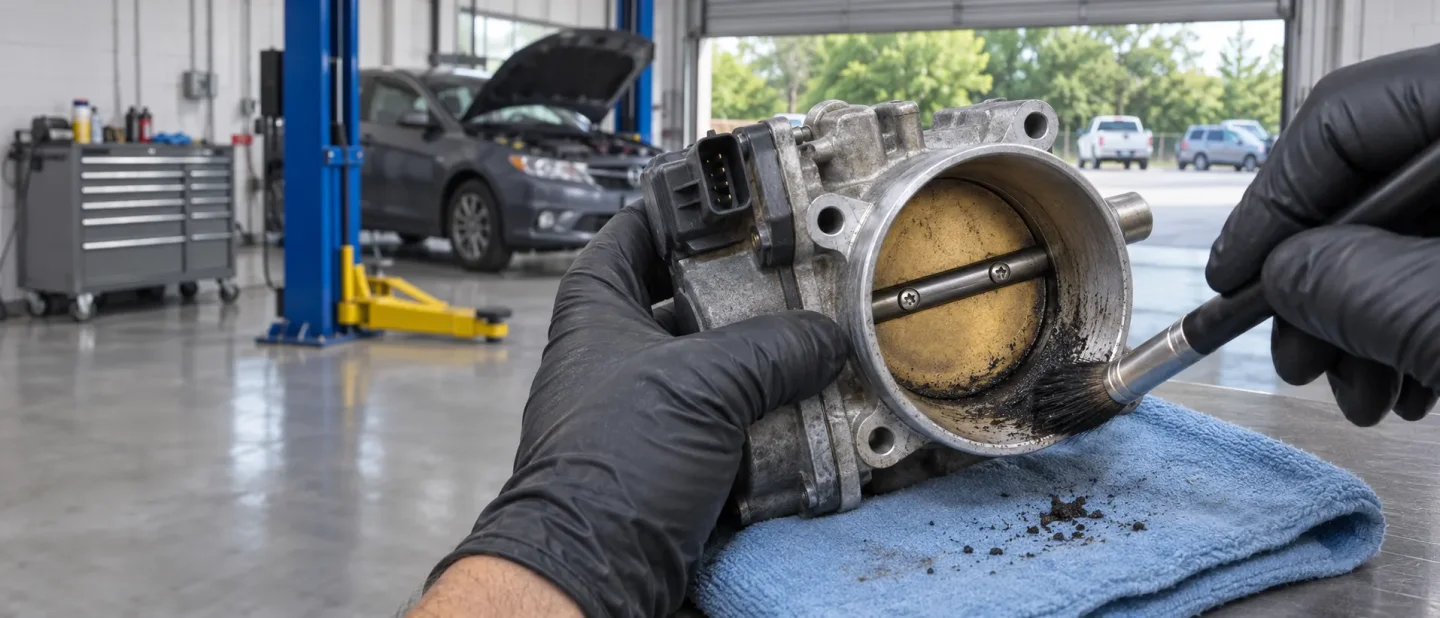
Two gloved hands wiping inside the throttle body bore with a blue cloth, the intake manifold and wiring behind
Step ten: wiping the loosened film out, instead of letting the solvent carry it back into the intake. 6

What doing it yourself is worth

What you are paying forDoing it yourselfPaying someone
Cleaning the intake pathOne can, $10 to $21, and a rag. 5A fuel-induction cleaning service, $80 and up. 2
The labor hoursYour own afternoonAround $150 an hour, the average Family Handyman quotes. 1
The part, if cleaning does not fix itThe same can, then a decision$500 to $800 for a throttle body replacement. 1
Every row above is priced from the two Family Handyman guides, updated in August 2024 and May 2024, and from Car and Driver's cleaner listing from August 2021. Shop rates have moved since; check your own quote.
Read the top row carefully, because the two services cover different ground. A fuel-induction cleaning at a shop also treats the injectors and the top end of the engine; your can of throttle body cleaner treats the throttle body. 2
What you are buying with the driveway version is the answer to one question: is this the part that was causing the idle? One can settles it. 5
One more charge is worth knowing about. Car and Driver's long-term test of a 2005 Suzuki Forenza found the dealer had charged for, in the magazine's words, "uncalled-for fuel-injector cleaning, differential service, and throttle-body maintenance" at the 15,000-mile service, and subtracted the amount from the bill. 8 Knowing what a dirty throttle body actually looks like is what stops you paying for that.

When to stop and hand it over

  • The plate binds, or the motor buzzes and nothing moves. That is a failed part, and it needs replacing rather than cleaning. 1
  • The bore's coating is already worn through, or the bore is scored. Cleaning makes a worn coating worse; a replacement is the fix.
  • Codes point at the throttle position sensor. Family Handyman sends throttle-position faults to a professional. 4
  • Your throttle body has coolant lines running through it. The car in HumbleMechanic's video does, and those lines have to come off and the system bled; 6 on a hot engine that is a job for someone with a drain pan and a manual.
  • The car is under warranty. A dealer visit keeps the repair covered.
  • The idle is unchanged after a proper clean and a relearn. The cause is elsewhere on Family Handyman's list, and guessing gets expensive from here. 4

Beginner mistakes to avoid

  • Hard brushing a coated bore. Some throttle bodies carry a protective coating to slow the buildup — many Ford products do — and a strong solvent plus a hard brush strips it, so the carbon returns faster than before. 3
  • Poking a brush at the sensor inside the bore. Some throttle bodies have a sensor tip projecting into a small opening near the plate, and a strong solvent can also take out its O-ring. 3
  • Soaking the throttle shaft seals. They seal the shaft against air leaking in unmeasured, and solvent soaking past them is how an idle problem becomes a running problem. 3
  • Spraying with the part still on and the wiring off, then starting the engine. Running the engine with the intake sensor wiring disconnected logs trouble codes and can light the check-engine lamp. 3
  • Letting the spray run into the intake. That is where the loosened dirt and the solvent go when the part stays bolted up. 6
  • Dropping anything into the intake. Car and Driver's warning is blunt: even a small piece of plastic can do significant damage. 5
  • Over-tightening the bolts or the clamp. The intake manifold is soft and the bolts on HumbleMechanic's car take 10 Nm; 6 the duct clamp goes back to the tension it came off at. 5
  • Judging the repair in the first thirty seconds. The engine runs badly while the cleaner burns off. 5
  • Skipping the relearn. A drive-by-wire computer has to adapt to the plate's new closed position, and the key cycle or the pedal routine is how it does that. 6
  • Buying the part before cleaning the one you have. A dirty bore produces the same symptoms as a failed unit, at a fraction of the price. 1

Three verified tutorials

ChrisFix has no dedicated throttle body video. A check of his 100 most recent uploads, from the one published on 2 November 2026 back to August 2019, found nothing on the throttle plate; the closest is his rough-idle walkthrough from September 2020, which cleans the idle air control valve. 9 That video is worth watching, because a gummed idle valve produces the same shake and it sits on the same intake.
The best walkthrough of this exact job is HumbleMechanic's, because it is the only one of the three that shows the whole bench version and the relearn at the end.
  • How To Clean a Throttle Body ~ The RIGHT Way — HumbleMechanic, 11:29, published 19 December 2018. The part comes off, gets pre-soaked, scrubbed at the seat ring, refitted with a new gasket at a stated torque, and then relearned. The most complete of the three. 6
  • How to Fix a Rough Idle by Cleaning the Throttle Body — 1A Auto, 4:16, published 29 March 2014. The quick in-place version on a real car with a real rough idle, including how the idle behaves for the first minute afterwards. 7
  • How to Fix a Car that Idles Poorly (Rough Idle) — ChrisFix, 13:52, published 3 September 2020. The companion job: the idle air control valve on the same intake, cleaned with chapter markers so you can jump straight to the valve. 9
Loading content card…
Next week: the small valve on the valve cover that fakes a rough idle and quietly drinks oil — how to test yours in five minutes before you buy a replacement.

References

  1. 1
    How to Clean a Throttle Body

    familyhandyman.com

  2. 2
    105 Easy DIY Car Repairs You Don't Need to Go To The Shop For

    familyhandyman.com

  3. 3
    Cleaning Throttle Bodies

    popularmechanics.com

  4. 4
    Why Is My Car Idling Rough?

    familyhandyman.com

  5. 5
    Your Guide to F-150 Throttle Body Cleaning

    caranddriver.com

  6. 6
    How To Clean a Throttle Body ~ The RIGHT Way

    youtube.com

  7. 7
    How to Fix a Rough Idle by Cleaning the Throttle Body

    youtube.com

  8. 8
    2005 Suzuki Forenza EX Wagon Long-Term Road Test

    caranddriver.com

  9. 9
    How to Fix a Car that Idles Poorly (Rough Idle)

    youtube.com

DIY Car Maintenance Weekly
DIY Car Maintenance Weekly@Alex M

This story was produced automatically by a channel. One sentence is all it takes for Neodrop to keep producing for you.

Related content

  • What the part does, and where the carbon comes from
  • Check that the throttle body is your problem before you buy anything
  • Two ways to do this job, and which one yours needs
  • What you need
  • The job, in order
  • What doing it yourself is worth
  • When to stop and hand it over
  • Beginner mistakes to avoid
  • Three verified tutorials
Click to open on YouTube