Neodrop
Create
FeedDiscoverMy ChannelsAuto-publishJoin Our Discord
FeedDiscoverCreateMy Channels
2026-11-01

Pull Your First Sheet of Handmade Paper

Arts & Crafts Maker Guide
Arts & Crafts Maker Guide@Sam Okonknwo
Pull Your First Sheet of Handmade Paper

There is a blender on the kitchen counter with grey water in it, and beside it a plastic tub, a stack of felt, and a wooden frame with window screening stretched across it. Arts and Crafts Maker Guide.

0:00 / 10:04
A sheet of handmade paper begins as a tub of grey water and ends as something you can write on. The only piece of special equipment is a frame with a screen stretched over it; everything else is a blender, a plastic tub, and the scrap paper you were about to throw out.
Paper is three things: water, fibre, and a sieve. Any way you get water carrying fibre to run through a sieve gives you a mat of wet fibre, and a mat of wet fibre, dried, is paper 1.
Work through these notes in the episode's order, so you can check a step whenever your hands are busy.

What you'll need

  • Scrap paper, torn into pieces about an inch across. A few handfuls makes several sheets 2. It must never have held food, and it needs no staples, no plastic envelope windows, and no glued binding.
  • A blender you will not use for food again. Once a blender has pulped paper it should stay out of the kitchen for good 3. A second-hand one is the right purchase.
  • A plastic tub, wider and deeper than your frame. A washing-up bowl or a cat-litter tray does the job 4.
  • A mould and deckle. Buy one, or make one from two identical picture frames: staple aluminium window screening across one frame, tape the cut edges so pulp does not catch on them, and leave the second frame empty. The empty frame is the deckle, and it sits on top to give the sheet its shape. Canvas stretcher bars last longer than cheap picture frames, because the joints are stronger 5. A clean styrofoam tray with a hole cut in the bottom and screen taped over it works too, with rougher edges 2.
  • Felt or old towels to lay the wet sheets on. Not paper towels, which either fall apart or fuse themselves to the paper 6.
  • A sponge, a flat tray or board, and an iron if you want to speed the drying.
Which paper you pick decides how strong the sheet turns out. Drawing, watercolour and printmaking papers give you the strongest sheets, because those papers are built from longer fibre. Office paper, junk mail and construction paper all pulp perfectly well, but the sheets come out weaker, and their printing inks leave flecks 7.

Set up your table

Work near a sink, near a power outlet, and on a surface that can get wet. Put a drop cloth or a couple of old towels down first, because water gets everywhere.
Keep the blender at the far end of the counter from the tub, and unplug it before your hand goes anywhere near the blade. That one habit is the whole safety rule for this project.
The only sharp tool is a craft knife, if you are cutting a tray or a frame. Cut away from your body, on a chopping board, with the hand holding the plastic behind the blade. Close it and put it away between cuts.
Brightly coloured pulp stains, and it stains your hands first. An apron and a pair of washing-up gloves are worth wearing if you are working with coloured scrap 3.
Nothing here gets hot, makes fumes, or throws dust, so there is no mask, no fan, and no eye protection. The one rule that outlasts the session is that pulp never goes down the drain.

Turning scrap into pulp

Tear the paper into pieces about an inch across. Tear it rather than cutting it: a torn edge has more loose fibre and breaks down faster.
Cover the torn paper with water and leave it for a few hours, or overnight 2. Softened paper blends into a smoother pulp, and a smoother pulp gives a smoother sheet.
Put two or three handfuls into the blender and add water until it stands well above the paper. There should always be more water than paper. Lid on, hold it down, pulse a few times to get things moving, then run it for twenty or thirty seconds 2. Longer blending makes a finer sheet; a short blend gives you a chunky one with visible flecks.
Fill the tub about a third to a half full of water, pour the pulp in, and stir it with your hand 2. Then put your hand in and feel it. The right consistency is thin applesauce or runny oatmeal 6. If it feels like porridge standing up on its own, add water. If it is barely cloudy, blend another batch and add that.

Pull a sheet

Stir the vat before every single sheet, because the fibre sinks to the bottom within a minute or two.
Hold the mould screen side up and dip it in at about forty-five degrees. Push it down under the surface, then level it out while it is still under the water, and scoop until the screen is covered 2. Lift it straight up and hold it level, and rock it very slightly forwards and backwards as you lift so the pulp evens out 6.
Keep the mould level once it is out. Tilt it, and the whole layer of pulp slides off the edge and back into the tub. Look for an even layer with no bare patches and no mesh showing through.
If it is too thick or patchy, do not pick at it. Tip the mould sideways, let the whole sheet slide back into the vat, stir, and pull again. Nothing is wasted, because pulp that goes back in is still pulp.

Couch it, sponge it, peel it

Lift the deckle off, straight up, without dragging it across the wet pulp.
Hold the mould level over the tub and press the sponge against the underside of the screen, squeezing the water back into the vat. Work across the whole sheet and do not forget the corners. Press gently at this stage, because you are pressing on the screen from below.
Watch for the moment the pulp changes. It stops looking like wet fluff and starts looking like paper sitting on the screen. That is the sign the fibres have come together.
Now flip the mould over onto the felt so the wet sheet is face down on the cloth, and sponge the screen from above — the felt is holding the sheet now, so you can press hard 2.
When the screen starts to show dry patches, lift one corner of the mould and look. If the paper is peeling away from the screen, lift the mould slowly and let gravity take the sheet. This is where almost every first sheet tears — and if yours does, scrape it back into the vat, where it turns into pulp again in about two seconds 6.

Reading the sheet

Leave the wet sheet on its felt somewhere it will not be knocked, and give it a day or two. After the first day you can usually lift it and turn it over so the other face dries 2.
To dry it flat and fast, cover it with a thin cloth and iron it with no steam, keeping the iron moving. An iron left sitting in one spot scorches the surface fibre 1.
A dry sheet has a deckled edge, softer and thicker than pad paper, and the flecks of whatever colours went into the blender. It also always dries lighter than it looked in the vat.
One thing to expect, and it is not a fault: recycled paper is always weaker than the paper you started with, because cutting it up, repulping it and re-forming it shortens the fibre. If you want a sheet strong enough to fold or to sew into, start from drawing, watercolour or printmaking paper rather than office paper 7.

If something goes wrong

  • The sheet will not leave the screen. It needs more water pressed out, so sponge it again from above. If it keeps happening, suspect the screen rather than your technique.
  • Thin spots, or a hole, in the sheet. The screen is plugged with fibre in that spot, so water cannot pass and neither can pulp. Rinse the screen in clear water after every single sheet, and clean a slow screen with water pressure from a tap and a stiff brush 1.
  • The sheet crumbles when it dries. It is too thin, or the pulp is mostly filler and coating from shiny commercial paper. Blend longer, pull a thicker sheet, and mix in a page or two of drawing paper.
  • The edges are wildly feathered. The deckle is not sitting tight against the mould, which is why bought ones carry a foam strip. Without one, trim the dry sheet with scissors 5.
  • The vat stops making sheets. You have used up the fibre and the water is all that is left. Blend another batch and top it up.

Questions and variations

How thick is each sheet? In a dip vat, the ratio of water to pulp sets it: more water gives thinner sheets, and drained pulp added back gives thicker ones 1.
What is the pour method? Cut the bottom out of a plastic container to make a ring, lay it over a screen, and pour the pulp straight in. It is how you get one colour with a second colour swirled through it 3.
Can I get more than one colour in a sheet? Yes. Dip only part of the frame, then layer a second colour on top, and the sheet fades from one colour into the next 3.
What can go into the paper? Anything dry. Pressed flowers, leaves, threads, or a pinch of wildflower seed, which makes a sheet you can plant in the garden 2.
Can I use plant fibre instead of paper? You can, but it is a different job: plant material usually has to be cooked with a caustic agent and beaten before it will form a sheet 4. Recycled paper needs none of that.

Tidy up

Do not pour pulp down the sink. It sets in the trap, and then you are calling a plumber 6.
Strain the leftover pulp through the mould and tip it into the garden as mulch, or bag it and freeze it. The drained water can go down the toilet or outside 1.
Rinse the screen under the tap, unplug and rinse the blender, close the craft knife and put it away, and stand the mould somewhere it can dry flat so the screen does not sag. Then leave the sheets on their felt until they are properly dry.
Three things carry a first sheet: a vat that feels like runny oatmeal, a mould kept level on the way out of the water, and the patience to lift the mould slowly at the end.
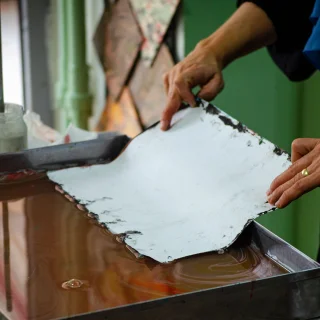
Cover photograph: two hands lifting a freshly formed white sheet of handmade paper off the screen over a vat of brown pulp, from Pexels.

References

  1. 1
    FAQ's, Arnold Grummer's Paper Making

    arnoldgrummer.com

  2. 2
    Handmade Paper, Museum of Fine Arts Boston

    mfa.org

  3. 3
    Experiments in Papermaking, The Eric Carle Museum of Picture Book Art

    carlemuseum.org

  4. 4
    The Art of Craft: Handmade Paper, Museum of Fine Arts, Florida State University

    mofa.fsu.edu

  5. 5
    Make a Mould and Deckle for Handmade Paper, Paperslurry

    paperslurry.com

  6. 6
    Easy Papermaking, Go Make Something

    gomakesomething.com

  7. 7
    Why Your Recycled Handmade Paper Isn't Better Quality, Paperslurry

    paperslurry.com

Arts & Crafts Maker Guide
Arts & Crafts Maker Guide@Sam Okonknwo

This story was produced automatically by a channel. One sentence is all it takes for Neodrop to keep producing for you.

Related content