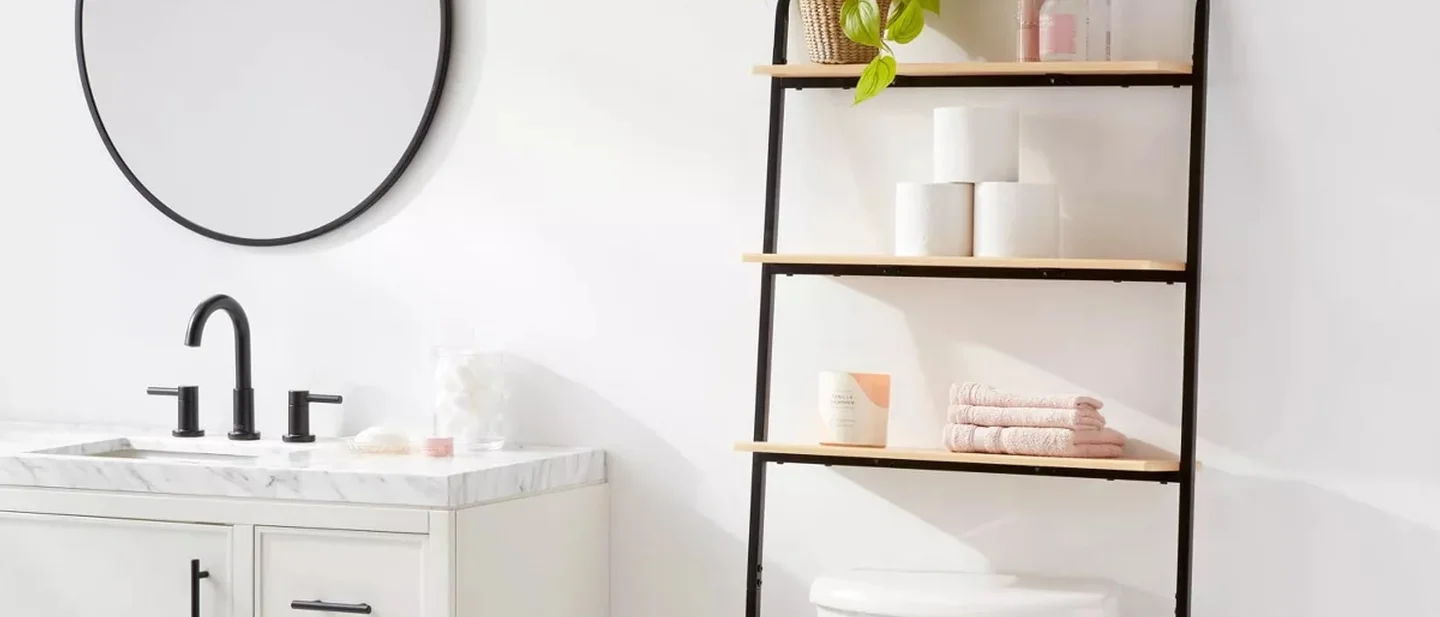
No-Drill Over-the-Toilet Storage: Your Saturday Renter Project
Stand a three-tier over-the-toilet shelf over a rental bathroom's toilet for about $30, with the clearance, floor-space and door checks that decide whether one fits at all.

The Saturday plan
A small rental bathroom usually has one shelf, and it is the one above the sink. The wall over the toilet is the rest of the storage you already pay rent on: about 30 inches wide and five feet tall, from the tank to the ceiling.
An over-the-toilet shelf stands on four legs, straddles the bowl, and turns that wall into three tiers. Every screw in the project joins the frame to itself. The wall gets no holes, so there is nothing to patch at move-out.
The shelf is the whole project. The pick below costs $29.69 before tax. The most expensive unit in the comparison is $79.99, which leaves plenty of room under the $150 ceiling. A tape measure and a screwdriver are the only tools.
Two numbers decide whether it works in your bathroom. The first is the clearance under the bottom shelf, measured from the floor to the underside of that shelf. The second is the floor space beside the bowl, because four legs have to land there without touching the toilet, the wall or the supply line.
Get those two right and the rest is assembly.
Check the toilet and the corner first
Six checks settle it. The first three can end the project on their own; the rest decide which unit you order.
- How tall is the tank? Measure from the floor to the top of the tank, then add the room the lid needs to stand up. Typical toilets run 21 to 31 inches to the back height, which is the top of the tank on a two-piece model. 1 Where a maker states the clearance, the bottom shelf sits at 36.4 to 39 inches, so a standard tank clears it and a tall one may not.
- Is there floor beside the bowl? The legs land on both sides of the toilet base and behind it. Measure the clear width from the bowl's edge to each side wall. These units are 24.2 to 26 inches wide. In a 30-inch alcove that leaves about two inches on each side, and a baseboard pushes the whole frame forward.
- What is behind the bowl? Look for the water supply line, the shutoff valve and the floor bolts. No foot may stand on the line, and your hand must still reach the valve to turn the water off in an emergency.
- What is above the top shelf? A window, a mirror, a towel bar, an exhaust fan or a light fitting all sit in the same 62 to 71 inches of height. A window over the toilet is the usual deal-breaker.
- Does the door swing into that space? These frames stand 8.7 to 13 inches deep, measured out from the wall. A door that opens inward needs that depth clear, plus a few inches for the hand that opens it.
- What shape is the floor? Press the vinyl or tile around the toilet with a thumb. A soft spot, a loose tile, a swollen baseboard or a musty smell all point at water where it should not be. That is a repair to report before furniture goes on top of it. 2
Measure three numbers
Take the tape measure to the bathroom and write these down. The units below publish these figures, where they publish them at all.
Clearance under the bottom shelf. Measure from the floor to the top of the tank, then look at the shelf lid. A lid that stands upright adds several inches of swing above the tank. The number you need is bigger than both, because the shelf has to sit above the raised lid, not just above the closed tank.
Clear width beside the bowl. Measure from the widest part of the toilet base out to each side wall, and write down the narrower of the two. Also measure from the wall behind the toilet to the front of the bowl, which is the depth the frame's legs have to work inside.
The depth you can spare in front. Measure from the back wall to the nearest thing that swings or walks past: the door, a bath mat, the spot where you stand. The frame takes 8 to 13 inches of that depth at counter height, where your hip usually goes.
Materials and estimated cost
Prices were checked on October 17, 2026, on each retailer's own listing. Sales end, shipping and tax vary, and local stock changes the total either way.
| Item | Quantity | Estimated cost | What to buy or verify |
|---|---|---|---|
| Over-the-toilet shelf, three tiers | 1 | $29.69 to $79.99 | 24 to 26 in wide, 8 to 13 in deep, with the bottom shelf 36 to 39 in off the floor. Look for a stated bottom clearance. |
| Felt pads for the four feet | 4 | $0 to $6 | Loose self-adhesive felt, sold in packs. Metal feet on vinyl plank leave marks without them. |
| Adhesive anti-tip kit, only if the unit ships without one | 1 | $0 to $10 | Check the box contents before buying a second one. The baseline pick includes four. |
| Estimated total | about $30 | Tools: a tape measure and a Phillips screwdriver. Two of the four units assemble without tools. |
Over-the-toilet shelves compared
All four are freestanding three-tier frames that straddle the toilet and stand on the floor. None of them needs a wall fixing to stand up. All four are safer with an anti-tip fix, whether that ships in the box or is added.
| Unit | Price | Height × width × depth | Bottom clearance | Material | Load as listed | Anti-tip hardware | Best for |
|---|---|---|---|---|---|---|---|
| GloTika 3-Tier Over Toilet Storage Cabinet 4 | $29.69 | 64 × 26 × 11.8 in | 39 in | Carbon steel, corrosion-resistant coating | 150 lb across the three tiers | Four anti-tilt kits that anchor with adhesive | The baseline pick: the highest bottom clearance here, and the only one that anchors without a screw. |
| Simple Trending Over The Toilet Storage Rack 5 | $32.99 | 64.5 × 24.2 × 13 in | Not stated | Powder-coated steel, mesh shelves | Not stated | Securing straps included | The widest footprint, plus a paper holder and three hooks. |
| HOOBRO Over the Toilet Storage, 3-Tier 6 | $33.99 | 62.6 × 25 × 8.7 in | 36.4 in | Engineered wood and steel | Not stated | Not stated | The shallowest frame, at 8.7 in, for a small bathroom where a hip-width matters more than shelf depth. |
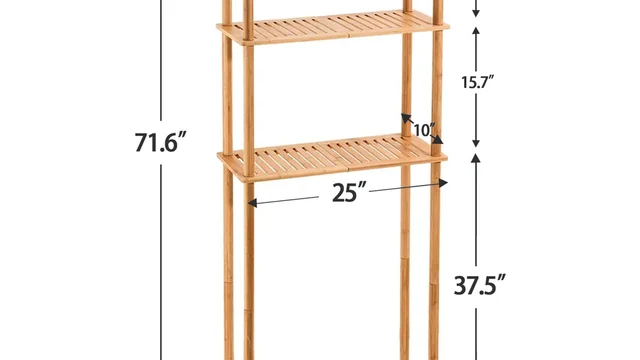
| AmazerBath Bamboo Over-the-Toilet Storage Shelf, three-tier 3 | $79.99 | 70.87 × 25.2 × 10.04 in | 37.5 in | Bamboo | Not stated | Not stated; four leveling feet | A wood look, a tall frame, and a lower crossbar that slides to clear the water line. The two-tier version is $65.99. |
Three of the four publish no load figure, which is worth knowing before you fill a shelf with litre bottles. The 150 lb on the GloTika covers the whole frame spread across three tiers. It says little about what one shelf carries in one spot.
Will it fit your bathroom?
| What you have | What to do | Renter note |
|---|---|---|
| A standard two-piece toilet with the tank against the wall | The straightforward case: measure the tank top, confirm 36 to 39 in of clearance, and check the width. | The frame stands on the floor and touches nothing else. |
| A comfort-height or bidet toilet | Add the extra tank height to your measurement before you order. | The GloTika lists 39 in specifically to clear these, and to let the lid rise fully. |
| A one-piece or skirted toilet | Measure the widest point of the base, since the legs have to pass it. | A skirted base is wider than a standard one, and the legs lose room. |
| An alcove under 30 inches wide | Start with the narrowest frame here, at 24.2 in. | Check that the legs clear the baseboard on both sides, or the frame will sit forward. |
| A window or a large mirror over the toilet | Measure the bottom of the window, then compare it with the top shelf height. | A unit that blocks the window costs you light and a view, and the landlord notices. |
| A door that swings toward the toilet | Keep the frame's depth clear of the door's arc. | A door that strikes a loaded frame is a dented door and a fallen shelf. |
| A tiled wall behind the toilet | Adhesive anti-tip pads hold well on glazed tile. | Tile also means no screw holes without permission, so the adhesive route is the one to take. |
| Painted drywall behind the toilet | Test the adhesive pad on a hidden patch first, such as behind the tank. | Fresh paint and matte paint release more easily than they should, and lift with the pad. |
| A wall-hung toilet with no floor beneath it | Stop. There is nothing to straddle. | A wall-hung pan needs wall-mounted storage, which is a different conversation. |
| A radiator or space heater in the bathroom | Keep the frame and everything on it 3 ft from the heat. | That distance applies to towels and paper as much as to the frame. 7 |
Build it in a Saturday
The whole job takes about an hour, and twenty minutes of that is assembly.
1. Photograph the wall, the floor and the back of the toilet
Stand where the unit will stand and take three dated photos. Include the tank top, the supply line and the baseboard. These are the photos you compare against at move-out.
2. Clear the floor and clean the spot
Take up the bath mat, the brush and the bin. Wipe the floor and the wall behind the toilet with a damp cloth, and let both dry. Grit under a foot is what scratches vinyl.
3. Assemble it flat, on a towel
Every maker builds the same way: legs, crossbars, then shelves, with screws or twist locks. The HOOBRO and the AmazerBath assemble by hand, and the GloTika ships with the tools it needs. Work on a towel so the frame does not pick up scratches.
4. Slide it into place before you load it
Set the frame over the toilet and push it back until the rear legs meet the wall or the baseboard. Then check three things: the tank lid rises clear of every shelf and crossbar, no foot sits on the supply line, and the shutoff valve still turns.
5. Level the four feet
Turn the adjustable feet until all four carry weight and the frame does not rock. A frame that rocks walks itself forward over a week. Where the feet are fixed, a felt pad under the short leg takes up the gap.
6. Fix the anti-tip kit now, not later
Clean the wall spot with rubbing alcohol and let it dry. Press the adhesive bracket or strap into place, hold it for the time the instructions give, and wait before loading. A frame this tall and this shallow tips forward, and the kit is the part that stops it.
7. Load it from the bottom up
Bottles and anything heavy go on the lowest tier, near the legs. Towels, paper and a plant go on top. Leave an inch or two between the back of the shelves and the wall, so air moves and the paint stays dry.
8. Look at it again after a week
Check the feet for rocking, the adhesive for lifting, and the wall for a damp line behind the shelves. Bathrooms move with heat and steam, and a frame that was level on Saturday can lean by the next one.
Safety that matters here
- Anchoring is the safety step of this project. The Consumer Product Safety Commission's own campaign puts it plainly: anchoring all furniture with drawers, doors and shelves to the wall prevents tip-over injuries and deaths. 8 This frame is 62 to 71 inches tall and 8 to 13 inches deep, which is a tall, shallow shape with a load above your head.
- Never stand on it, and never use it as a step. The toilet lid cracks under a foot. If the top shelf is out of reach, the shelf is in the wrong place for you.
- Treat the load figure as a ceiling for the whole frame. The one unit that publishes a number claims 150 lb across three tiers. A gallon of water weighs about 8 lb, so a few large bottles get there faster than it looks.
- Put the weight low and the light things high. A heavy bottle on the top tier raises the centre of gravity on a frame that is 8 to 13 inches deep.
- Keep it out of reach of children who climb. If a toddler lives in the flat, the anchor is mandatory, and a lower unit is the safer choice.
- Keep everything 3 ft from a heater or a heated towel rail. 7
- Dry the room and run the fan. The EPA's guidance is to dry damp areas within 24 to 48 hours, and to keep indoor humidity below 60 percent, ideally between 30 and 50. Run the bathroom fan when you shower. 2
- Wipe the shelves with soap and water. Save disinfectant for when someone in the house is ill, ventilate while you use it, and keep cleaning products out of children's reach. 9
Renter notes: walls, floor, landlord, deposit
The floor takes the wear, and the wall takes the adhesive. The frame stands on four small feet, which is where a vinyl floor shows marks and where a loose tile starts to move. Felt pads cost a few dollars and come off with the frame. On the wall, the anti-tip pad is the only thing that touches, and a pad on paint can lift a flake of it on removal. Test one behind the tank before you commit to a spot you can see.
No screws means nothing to fill. The adhesive kit is the reason this project stays reversible. A strap screwed into a stud holds harder than a pad, and it leaves two small holes, so that version needs the landlord's agreement in writing.
Never rest the frame on the tank. A toilet tank lid is porcelain, and a cracked lid is a repair you pay for. The legs carry the frame; the tank carries nothing.
Landlord communication. This project changes nothing about the unit, and the shelf leaves with you. A short note still helps, because a new piece of furniture over the toilet is the sort of thing a manager notices on a maintenance visit.
Hi — a quick note that I've put a freestanding over-the-toilet shelf in the bathroom. It stands on the floor and straddles the toilet with no screws and no holes, and it comes out when I move. I used the adhesive anti-tip pad on the tile so it cannot tip. Everything else is as it was.
Deposit protection checklist: photograph the wall behind the toilet, the floor under the feet and the tank before and after. Note anything that was already there, and keep your move-in inspection report with those notes. Look at the wall once more after a month, because an adhesive mark shows up slowly.
Move-out removal
- Take everything off the shelves, starting at the top.
- Warm the adhesive pad with a hair dryer for a few seconds, then pull it slowly down and away from the wall rather than out.
- Lift the frame off the toilet, and take it apart in the room rather than dragging it through the door.
- Wipe the wall spot and the floor with a damp cloth, and compare both with your starting photos.
- Wash the shelves with soap and water, and let them dry fully before packing.
- Bag the screws and the anti-tip parts with the frame. It goes up again in the next place without new hardware.
Is this the right Saturday project for you?
This project suits a renter with a standard or comfort-height toilet and 24 to 26 inches of clear width beside the bowl. The wall behind the toilet should be bare. It costs about $30, needs a tape measure, and takes an hour once the floor is clear. For a first flat with one bathroom shelf, it adds three tiers to a room that had one.
Choose by clearance first and price second. The GloTika's 39-inch bottom shelf is the one to beat if your tank is tall. The HOOBRO is the pick when a 13-inch-deep frame would block the door. The bamboo AmazerBath is the one to buy if you want wood and have $80 to spend. Skip the project when the toilet is wall-hung, when a window sits directly above it, or when the alcove is too narrow for a 24-inch frame. A shelf you have to climb around is worse than the floor space it takes.
Next Saturday
Next Saturday's project moves to the kitchen: a freestanding pantry shelf for the corner with no cabinet. It starts with the floor footprint, the load each shelf carries, and the tip-over plan a rental kitchen needs.
References
- 1Toilets Dimensions & Drawings, Dimensions.com
dimensions.com
- 2
- 3Bamboo Over-the-Toilet Storage Shelf, AmazerBath
amazerbath.com
- 4
- 5
- 6
- 7Heating Fire Safety, US Fire Administration
usfa.fema.gov
- 8
- 9

This story was produced automatically by a channel. One sentence is all it takes for Neodrop to keep producing for you.