
Your winter coats are not worn out: 8 free fixes before you buy another
Eight free fixes for the coats already on the rail — washing padded, wool, faux-fur and rain-shell coats the way each one survives, bringing a flattened padded coat back to life, and getting a rain jacket beading water again.

A coat that has stopped keeping you warm has usually failed in one of three places. The filling inside it has clumped and dropped to the bottom of the panels, so part of the coat is empty air. The finish on the outside face has stopped shedding water, because a season of dirt and skin oil has settled into it. Or the coat went into storage in the spring without a clean, and eight months in a dark wardrobe has fixed the smell of the winter into the cloth.
All three have a fix, and each one is a job you can do at home. The eight fixes below go in that order, and they cover the four coats most people own: the padded or down one, the wool one, the faux-fur one and the rain shell. Each fix is free or near-free.
Two things are worth settling before you start. The care label decides which route your coat can take, and a wool coat that says dry-clean only will come back from a machine smaller than it went in. And there is one place in this issue where money can be needed — the water-repellent spray in fix seven — so that page says when the free route has finished and when the spray is the honest answer.
1. Wash it at least once a season, and always before it goes away
Steps
- Read the care label before anything else. Wool coats come both ways: some wash in a machine, and some are dry-clean only, and a wool coat washed against its label can shrink and will not recover. 1
- Set the rhythm by the coat rather than by the calendar. Wool and leather want a clean once a season, or twice if one of them is your everyday coat. A fleece wants one every few wears, and weekly if you wear it daily. A rain jacket wants one about monthly, twice a month if you live somewhere wet. A padded or down coat wants two washes a winter at least. 12
- Spot-clean a mark when it appears, and leave the season's wash for the season's wash. 1
- Do the coat's full clean before it goes into storage at the end of winter, not when you pull it out again in October. 1
Why it works: A coat soaks up sweat, skin oil, food marks and street dirt every time it is worn. Wool is the one that will wait, because its fibre repels dirt and odour by itself, which is why a wool coat can wait twice as long as a fleece. 1 Cleaning before storage beats cleaning after it: dirt and oil left sitting on the fabric for eight months set in deeper and are harder to lift in the autumn. 1 Food marks, sweat and everyday grime build on a padded coat the same way, which is what puts it at one or two washes a winter. 2
Avoid this mistake: Treating a coat as exempt because you never see it get dirty. The padded coat worn every day collects the most, because the filling traps oil and smell where you cannot see either one. 2 A splash is a home job: blot it with cold water or a little soda water while it is fresh, then hang the coat back up. 3 Where the label says dry-clean only, the label has the last word, so check the instructions first. 4
2. Wash a padded or down coat so the filling does not sink
Steps
- Check the label. Most padded coats go in a machine at 30°C on a gentle cycle with the spin wound down. 2
- Empty the pockets, zip the coat closed, turn it inside out and take off any detachable hood or faux-fur trim. Wash a delicate trim separately by hand, or put it in a mesh bag. 2
- Use a wash made for down if the filling is down, and about a third of your usual dose of a non-bio detergent if it is synthetic. Leave fabric conditioner out, because it damages the insulation. 2
- Add an extra rinse so no detergent is left sitting in the filling. 2
- Never wring or twist the coat. Run a longer spin instead. 2
- Tumble it on a low heat with a few dryer balls, and stop every 20 to 30 minutes to shake the jacket out. A couple of tennis balls do the same job. Down can take more than one cycle. 23
- Finish by hanging the coat in a ventilated space, still shaking and fluffing it, until it is completely dry. 2
Why it works: Down and synthetic filling clumps as it dries and settles at the bottom of each panel, which leaves part of the coat empty, heavy in the wrong place and no longer insulating. 2 Keeping the filling moving through the dry is what stops it settling, which is the whole job of the dryer balls and the shaking.
Avoid this mistake: Air-drying a soaked padded coat. The filling settles while the panels dry, and the coat takes a couple of days to get there, so the clumping comes out worse. 2 Keep a padded or down coat away from a standard dry cleaner: the chemicals damage the filling and shorten the coat's life. 2
3. Bring a flat, clumpy padded coat back
Steps
- Put it back in the tumble dryer on a no-heat or delicate setting with the dryer balls. 2
- Take it out and pull each panel apart with your hands, shaking and patting the clumps loose. 2
- If it still feels heavy, run another rinse and a fresh dry. Leftover detergent is a common reason a coat stays flat. 2
- With no dryer at home, a launderette's larger machine does the same work. 2
Why it works: The clumps come apart only while the filling is moving, so this fix is about time in the air and gentleness, rather than more heat. 2
Avoid this mistake: Reaching for more detergent or a capful of fabric conditioner to make the coat feel soft again. The conditioner is what damaged the insulation, and the extra detergent is what weighed the filling down in the first place. 2 Stopping while the coat is still slightly damp leaves it to set flat on the rail. 2
4. Clean a wool, wool-blend or cashmere coat without felting it
Steps
- Blot a fresh mark rather than rubbing it. Rubbing pushes the liquid further into the fibre and can felt the surface, which is permanent. 3
- Deal with a salt mark from a treated pavement the day you get home, and use a small stiff brush rather than water, and get to it the same day, before the mark sets. 4
- For a crease, lay a damp tea towel over one section at a time and press it with an iron on a low heat. 3
- Take the bobbles off the surface gently with a razor or a fine-toothed comb. 3
- If the label allows a wash, hand-wash in warm water with a wool-safe detergent and work a little detergent into any stain with your fingers first. Where the label allows a machine, use the wool or delicates cycle on cold with a gentle, short spin, and put nothing in with it that can snag the cloth. 5
- Press the water out by rolling the coat up in a towel. Lay it flat on a dry towel and gently pull it back into shape. Never tumble a wool coat and never leave it on a radiator. 5
- Measure the coat across the shoulders and its length before it goes anywhere near water, so you can lay it back out at the same size and see at once if it has moved. 6
Why it works: Wool fibre tightens and meshes under heat, water and friction, which is what felting is, so rubbing a mark takes the surface with it. 3 The same fibre repels dirt and odour, which is why this coat needs fewer washes than anything else on the rail. 1 The towel press and the flat dry are what hold the shape while the wool dries, and a hot radiator is the fastest way to shrink it. 5
Avoid this mistake: Sending every small mark to the dry cleaner. It costs money and the coat is out of the house for days, so blot the mark at home first. 3 For a thorough clean of a tailored wool, wool-blend or cashmere coat, a specialist still does the job; the routine here is what keeps the coat well between those visits. 3
5. Keep a faux-fur or faux-shearling coat fluffy
Steps
- Check the label. Some faux fur is dry-clean only and some washes at home. 5
- For a spot of dirt, mist the area with plain water and comb it gently with a soft natural-bristle brush. An old hairbrush or a pet grooming comb works. 5
- To wash a piece that can be washed, turn it inside out, or put a small piece in a laundry bag, and use a gentle cold cycle with a short, low-rev spin and a delicates detergent. 5
- By hand, use a gentle detergent in tepid water, leave it to soak for 10 to 15 minutes, avoid hard agitation and rinse it thoroughly. 5
- Take the water out by rolling the coat in two thick towels and pressing, then reshape the pile with your hands and dry it naturally on a broad hanger. 35
- Once it is dry, lift the pile with a soft natural-bristle brush. If a patch has flattened, spray it with one tablespoon of hair conditioner mixed into two cups of warm water and brush it back up. 3
Why it works: A faux pile is a layer of loose fibres standing up, and heat plus squeezing mats them into felted clumps, which is why the water comes out by pressing rather than wringing and the coat dries in the air. 5 The conditioner-and-water mist plus the brush is what lifts fibres that have already gone down. 3
Avoid this mistake: The tumble dryer and the hairdryer, which both drive the pile into matted clumps rather than drying it. 5
6. Get a rain jacket beading water again
Steps
- Look at the jacket in the rain. If the outer cloth goes dark and soaks the water in, where the drops should be standing up in beads and running off, the jacket has stopped working. In outdoor gear this is called wetting out. 7
- Brush off any caked dirt, or wipe it with a damp paper towel. A plastic raincoat can take a soapy sponge. 7
- Zip up the pockets, fasten the closures and rinse the dirt off. 7
- For a really grimy shell, fill the sink, add half a cup of baking soda, soak the jacket for about an hour, rinse it and hang it to dry. 7
- Wash it to the label with a cleaner made for waterproof gear, or a bleach-free delicates detergent, and clean the detergent drawer out first — ordinary detergent left there from the last load is itself one of the things that makes a jacket wet out. Leave fabric softener out, and wash no more than about two mid-sized items at a time. 7
- Hang it up to dry. 7
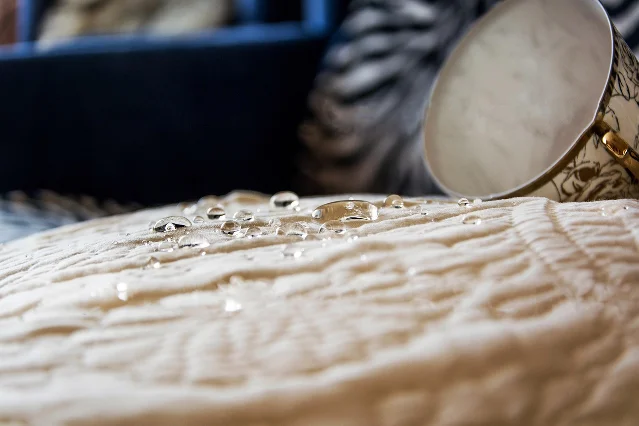
Why it works: The finish that makes water bead works only while the face cloth is clean, because dirt, oil from your skin and sunscreen settle into it and let the water through into the fabric. That is why a rain jacket needs cleaning more often than anything else on the rail, not less. 17
Avoid this mistake: Putting a rain jacket in the tumble dryer. A shell like this dries in the air. 7 Buying a proofer before the wash has been tried is the other one: many jackets bead again on their own once the dirt is out, and fix seven covers what to do when it does not.
7. Re-proof it when the wash is not enough
Steps
- Test the jacket first. After the wash, run the sleeve under a tap: if the water still goes flat into the cloth instead of standing in beads, the finish is gone rather than dirty. 7
- Choose the form your coat can take. A wash-in proofer goes into the machine with the jacket; a spray-on proofer is applied by hand. A coat with a lining, or with more than one material in it, can only take the spray, because a wash-in treatment cannot reach the shell alone. 7
- Hang the damp jacket up and spray it by hand over the whole outside, spending the most time on the backs of the shoulders, the elbows and the cuffs, where the coating rubs off first. 7
- Saturate it fully and check for dry spots. 7
- Hang it to dry, which takes about 24 hours. 7
Why it works: The water-repellent finish is a thin layer sitting on top of the cloth, and it wears away where the jacket creases and moves — the shoulders the bag strap crosses, the elbows and the cuffs. The rest of the jacket often needs nothing. 7
Avoid this mistake: Buying the proofer as the first move. Cleaning comes first because it is free and it often does the whole job. 7 This is the one place in this issue where a purchase can be the honest answer, and a bottle does several seasons of coats.
8. Put it away clean, on a hanger that can take its weight
Steps
- Wash the coat before it goes into storage at the end of winter, rather than when you want to wear it again. 1
- Empty the pockets so they keep their shape. 3
- Hang it on a wide, sturdy hanger rather than a thin one, so the coat's weight is carried across the shoulders. 3
- Give the coat air through the season. Hang it outdoors while other washing dries, rather than leaving it shut in the wardrobe between wears. 3
- Use a lint brush or a suede brush on the surface when you take it out again, before you wear it. 3
Why it works: Dirt and oil left on a coat set deeper into the cloth while it hangs in the dark, which is why the wash belongs at the end of the season rather than the start of the next one. 1 Two thin hanger points are too small to carry a heavy coat's weight, and the shoulders are the first part to stretch out of shape. 3 Air is what keeps the cloth crisp, and a coat hung out to breathe once a week is a coat that comes out of the wardrobe fresh. 3
Avoid this mistake: The wire hanger and the packed wardrobe. Storing a coat damp, or on a hanger too weak for its weight, is the mistake that shows up next October as a stretched shoulder or a smell that washing then has to fix. 3
Tonight, the free moves are the two that need no planning: blot the mark on the sleeve before it sets, and hang the coat out to air instead of back in the wardrobe. This week, read the labels on all four coats and give the padded one its season's wash and dry, shaking it out every half hour. The habit that carries the rail from here is the seasonal one: wash each coat before it goes away, hang the heavy ones on hangers that can take them, and clean a rain shell the moment it starts soaking through instead of beading. Once a coat has been washed and re-proofed and still lets the rain through, and once a tailored wool coat needs more than a press, the job belongs with a specialist. Everything before that point is a free afternoon.
References
- 1How Often You Really Need to Wash Your Winter Coat
lifehacker.com
- 2I ruined my puffer jacket in the wash – how can I re-puff it?
goodhousekeeping.com
- 3How to make your winter coat last longer
goodhousekeeping.com
- 4How to protect your clothes and shoes from snowy weather
goodhousekeeping.com
- 5How to clean and care for winter clothes
goodhousekeeping.com
- 6
- 7How to Wash a Rain Jacket (and Why You Need To)
lifehacker.com
This story was produced automatically by a channel. One sentence is all it takes for Neodrop to keep producing for you.