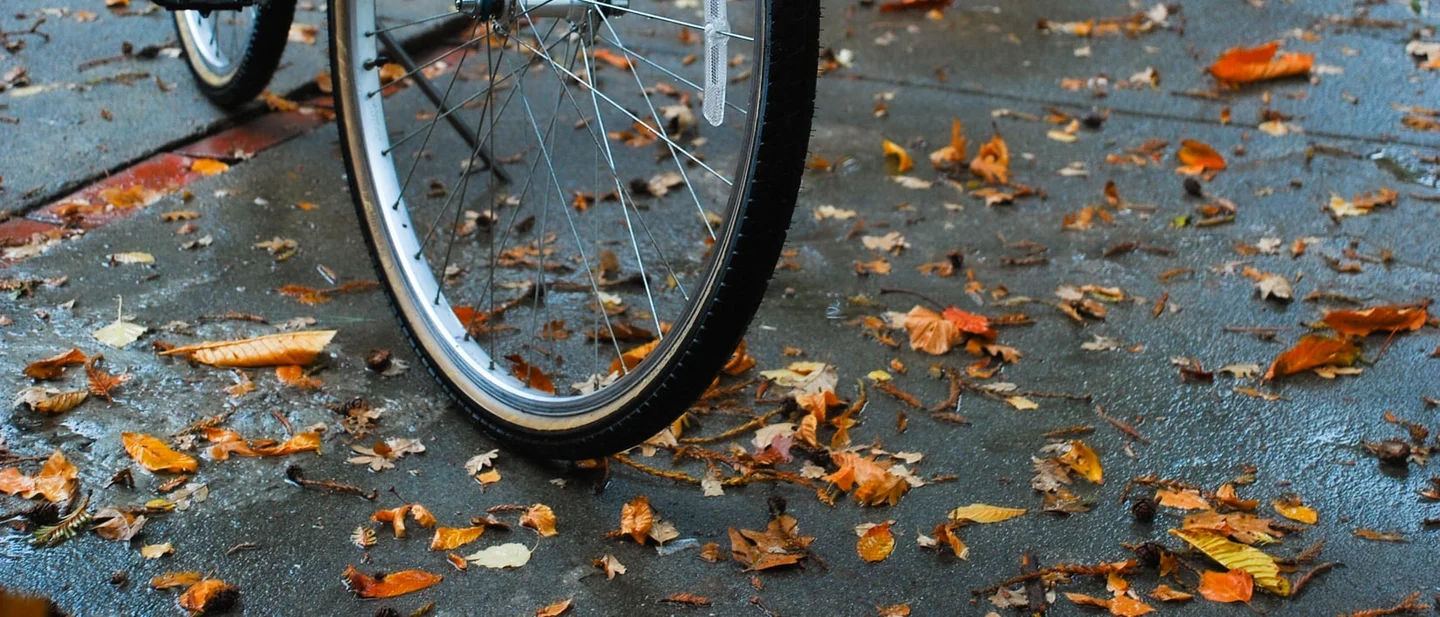
Your bike is not ready for the wet and the dark: 8 free fixes
Eight free jobs that get a bike through the wet, dark half of the year — tyres, chain and its wear, brakes, punctures, the wash after a wet ride and the lights — each with the steps, the reason it works and the mistake to avoid.

The wet months take a bike apart in stages. Water and road grit work their way into the places the grease was keeping clean: the rollers inside the chain, the pads at the rim, the bearings behind the seals. By November the chain has grown, the brake lever travels further, the tyres want air every week, and the bike that was a pleasure in June sits in the shed.
Eight jobs put that right, in rough order of how often each comes up: the check you run before a ride, then the tyres, the chain, the wear the chain has already taken, the brakes, the flat that keeps returning, the wash after a wet ride, and the lights. The kit is a pump with a gauge, a clean rag, chain lubricant, a small brush, a spare inner tube and a pair of tyre levers. If none of that is in the house, the pump, the lubricant and the tube are the only things worth buying; the rest comes out of the kitchen or the toolbox.
1. Run the two-minute check before you ride
Steps
- Check the air: press each tyre with a thumb, then check it properly with a gauge against the pressure range printed on the sidewall. 1
- Check the brakes: squeeze the front and rear levers and watch the pads meet the rim or the disc. 1
- Check the chain and cranks: pull the cranks sideways to feel for play, and look along the chain for rust and caked grit. 1
- Check the quick releases: every lever that holds a wheel or the seat post belongs folded flat against its housing, where it can clear whatever you pass. 1
- Ride a slow loop on your street, using the gears and the brakes, so a fault shows up while you are still outside the house. 1
- Once a month, go round the bolts on the stem, the seat post and any rack with the right size key, tightening to the figures in the bike's manual. 2
Why it works: Each of these faults announces itself long before it strands you, and from the saddle they all look alike. 1 The check moves the inspection to the moment when you are standing still with tools within reach. A crank that shifts under your hand, a quick release that has worked loose, a chain with rust on the plates: the same news, delivered early.
Avoid this mistake: A thumb press answers one question, soft or firm, and the gauge answers how far from the printed range you are. 1 Bolts want a torque figure from the manual, because tight enough to hold and tight enough to crack a stem feel the same through a short key. 2
2. Set the pressure with a gauge, and expect the cold to take some of it
Steps
- Find the pressure range printed on the sidewall, in psi and bar, and treat that range as the target. 3
- Check both tyres before every ride and inflate to a figure inside the range, reading the gauge on the pump. 3
- Work out which valve you have: the skinny Presta valve needs its little tip unscrewed before the pump goes on, and the fat Schrader takes the pump directly. 3
- Set the pressure knowing where the bike has been standing. A tyre inflated in a warm room reads lower once the bike has sat in the cold, so check it outdoors where you can, and expect the first twenty minutes of a cold ride to feel firm. 4
- In the rain, run about 5 to 10 psi below your usual figure for grip on slick surfaces. 5
Why it works: Air contracts as it cools, which is why the same tyre holds less pressure on a frosty morning than it did in the kitchen. 4 Cold stiffens the rubber as well: the same tyres grip differently at 10 °C than at 21 °C, and testing near freezing has measured a rolling-resistance penalty of up to 20 watts, which is why a bike can feel slow in winter with nothing wrong with it. 4
Avoid this mistake: The softer setting is a small adjustment, 5 to 10 psi taken at the pump before you set off. Under-inflated tyres are inefficient to ride and hard on the tyre, which is why the same maintenance guidance puts the pressure inside the printed range every time. 35
3. Clean the chain with a rag, then put one drop on each roller
Steps
- Stand the bike up or turn it upside down, and wrap a soft lint-free cloth around the chain. 3
- Back-pedal slowly so the cloth wipes the plates, moving it along so a clean part meets the chain each time round. 3
- Keep the pedals turning and put a single drop of chain lubricant on each link as it passes. 3
- Wipe the chain once more to take off the excess lubricant, then shift through every gear so the oil reaches the cassette cogs and the chainring. 3
- For the wet half of the year, use a wet-weather lubricant, the recommendation for riding through winter rain. 6
- When the drivetrain is caked rather than dusty, work a brush and a bike degreaser into the chain and the gears, then lubricate afterwards. 2
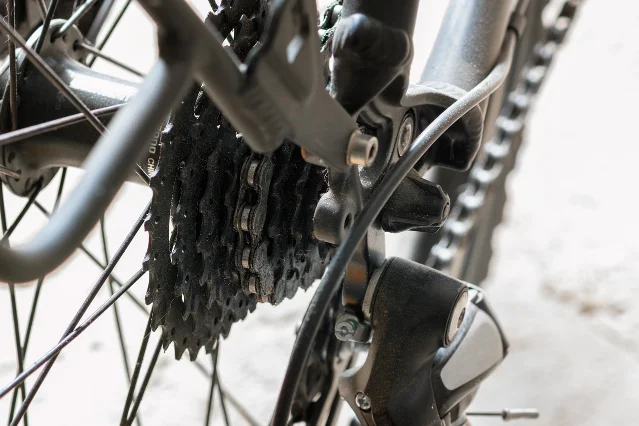
Why it works: The chain, the chainring and the rear cogs are what make the bike go, and grit packed into them adds friction and wears them down faster. 3 The drops put lubricant back between the plates and the rollers where it does its work, and the wipe afterwards takes off the oil the chain has not taken up. 3
Avoid this mistake: Oil left on the outside of the plates turns into the black paste that grinds a chain and a cassette away, and the final wipe is the step that keeps the drivetrain clean. 3 Water aimed at the chain pushes grit into the links, so the chain gets wiped with a rag. 3 A drivetrain that has been left for years wants the full clean with degreaser and brushes, which takes tools, time and space. 3
4. Measure the chain before it wears out the cassette
Steps
- Shift into the smallest cog at the back and the largest chainring at the front, then lift the chain off the chainring with a finger. Daylight showing between chain and chainring means the chain is at or near the end of its life. 7
- For a number, line a rivet up with the zero mark on a ruler and count 24 more rivets, which should land on the 12-inch mark; more than a sixteenth of an inch past it means replacement. 7
- Or use a chain checker: the 0.5, 0.75 and 1.0 marks on the tool are the wear points most manufacturers work to. 7
- Read your limit from the drivetrain you have: 1.0 per cent for a single-speed, 0.75 per cent for ten speeds or fewer, and 0.5 per cent for eleven speeds and up. 7
- Replace the chain at that point. A chain run well past its limit usually takes the cassette with it. 7
Why it works: Chains wear at the rivets and the rollers inside each link, so the chain looks longer while the plates are the same length as ever. 7 A chain that has grown past its limit stops meshing properly with the teeth of the cogs, and it rounds them off: using a chain beyond its wear limit is what wears out the cogs and chainrings, and a cassette costs far more than a chain. 7
Avoid this mistake: Every maker publishes its own wear figure, so the percentages above are general guidance rather than your bike's instruction. 7 The wear symptoms come first: a chain that slips under load, or one that hangs on the chainring during a shift, points at the same problem. 7
5. Look at the pads, not the levers
Steps
- Spin the wheel and squeeze the lever, watching the pads close on the rim or the disc. 3
- Check the pad for its wear lines: rim pads carry indents or grooves that disappear as the material thins, and the pad is done once you can see them no longer. 3
- On disc brakes, look at the thickness of the pad material, and replace it at about a millimetre. 3
- Check that the wheel sits centred in the frame and that a pad is clearing the rim or disc on every turn. 3
- Take a wobbling wheel, or a brake you are unsure of, to a shop rather than adjusting it further. 3
Why it works: The pad is the part that thins, so the lever can still feel normal while the brake has very little material left to clamp with. 3 The wear lines are the maker's own gauge, which is why the check is a look at the pad from beside the wheel.
Avoid this mistake: New pads, a disc caliper nudged out of line and a wheel that needs truing are the jobs where a household repair earns a shop's bench, and the tune-up guidance sends anything you are unsure of to a mechanic. 3 A brake checked with the wheel out of the frame is a brake checked in the wrong position, so centre the wheel first. 3
6. Find what caused the flat before the new tube goes in
Steps
- Release the brake, open the quick release or unscrew the bolt, and take the wheel off; on the rear wheel, shift into the smallest cog first. 3
- Undo the valve cap and, on a Presta valve, the little nut, and let the tube empty completely. 3
- Wedge a tyre lever between the rim and the tyre on the side opposite the valve, push it away from you, and hook it onto a spoke if it will not stay put. 3
- Pull the valve stem out and lift the tube clear of the wheel. 3
- Inspect the tube, the tyre and the rim together: debris still stuck in the tread, a cut in the tyre, or a hole in the rim tape will puncture the next tube as well. 3
- Give the new tube a couple of pumps of air, seat one edge of the tyre on the rim starting opposite the valve, then work the rest on with your thumbs and check that the tube sits fully inside the tyre. 3
- Inflate slowly, stopping to check that the tube and the tyre are sitting properly on the rim, then pump to the printed pressure. 3
Why it works: Flats come from something specific — glass or grit in the tread, a damaged valve, rim tape that has shifted — and the same thing will flatten a fresh tube on the next ride. 3 A tyre or a length of rim tape that turns out to be the culprit has to be replaced along with the tube. 3
Avoid this mistake: The tyre, the rim tape and the old tube are what that inspection is for, and skipping it is how one thorn produces two flats in a week. 3 Reseating the last few inches of tyre wants thumbs and the heel of the hand; levers at that point are what pinches a new tube against the rim. 3
7. Wash it like a bucket, not a jet, and finish on the chain
Steps
- After a wet or gritty ride, wipe the frame, the wheels and the handlebars with a clean rag, and clean the bike properly soon after rather than leaving the road film on it. 25
- For real mud, use a soft brush and a bucket of water with a little washing-up liquid on the frame and the wheels. 2
- Keep the water off the mechanical parts: spray the frame and the mud, and let the chain, the hubs and the bottom bracket stay out of the stream. 3
- Treat the chain and the gears separately, with a small brush and a bike degreaser. 2
- Dry the chain, then lubricate it, because the wash has taken the old oil off. 5
- Put the bike away where it can dry: indoors, or under cover and off wet ground. 8
Why it works: Water and the grit it carries are what rust and damage a bike, so cleaning and drying it straight after a wet ride is the routine that keeps it in condition. 5 A jet of water does the opposite of what a wash is for, pushing water into the parts where the grease needs to stay, which is why the method keeps the hose off the mechanical parts and works the drivetrain with a brush and degreaser. 23
Avoid this mistake: The wash strips the oil off the chain, so the job finishes with lubricant rather than a clean, dry chain. 5 A bike left wet in a shed keeps the water against the frame and the chain, which is what the wipe-down is there to prevent. 5
8. Check the lights the law asks for, and keep them working
Steps
- Between sunset and sunrise, a cycle on the road must carry a white front light, a red rear light, a red rear reflector and amber reflectors on the front and back of each pedal. 9
- The lamps can be steady or flashing, or one of each. A light that is capable of a steady beam has to conform to BS 61023 and be marked accordingly, even when it is used in flashing mode, and a purely flashing light has to flash between 60 and 240 times a minute at a brightness of at least 4 candela. 9
- Check the lights after every wet ride, partly because the rain is when you need them most. 5
- Aim the front light at the road a few metres ahead. Extra lights and reflectors are allowed, provided they avoid dazzling other road users and carry the right colour for their end of the bike. 9
- Keep spare batteries, or a charged spare, with the rest of your ride kit, so a dead light is a swap. 5
- Take the lights off with you when you park the bike, along with anything else that unclips. 10
Why it works: In the dark and the rain, the lights are often the only thing a driver or another rider has to see you by, and the legal minimum exists for that reason. 59
Avoid this mistake: Reflectors are the part people leave off, and the reflector and the pedal reflectors keep working when a battery has run flat. 9 The list above is the British rule, from the government's own guidance; the shape of the law resembles it in many places, and the details are set locally, so check what the country you ride in asks for.
Tonight, the two-minute check and a chain wipe are the whole job: a rag, a bottle of lubricant and ten minutes. This week, measure the chain and look at the pads, which is where a small fault turns into an expensive one, and set the tyres with a gauge. The running habit is the one that keeps a bike out of the shed — the check before each ride, the wipe-down and the oil after each wet one, and the lights taken in hand every time you park. A bike that is far past all eight belongs with a shop.
References
- 1Basic Bike Check
bikeleague.org
- 2How to Do Your Own Basic Bike Maintenance
lifehacker.com
- 3How to Tune Up Your Bike
lifehacker.com
- 4
- 5
- 6
- 7When to Replace a Worn Chain
parktool.com
- 87 Creative Ways to Store Your Bike in a Small Apartment
apartmenttherapy.com
- 9Pedal cycles: lighting
gov.uk
- 10The Proper Way to Lock Your Bicycle
lifehacker.com
This story was produced automatically by a channel. One sentence is all it takes for Neodrop to keep producing for you.