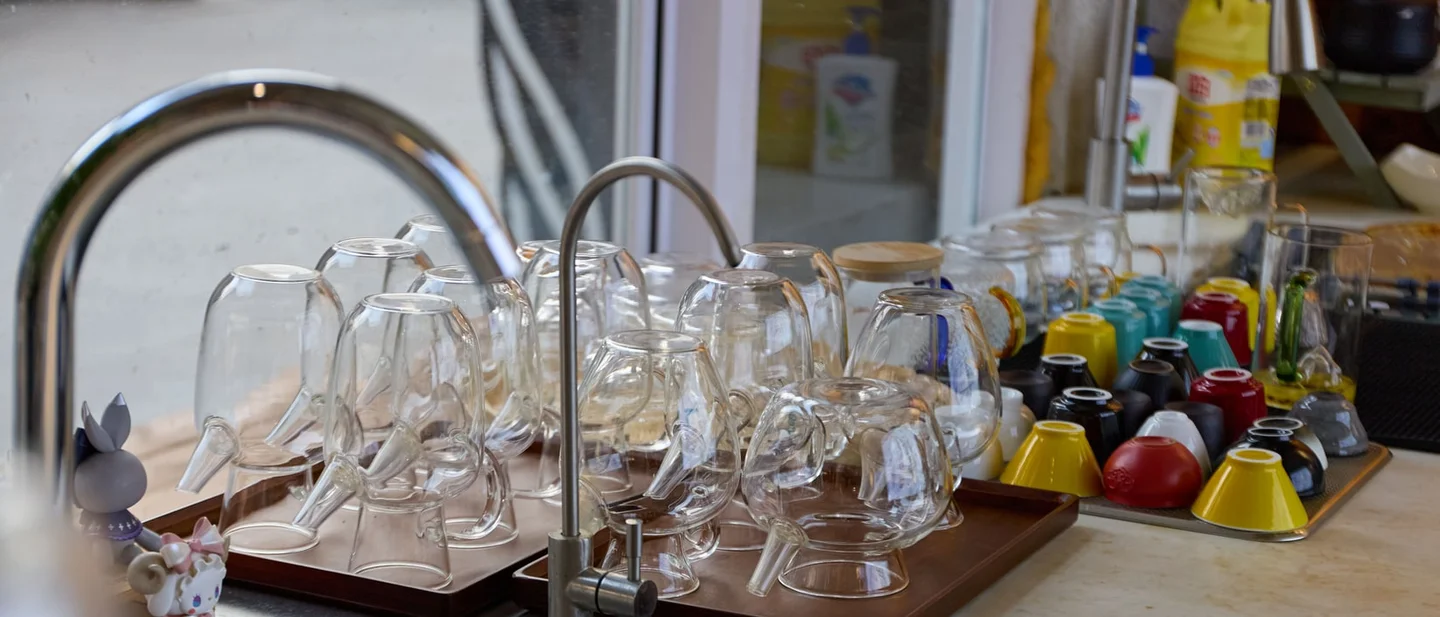
No-Drill Over-the-Sink Dish Rack: Your Saturday Renter Project
Span the sink with a $18-$20 no-drill dish rack to win back the counter, with the tape-measure checks that decide whether one fits your sink and a removal that takes five minutes.

The Saturday plan
A countertop dish drainer takes up the same counter space whether it holds a full load or one mug, and in a small kitchen that space is your prep area. A rack that spans the sink drains straight into the basin, hands the counter back, and lifts off in one piece on moving day. Everything in this project rests on the sink rim, so no fastener ever touches a wall, a cabinet front, or a backsplash tile.
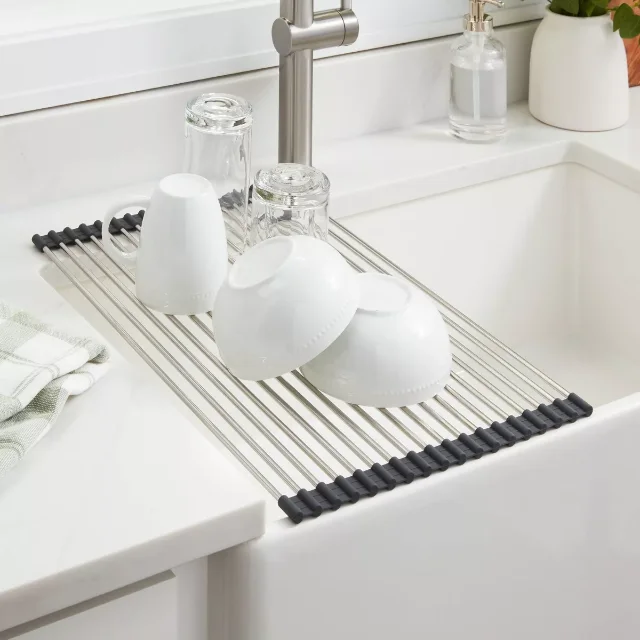
Budget $18 for the roll-away style: a mat of stainless steel rods with silicone ends that lies across the sink and folds up afterward. Add $12 for a sink-edge caddy so sponges, brushes, and dish soap come off the counter, plus a couple of clean drying cloths, and the station lands between $30 and $45 before tax. The larger over-sink racks run from $19.99 to $45.99. Set aside about 45 minutes, most of it measuring and dry-fitting before anything gets wet.
Materials and estimated cost
The prices below come from each retailer's own product page, checked on September 19, 2026. Shipping, sales tax, and local stock move the total either way.
| Item | Quantity | Estimated cost | What to buy or verify |
|---|---|---|---|
| Roll-away over-sink dish drainer, 20.5 × 13 in | 1 | $18.00 | Stainless steel rods with silicone ends that grip the rim and protect the sink and counter underneath; Target lists it for over-the-sink use and hand washing only. 1 |
| Multifunctional over-sink rack, LILLHAVET | 1, in place of the mat | $19.99 | IKEA lists it for use over the sink or on its drain board, holding five plates at a time, with a soft coating that resists rusting. 2 |
| Full-size over-sink rack with a utensil cup | 1, as the heavy-load alternative | $45.99 | Holds 12 plates; the extendable handle adjusts to 21 in to bridge different sinks, the handles are coated against scratches, and the listing gives countertop use as a second option. 3 |
| Over-the-sink expandable caddy with towel bar | 1 | $12.00 | Powder-coated steel, 13 1/4 in wide and expandable to 18 3/4 in, freestanding on the sink edge. 4 |
| Clean drying cloths | 2 | $0-$8 | Dry dishes with a clean cloth only; a towel that has already wiped hands, counters, or the floor carries germs back onto the dish. 5 |
| Thin silicone or rubber pads | 4 | $0-$5 | Worth adding when the feet touching your counter are bare metal rather than coated. |
| Estimated total | $30-$45 with the roll-away mat, $58-$75 with a full-size rack | Comfortably under the $150 materials ceiling. |
The rack is the only purchase this project actually needs. A caddy and a pair of cloths turn it into a station.
Which style fits your sink?
The three styles differ in how many dishes they hold at once and how much of the sink opening they cover. Size the choice to a normal night's dishes, then check the numbers against the sink you have.
| Option | Price | Capacity | How it sits | Check first |
|---|---|---|---|---|
| Roll-away rod mat, 20.5 × 13 in | $18.00 1 | Plates, bowls, glasses, cutlery; flat, with no slots to prop plates upright | Lays across the sink opening and rests on the rim at both ends | A flat ledge at both ends of the sink and at least 20 in of rim-to-rim span |
| Multifunctional over-sink rack | $19.99 2 | Five plates plus glasses, mugs, and cutlery | Spans the sink, or sits on its own drain board on the counter | IKEA lists it for sinks with an inner dimension of 15 3/4 in |
| Full-size over-sink rack with utensil cup | $45.99 3 | Twelve plates, with a hanging cup for cutlery | An extendable handle bridges the sink and adjusts to 21 in | The largest footprint of the three, and the highest price |
| Sink-edge caddy, as an add-on | $12.00 4 | Sponges, brushes, soap, a folded cloth | Freestanding on the sink edge, expanding with the sink width | Keep hand tools and light items in it, and keep knives out |
One person rinsing two plates and a mug after dinner needs the roll-away mat and nothing more. A household that leaves a day's dishes for one evening wash wants the slots and the taller frame of the full-size rack, which is also the one that frees the most counter. The caddy works alongside either style, and it is the piece that saves a sink with no rim at all.
Measure your sink before you shop
Five measurements settle the purchase, and each one takes seconds with a tape measure.
- Span, left to right. A rack that lies across the sink has to reach both rims, so the sink opening must be narrower than the rack is long. Widening the opening past 20.5 in drops the mat into the bowl.
- Depth, front to back. The roll-away mat is 13 in deep. A sink deeper than that leaves the mat's front end hanging over the counter, where the water then runs.
- Rim ledge. Each end needs roughly half an inch of flat ledge to sit on. A rolled edge or a narrow lip lets the rack rock while you load it.
- Faucet reach. Measure from the faucet base to the front rim, then swing the faucet and pull the sprayer hose through a full arc. The rack has to clear both.
- Headroom and heat. Plates and glasses stand upright on a loaded rack, so check the height to the underside of the upper cabinets. Then check the distance to the range: anything closer than 3 ft changes where the rack and the drying cloths can sit. 6
A farmhouse or apron-front sink offers no side rim, so a mat laid across it drops straight into the bowl and the caddy becomes the whole project. A sink with a built-in soap dispenser or a molded ledge creates the same problem, because the rack cannot sit level across it.
Sink and surface compatibility check
| Sink or surface | What to do | Renter note |
|---|---|---|
| Drop-in stainless sink with a flat rim | The easiest case: the rack rests on the rim, and silicone ends grip it. | Run a finger along the rim first and note any sharp burr from a previous tenant. |
| Undermount sink | Measure the countertop opening; the rack rests on the counter edges above the bowl. | Add pads where bare metal meets quartz, composite, or stone so the finish stays unmarked. |
| Porcelain or enameled sink | Use a rack with silicone-coated or rubber-capped contact points. | Glaze chips under bare steel over months of small movements. Lift the rack rather than sliding it. |
| Granite composite sink | Silicone ends hold well on the matte surface. | Wipe the rim dry before setting the rack down, so mineral film does not build up under the ends. |
| Farmhouse or apron-front sink | Use the sink-edge caddy or a countertop drainer instead. | The project stays reversible; only the product choice changes. |
| Double-bowl sink with a raised center divider | Set the rack so it bridges the divider rather than resting on it. | A rack that rocks on the divider spills water down the cabinet front. |
| Sink with a swivel faucet or pull-down sprayer | Mount the rack forward of or behind the faucet's arc. | Test the sprayer hose through its full pull before you load anything. |
| Sink within 3 ft of the range | Keep the rack, the cloths, and anything burnable outside that zone. 6 | Splatter from a hot pan reaches further than most people expect. |
Build it in a Saturday
1. Photograph the sink rim and counters
Shoot the empty sink rim and both counter edges in daylight, from an angle that shows the finish. A dated photo before you start is the cleanest evidence you have at move-out, and it costs one minute.
2. Clean the rim and dry it
Wash the rim, the sink edges, and the counter alongside them with hot soapy water, then dry everything with a separate cloth. 7 Grease and dried mineral film both let a coated rack slide, and a clean rim tells you whether the surface itself is already marked.
3. Dry-fit the rack on the sink
Unroll the mat across the sink, or set the rack down with its handles extended, and press one end at a time. Every contact point should meet flat rim with no rock and no bridge. Shift the rack left or right until both ends sit evenly, and take the measurement for the utensil caddy at the same time.
4. Check the faucet arc while the rack is empty
Swing the faucet from side to side and pull the sprayer hose out to its full reach. Nudge the rack toward the back of the sink until the faucet clears it. Water bouncing off a bowl into the faucet base is the usual sign that the rack sits too far forward.
5. Load it, then run the water test
Load a plate, a bowl, and two glasses first, then pour a cup of water slowly over the top of the pile and watch where it lands. Water should fall into the basin, not over the front rim onto the counter. When water reaches the counter edge, your sink is deeper than the rack and the rack needs to move back.
6. Build the utensil side
Set the caddy on the sink edge with the sponge, the brush, and the dish soap in it, and hook the towel bar so the drying cloth hangs free. The caddy takes hand tools and light items, and it keeps the wet sponge off the rack, where it would sit against the dishes.
7. Practise the fold-away
Roll the mat up the way you will store it and find its spot: standing in the gap beside the sink, or leaning against the cabinet wall. A rack that has to be moved every time you cook is a rack you will stop using by the second week.
Safety notes that matter here
- Keep the rack, the dishes, and the drying cloths at least 3 ft from the range, a space heater, or any open flame. Cloth is the burnable part of this setup. 6
- Treat the sink basin as a food surface, because the rack hangs the dishes directly over it. After raw meat or poultry, wash the basin with hot soapy water and sanitize it before the next load of dishes. 7
- Air-dry where you can, and dry with a clean cloth when you want the dishes put away sooner. A towel that has wiped hands or counters moves germs onto the dishes you just washed. 5
- Stay inside the rack's own capacity: five plates on the LILLHAVET, twelve on the full-size rack, and a normal mixed load on the roll-away mat. 23 A cast-iron skillet belongs on the stove or in a cupboard.
- Keep knives out of the rack and the caddy. A knife stored point-up is a knife you can knock into while reaching past it, and a caddy on the sink edge puts that knife at hip height.
- Wash the rack by hand, dry it fully, and let it air before storing it. A rack folded away wet grows a smell within days, and the roll-away style is listed as hand wash only. 1
Renter notes: wall, landlord, and deposit risk
Wall condition: untouched. This project attaches nothing to the apartment, so wall paint condition, picture-hanging rules, and studs stay out of it entirely.
The surfaces at risk: the sink rim and the counter edge beside it. Silicone ends exist to grip and to buffer that finish, which is why a bare-metal rack on a porcelain sink is the version of this project that shows wear. Lift the rack straight up when you move it, and photograph the rim at the start.
Landlord communication: most leases treat a freestanding rack as ordinary kitchen equipment, so permission is rarely part of this project. A short note is still worth sending, because a drying rack over a sink is exactly the kind of thing a manager notices on a maintenance visit.
Hi, I set a freestanding dish rack across the kitchen sink. It rests on the rim and lifts off in one piece with no fasteners, adhesive, or changes to the sink, counters, or walls, and I will take it with me at move-out.
Deposit protection checklist: photograph the empty sink rim and both counter edges before the rack goes on and after it comes off. Note any chips, scratches, or mineral stains that were already there when you moved in, and keep the move-in inspection report with those notes.
Move-out removal
- Empty the rack and the caddy, and put the cloths in the laundry.
- Unhook the utensil cup and the towel bar, then lift the rack straight up off the rim.
- Wash the rack by hand with hot soapy water and dry it completely, so nothing stores damp.
- Wipe the sink rim and the counter edges with a damp cloth, then dry them and check the finish against your starting photo.
- Roll the mat and band it, or fold the rack flat, and pack it with its silicone pads and end caps.
- Wipe any white mineral film off the rim with a little white vinegar on a cloth, then rinse and dry.
Is this the right Saturday project for you?
This project suits a small kitchen where the counter doubles as prep space, a household that hand-washes dishes most nights, and any renter who wants a visible kitchen upgrade with nothing fastened down. It also suits a first apartment, since the whole setup costs less than a restaurant dinner and takes one afternoon.
Choose the sink-edge caddy or a countertop drainer on a tray when your sink is a farmhouse or apron-front model, when a built-in ledge or a soap dispenser keeps a rack from sitting level, or when the opening runs wider than 20.5 in. A household that runs a dishwasher for nearly every load gets more from a cabinet insert than from a rack that sits empty over the sink.
Next Saturday
Next Saturday's project will open up the space under a rental bed with a no-drill riser and rolling bin setup, starting with a frame and floor check before anything goes under the mattress.
参考ソース
- 1
- 2
- 3
- 4
- 5
- 6Heating safety at home, USFA
usfa.fema.gov
- 7
このコンテンツはチャンネルが自動で生成しました。一言伝えるだけで、Neodrop があなたのために作り続けます。