No-Drill Under-Sink Storage: Your Saturday Renter Project
Clear the cabinet under a rental kitchen sink with two $10 tension rods and a few clear bins, working around the drain pipe for about $35 and lifting it all out at move-out.

The Saturday plan
The cabinet under a rental kitchen sink usually holds the same three things: a bucket, a bottle that has fallen over, and the drain pipe. The pipe is the reason. It drops through the middle of the cabinet and eats the space a shelf would have used.
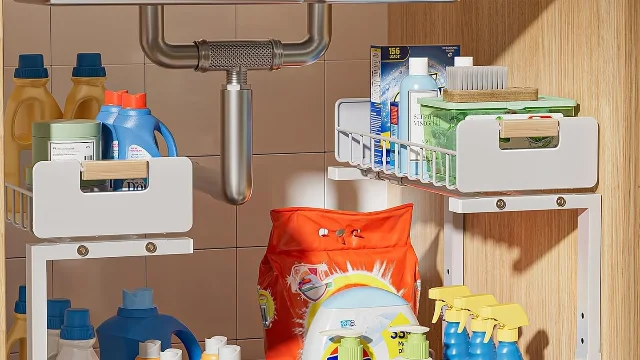
This project puts that space back to work without a single screw. Two spring tension rods wedge between the cabinet's side walls, one toward the front and one toward the back, and light spray bottles hang from them by their trigger heads. Clear bins sit on the floor on either side of the pipe. Nothing is screwed down, nothing is glued, and the whole setup lifts out on moving day.
The setup this article walks through costs about $35 before tax: a two-pack of tension rods for $8 to $10 and four clear bins at $5 to $7 each. Leave out the rods and put everything in bins, and the total comes to about $20. Either way it stays well below the $150 ceiling.
Budget a Saturday morning rather than a whole day. Most of that time goes into the checks below, because one past leak changes what belongs in this cabinet at all.
Check the cabinet before you buy anything
Five checks settle whether this project suits the cabinet you have, and each one takes about a minute.
- Has it leaked? Look at the cabinet floor for dark rings, soft or swollen board, and lifted edges where the finish has come away. Push on the floor with a thumb. A swollen floor is particleboard that has been wet, and a rod and bins will not fix it. Photograph it and tell the landlord instead.
- What is under there? Most kitchen sink cabinets hold a P-trap (the U-shaped bend in the drain), two shutoff valves where the water lines meet the wall, and often a garbage disposal and a dishwasher drain hose. Take one photo of the whole cabinet with the door open.
- Can you still reach the valves? Anything you add has to leave the shutoff valves and the disposal's reset button clear. In an emergency you turn those by hand, in the dark, with water running.
- What are the side walls made of? Cabinet sides are usually half-inch or three-quarter-inch board. A rod presses hard against them, and a soft or water-damaged panel is a stop sign.
- How wide is the clear span? Measure the distance between the two side walls where you want the rod. That number decides the rod, and the next section explains how to take it.
Measure the span, the depth, and the bottles
Three measurements pick the rod and its position, and a fourth keeps the load safe.
- The clear span. Measure side wall to side wall at the height you have in mind, at both the front and the back of the cabinet. Frames are rarely square, so use the smaller number. Buy a rod whose range covers that span and leaves an inch or two of adjustment, because a spring rod holds by pushing outward.
- The depth and the pipe. Measure front to back. The trap and the disposal sit in the middle, so a rod placed near the front face or near the back wall usually clears them. Set the rod where the pipe is out of its way.
- The height for hanging. Measure from the cabinet floor to the underside of the sink bowl and to the lowest point of the pipe. A bottle hung from a rod hangs below it, so the tallest bottle plus about an inch has to fit under whatever is overhead.
- The load. The rods compared below are rated between 3 lb and 6.6 lb each. A 32-ounce spray bottle holds about two pounds of liquid, so a rod carries two or three of them, no more. Keep glass, bulk jugs, and anything heavy on the cabinet floor.
Materials and estimated cost
Prices below come from each retailer's own listing, checked on October 3, 2026. Sale prices move, and shipping, sales tax, and local stock shift the total either way.
| Item | Quantity | Estimated cost | What to buy or verify |
|---|---|---|---|
| Spring tension rod, 18-28 in, 2-pack | 1 pack | $9.99 | Adjusts from 16.5 in to 28.3 in, a 0.51 in rod with PVC end caps, listed maximum load 6.6 lb. The maker says to order a rod one to two inches longer than the space. 2 |
| Clear box with lid, 3 gal, IKEA SAMLA | 2 | $4.99 each | 15 ¼ × 11 × 5 ½ in, polypropylene with a click-lock lid and moulded handles. IKEA's page advises keeping any stack under 35 in and putting heavy things at the bottom. 3 |
| Stackable box with lid, IKEA KUGGIS | 2 | $6.99 each | 7 × 10 ¼ × 3 ¼ in, PET plastic with at least 50 percent recycled content. IKEA lists it for damp indoor areas such as bathrooms, and the KUGGIS sizes are made to stack on each other. 4 |
| Small S-hooks (optional) | 1 pack | $0 to $6 | Only for bottles whose trigger has no loop to slip over the rod. Test your own bottles first. |
| Estimated total | about $35 for two rods and four boxes, about $20 for boxes alone | Comfortably under the $150 ceiling. |
Tension rods compared
Every rod here ships as a two-pack, and every one of them is a spring rod: you twist it longer than the opening, push it into place, and a spring inside presses the rubber ends against the two walls. The listing's own numbers are the ones that matter, because a rod sold as an 18-28 in rod is not meant to sit at 28 in.
| Rod | Price | Length and fit | Load as listed | Check before buying |
|---|---|---|---|---|
| Spring tension curtain rod, 2-pack | $9.99 2 | Adjusts 16.5 to 28.3 in | 6.6 lb | The highest rating of the four, and the only one whose range covers a 28 in cabinet. |
| Goowin small tension rod, 2-pack | $7.97 5 | Made for walls 16 to 25 in apart | About 4 to 8 lb | Cheapest of the four, and the maker warns against stretching it to its maximum. |
| AIZESI tension rod, 2-pack | $9.99 6 | 17 to 28 in, recommended 18 to 26 in | 5 lb | Stainless steel; the maker names cabinets and refrigerators as uses. |
| KXLife tension rod, 2-pack | $8.69 7 | 12 to 20 in; ½ in rod, ¾ in caps | 3 to 7 lb | The choice for a narrow cabinet under a small sink, where a longer rod has nothing to push against. |
A rod that arrives longer than the seller promised is a common complaint on all four listings, so measure the cabinet before ordering and again before you fit the rod. Keep both rods at the same height if you set them in one cabinet, and twist each one only until it holds.
Bins and boxes compared
| Container | Price | Outside size | How it moves | What it holds |
|---|---|---|---|---|
| SAMLA box with lid, 3 gal, IKEA | $4.99 3 | 15 ¼ × 11 × 5 ½ in | Moulded handles; the lid's click lock makes it stackable | Bottles lying flat, sponges, gloves, dishwasher tablets |
| KUGGIS box with lid, IKEA | $6.99 4 | 7 × 10 ¼ × 3 ¼ in | Stacks with the other KUGGIS sizes | Short bottles upright, cloths, brushes |
| KUGGIS box with lid, IKEA | $14.99 8 | 10 ¼ × 13 ¾ × 6 in | Same stack, the tallest of the three | Refill bottles and anything taller than the tray |
Two details worth knowing before you order. IKEA does not approve either box for food contact, which is fine for cleaners and cloths. And the clear version of a box shows you what is inside without lifting the lid, which matters more than it sounds in a cabinet you open once a week.
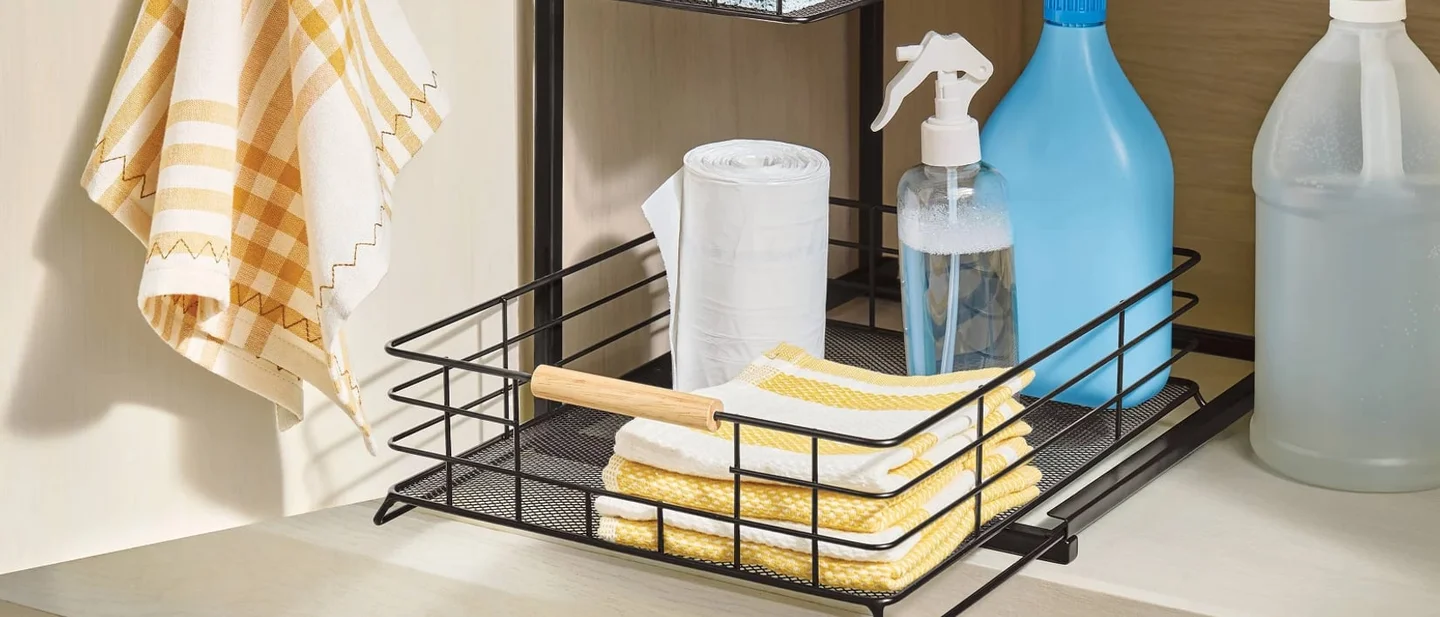
If you would rather skip the rods entirely, a freestanding unit does the same job on the floor. Simple Houseware's two-tier under-sink organizer is $14.87 and measures 16.1 × 8.6 × 13.4 in, with baskets that pull out past the pipe. 9 Delamu's two-tier pull-out set covers both sides of a wide cabinet and costs $49.99 for the pair. 1
Cabinet and pipe compatibility check
| What is under your sink | What to do | Renter note |
|---|---|---|
| A P-trap dropping through the middle | Put the rods near the front face and near the back wall, and the bins either side of the trap. | The pipe stays where it is; work around it. |
| A garbage disposal | Leave the bottom of the unit and its reset button clear. Hang nothing over it. | A disposal can shake loose a poorly seated rod. Test after the first run. |
| A dishwasher drain hose looped high | Keep bins and bottles off that hose. | A pinched hose can back wastewater into the cabinet. |
| A cabinet floor in good condition | Set the bins down rather than sliding them, and wipe up spills the same day. | Under-sink floors are the first place a deposit inspection looks. |
| A floor with old water stains or a swollen edge | Stop the project, photograph the damage, and tell the landlord in writing. | A moisture problem belongs to the building, not to your storage plan. |
| A narrow cabinet under a small sink | Use the 12-20 in rod and one stack of bins. | A rod that barely fits cannot hold much. |
| A shallow cabinet with a drawer above | Measure the drawer's travel before adding a rod. | A drawer that strikes a hanging bottle will empty it. |
| A cabinet within 3 ft of the range or a space heater | Keep burnable packaging and cloth out of that zone. 10 | Heat turns paper and cloth stored under a counter into fuel. |
| A bathroom vanity cabinet | The same method works with a shorter rod. | Bathroom cabinets run wetter; dry the floor before storing anything. |
Build it in a Saturday
1. Photograph the inside of the cabinet and the floor
Take one photo with the door open, one of the cabinet floor, and one of the shutoff valves. Dated photos taken before you start are the cleanest evidence you will have at move-out.
2. Empty the cabinet and check for leaks
Pull everything out. Run the hot tap for a minute, then watch the trap and the valve connections with a torch. Run the disposal if there is one. Any drip gets photographed and reported before you put a single bin back.
3. Clean and dry the cabinet floor
Wipe the floor and the lower side walls with a damp cloth and let them dry fully. The drying matters: the moisture guidance for homes is to dry damp areas within 24 to 48 hours, and to keep indoor humidity under 60 percent so that mold never gets a start. 11
4. Fit the first rod
Twist the rod until it is one to two inches longer than the clear span, then push it into place between the walls at the height you chose. Check it with a spirit level. Press the ends against solid board, not against a shelf pin hole or a loose panel.
5. Fit the second rod and test both
Same again, front or back, at the same height. Then pull down on each rod with your hand, firmly. A rod that slides or drops means the span is too wide for that rod, so move it or exchange it.
6. Hang the light bottles
Hook each spray bottle over its rod by the trigger head, or with an S-hook if the head has no loop. Two or three bottles per rod, spread out rather than bunched at one end.
7. Set the bins on the floor
Put the taller bins either side of the trap and stack the shallow trays on top of them. Leave a hand's width at the back so air can move, and check that each bin lifts out without catching the shutoff valves.
8. Test the whole setup, then check it again in the morning
Open and close the cabinet door through its full swing. Turn both valves a quarter turn and back, and check that nothing blocks them. Look again the next morning, and after the first dishwasher load, for a rod that has slipped or a bottle that has gone over.
Safety notes that matter here
- Household cleaners belong out of reach, and a cabinet lock is the cheap way to do it. The Consumer Product Safety Commission's guidance is to store medications and cleaners locked up or high, because even small amounts can poison a child. 12
- Stay under the rod's stated load. The four rods here carry 3 lb to 6.6 lb each, and a full spray bottle is about 2 lb. 2
- Hang nothing from the pipes, the trap, or the shutoff valves. A drain line carries water, not weight, and a joint you strain is a leak you own.
- Keep the shutoff valves and the disposal reset reachable by hand.
- Dry the cabinet after every spill. Mold needs only a wet surface, and a cabinet floor is the last place most renters look. 11
- Keep cloth and paper at least 3 ft from a range, a space heater, or any other heat source. 10
- Leave paint, solvents, and other flammables out of a sink cabinet. The one exception is a small quantity in a sealed original container, kept away from heat.
- Recheck the rods after a change of season. Cabinet walls move with humidity, and a rod that held in July can slip in January.
Renter notes: cabinet interior, landlord, and deposit risk
The surface at risk here is the inside of the cabinet, not the wall. Tension rods press outward against the side panels, and over-tightening can dent a soft or hollow-core panel or leave two small marks where the rubber ends sit. Twist each rod only until it holds, and slip a square of shelf liner behind each end if the panel feels thin.
Do not put adhesive hooks on the inside of a cabinet. Adhesive backing grabs laminate and melamine finishes harder than it grabs paint, and it can lift the finish when it comes off. The rods and the bins are the whole project, and neither uses adhesive.
Landlord communication: this project changes nothing about the unit, and the parts come with you. A short note still helps, because storage appearing in a cabinet is the kind of thing a manager notices on a maintenance visit, and a leak you reported early is a leak you did not cause.
Hi, a quick note that I've added two spring tension rods and a few storage bins inside the cabinet under the kitchen sink. Nothing is screwed or glued, and everything comes out when I move. I checked the pipes while I was in there and there's no leak.
Deposit protection checklist: photograph the cabinet floor, both side walls, and the shutoff valves before and after. Note any marks that were already there, and keep your move-in inspection report with those notes.
Move-out removal
- Take the bottles off the rods and empty the bins.
- Twist each rod shorter and lift it out of the cabinet.
- Wipe the side walls where the rod ends sat, and check them against your starting photo.
- Check the cabinet floor for new stains and photograph it.
- Wipe the floor and leave the cabinet cleaner than you found it.
- Pack the rods and the bins with the rest of your kitchen, and keep the set for the next place.
Is this the right Saturday project for you?
This project suits a renter with a standard sink cabinet, a small cleaning routine, and a habit of losing the sponge. It costs about $35, needs no tools beyond a tape measure, and takes an hour once the cabinets are empty. It suits a first apartment especially well, where a two-pack of rods is a cheap experiment before any real spending.
Choose the bins without rods when the cabinet walls are thin, damaged, or set at an awkward angle, or when your cleaning supplies run to bulk jugs rather than bottles. Skip the project altogether when the cabinet floor has swollen or the trap has dripped: a moisture repair belongs to the landlord, and no storage plan survives an active leak.
Next Saturday
Next Saturday's project moves to the bathroom: a no-drill shower storage reset with a tension-mounted pole caddy, starting with the ceiling, floor, and tile checks that decide whether a pole will hold there at all.
References
- 1
- 2
- 3
- 4
- 5
- 6
- 7
- 8
- 9
- 10Heating Fire Safety, USFA
usfa.fema.gov
- 11
- 12

This story was produced automatically by a channel. One sentence is all it takes for Neodrop to keep producing for you.