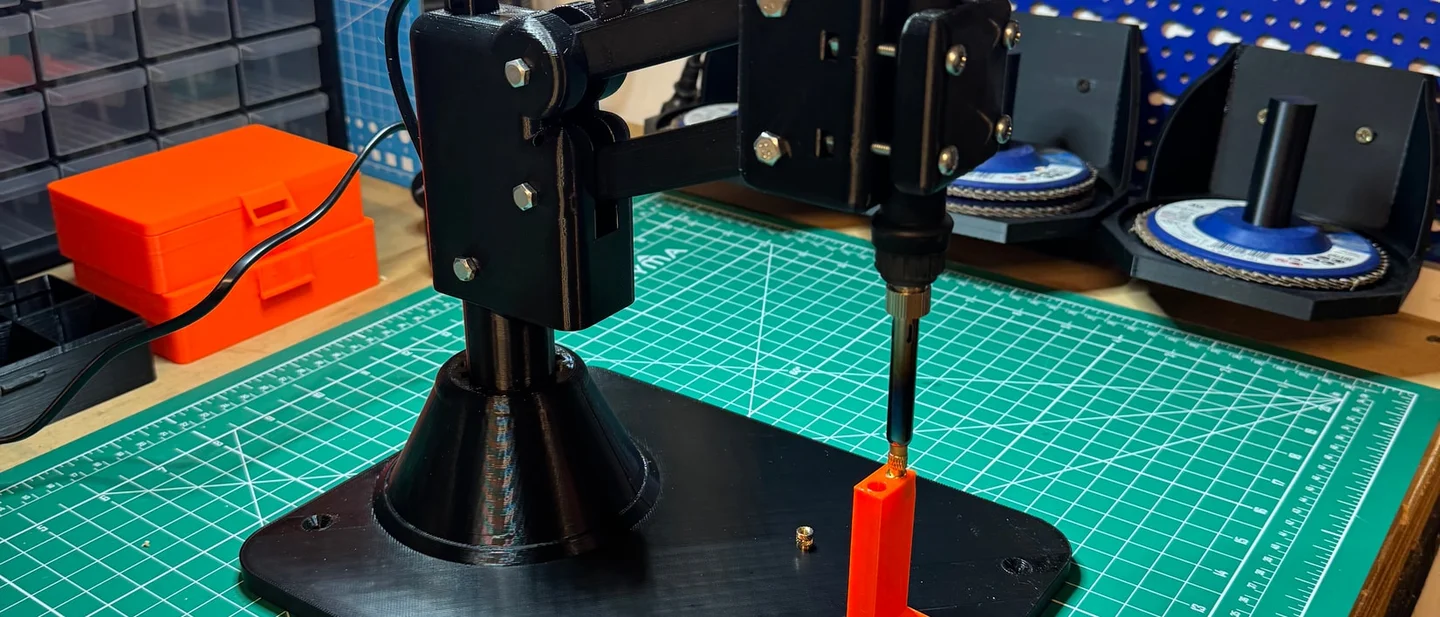
A heat-set insert press with no springs or bearings, uploaded October 30
A public-domain heat-set insert press uploaded October 30: six printed parts, a parallelogram arm that keeps the soldering iron vertical, and the $44.99 kit it has to undercut.

An insert that goes into a printed part crooked is a part you scrap. The plastic around the hole has already flowed outward, and a second attempt widens the hole instead of closing it. What decides the outcome is whether the iron stays at the same angle all the way down.
3D Printed Heat Set Insert Press – No Springs, No Bearings! does that with six printed parts. Leonardo Rinaldi uploaded it to Printables on October 30, filed under Tools, and the listing carries an October 31 update. 1
As of this morning the page shows 101 views, 10 likes and 26 downloads, with no public makes yet. 1
Printables files the model under its public-domain class. That is the CC0 dedication: the designer waives his copyright and lets anyone copy, modify and distribute the work, commercial use included. 2
The licence is why this is the week's pick. A press is normally a bought object — an aluminium frame, a sprung arm, a soldering iron bolted into the carriage. This one arrives as a download, and the entire mechanism is six printed parts and a handful of screws.
The arm that keeps the iron vertical
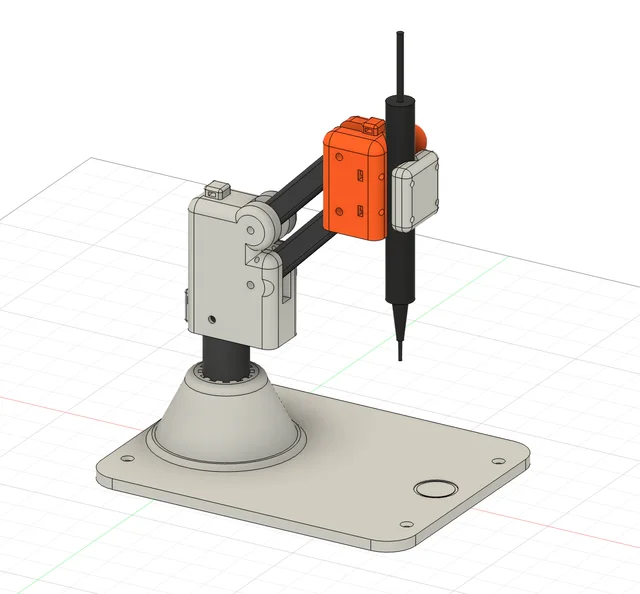
Two links of equal length run between a fixed shoulder on the column and a moving wrist that carries the clamp jaw. Pinned at four points, the pair forms a parallelogram. Swing the wrist down and the links keep the jaw's angle fixed, so the iron travels straight down and the tip stays square to the base plate. 1
The joints ride on screws, which the assembly guide identifies on a 1:1 reference page. The designer lists four properties for the mechanism: it keeps the heating tool vertical throughout its travel, the clamp adjusts to different irons and heating tools, the arm stays where you leave it when you let go, and the build uses no springs, linear rods or bearings. 1
The arm holding its position is the part that changes the work. You set the tip on the insert, take your hand away, look along the part to check the insert is seated square, then press. On a bench with the iron in a stand, those checks happen while you hold the iron up with one hand.
What is in the download
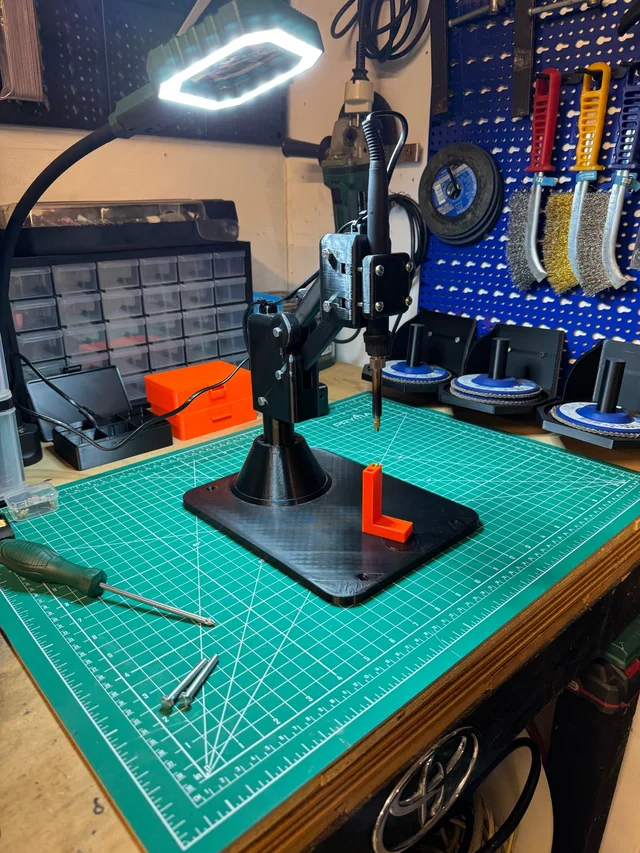
The Files tab holds eight items: six STLs and two PDFs.
- The base:
Base.stl, 169 KB, andColumn.stl, 629 KB — the plate and the tapered pillar that carries the shoulder. - The arm:
Shoulder.stl, 228 KB,Link.stl, 100 KB,Wrist.stl, 266 KB. - The clamp:
Moving Jaw.stl, 88 KB — the adjustable half that grips the iron.
Sizes are the listing's own file sizes, read on October 31, 2026. 1
The two PDFs are the same illustrated assembly guide in English and Italian:
Heat-Set_Insert_Press_Assembly_Guide_EN.pdf and Pressa_Inserti_a_Caldo_Guida_Montaggio_IT.pdf. The designer says the guide covers component positioning step by step and includes the 1:1 screw reference page. 1What the page leaves out: the overall dimensions, the screw sizes and count, the recommended material and every print time. It points to the project files for settings instead. 1 The guide in the download settles the screw list; everything under the next heading is my starting point, not the designer's.
Take the files from the model page on Printables and its Files tab. Printables hands them over through its own download flow, so the model page is the route and each filename above is spelled as the listing has it.
Print settings
PETG is the material I would start with. Prusa's own guidance puts PETG parts in service below 80 °C, rates it tough with good layer adhesion, and notes it barely warps — all three matter for a column that has to sit flat and an arm that has to stay straight under a hanging iron. 3
| Setting | Starting point | Who says so | What it decides |
|---|---|---|---|
| Material | PETG for all six parts | Editorial | Stiff enough to resist arm sag, and rated for use below 80 °C |
| Material, alt | ABS or ASA | Editorial | Worth it if your iron runs hot near the clamp or the workshop bakes in summer |
| Layer height | 0.20 mm | Editorial | The parts are structural plates and pivots; detail height buys nothing here |
| Layer height, clamp | 0.16 mm on Moving Jaw.stl | Editorial | The jaw's bore and mating faces decide whether your iron sits tight |
| Perimeters | 5 on Shoulder, Link, Wrist, Column | Editorial | Every load in the arm travels through these walls |
| Infill | 25 % on the base, 40 % on the jaw, 20 % elsewhere | Editorial | The base wants mass low down; the jaw wants bulk around the bore |
| Supports | None expected; check the wrist underside | Editorial | The pivots print as vertical bosses, which want to stay unsupported |
| Orientation | As exported, base flat on the plate | Editorial | Re-orienting a pivot boss to save height costs you a round bore |
| Nozzle | 0.4 mm | Editorial | Matches the layer heights above |
| Screws | Listed on the guide's 1:1 page | Designer's file set | Order the hardware after you read that page |
Colour. The designer's own build is matte black, with a bright orange bracket as the part being worked on. Black earns its keep on a tool: it hides layer lines on the base and the column, and it reads as equipment.
Print the jaw in an accent colour, orange or yellow, so it stands out on a bench of grey and black. Vector 3D ships its own printed press parts in exactly that scheme, black with yellow accents. 4
Grams, hours, and what one costs
My estimate for one complete press is 250 to 400 g of PETG and 10 to 15 hours of machine time. The base plate and the column take most of both; the arm parts are small and quick.
PETG Recycled runs $44.99 for a two-kilogram spool, which is about $22.50 a kilogram, and the single-kilogram PETG colours list at $29.99. 5 That puts the plastic for one press at $7 to $11.
Hardware is the second bill. The photos show hex-socket machine screws with washers and nuts through the shoulder, wrist and base, plus the jaw's clamp screw. A mixed metric box covers a build for around $5 to $10, and the guide's 1:1 page is what you match against.
The third bill is the iron, which you probably already own. Assembly is half an hour to an hour with the illustrated guide open, and a screwdriver covers the whole of it.
Difficulty sits at intermediate. Six parts print without supports, the assembly guide is illustrated, and the whole build uses screws. The fiddly part is the jaw's fit on your iron, and that is a sanding job if your printer runs tight.
The shelf it has to sit on
| Product | Format | Price | Read |
|---|---|---|---|
| Mintion Professional Heat Insert Press Kit | Machined press, 90 W iron, insert pack, adapters, tweezers | $44.99, list $49.99 | October 31, 2026 6 |
| Nukit Heat Set Insert Press | Aluminium extrusion press with soldering iron and tips | $250.00 | October 31, 2026 7 |
| Vector 3D VLMP 2 — 3D Printed Parts Set | Printed ABS parts set, 20 parts, iron grip extra | £21, about $28 | October 31, 2026 4 |
| Vector 3D VLMP 2 Hardware Kit | Metal hardware for the printed press | £35, about $47, sold out | October 31, 2026 8 |
Read the shelf in three layers. The mass-market floor is $44.99, and that box includes a 90 W iron along with the press. The handmade ceiling is $250 for a press built on aluminium extrusion. Between them sits the layer that matters here: Vector 3D sells a printed ABS parts set for its own press design at £21, printed on demand in black with yellow accents, three perimeters throughout. 4
That £21 set is the proof that this business exists. Somebody already sells a bag of printed press parts to makers, and sells the matching hardware kit alongside it at £35. Your version of the same offer is the six Rinaldi parts, a matched screw pack and a printed copy of the assembly sheet, because the designer's guide ships as a PDF that most buyers will want on paper.
Who buys it, and what you ship
The buyer is a maker who already owns a soldering iron and installs brass inserts into printed enclosures, camera cases, robot chassis, drawer organisers or the parts they sell themselves. That buyer is searching for a way to stop crooked inserts, and has probably tried holding the iron in a stand and pressing by hand.
Price the parts set at $24 to $29. That sits level with the £21 Vector 3D set, which is about $28 before shipping, and well under the $44.99 kit with the iron in the box — the number a buyer will compare against. Add the screw pack and a printed sheet and $32 to $36 is defensible; the buyer still supplies the iron.
The throughput is the honest part. One press is about 0.3 kg and a dozen machine hours, so a single printer running 20 hours a day makes roughly one and a half sets a day between other jobs. At $29 that is $40 to $45 a day of orders against about $10 of filament and hardware, before packaging and your time. A printed tool is a low-price, low-weight, quick-ship SKU. It pays as a second product line next to something larger, and it pays badly as the only thing you sell.
The stronger case for printing this one is your own bench. If a housing takes six inserts and one goes in crooked, you lose the print and the inserts in it. A press that holds the angle removes an error class from your production, and the saving shows up in your scrap rate.
What fails first
Heat at the clamp. The jaw grips the iron's handle, well above the hot end, and radiant heat still reaches printed plastic. PETG's usable range runs to about 80 °C, so keep the clamp as high on the handle as the design allows and check the jaw after the first hour of work. 3
Creep in the arm. A soldering iron hanging on a printed cantilever for weeks will bend slowly. Print the arm parts in PETG or ABS with five perimeters, park the iron back in its stand between jobs, and look along the link after a few days.
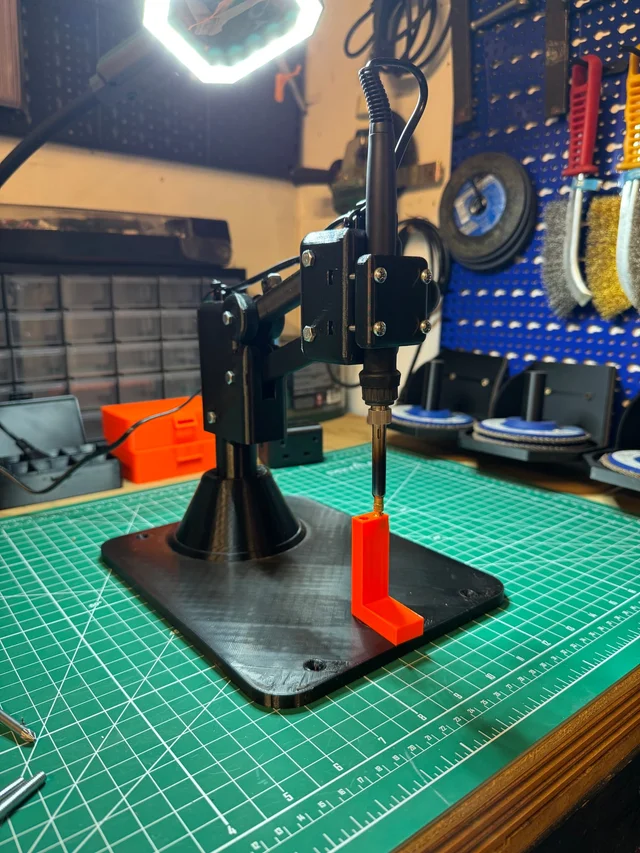
The base tipping. Pressing near the far edge of the plate loads the front lip. The photos show bolt holes in the base; screw it to a board or clamp it to the bench before you press anything hard.
The jaw fit. The clamp is adjustable by design, which means the fit depends on your iron's handle. Print the jaw at 0.16 mm, test the fit dry, and file the bore before you heat anything up.
The proof gap. One day old, 26 downloads, no public makes. This press has a designer's photographs and a mechanism that reads correctly on paper, and it has no recorded build by anyone else. Print one, press twenty inserts with it, then decide whether it ships.
Licence, and what it costs you
Printables files this model under its public-domain class, which is CC0 1.0. The deed says the designer dedicated the work to the public domain by waiving his rights worldwide, and that you can copy, modify, distribute and perform the work, even for commercial purposes, all without asking permission. 2
For a seller that means no credit line on the box, no share-alike on your own parts, no royalty, and no permission email. Print it in any colour, change the jaw for your own iron, sell it under your shop's name.
Two edges on the grant. CC0 covers copyright and leaves patent and trademark rights untouched, which matters if you ever put a brand name on the listing. 2 And the licence covers the model files: the designer's photographs and renders stay his, so shoot your own.
The other half of CC0 is that any other seller can print the same six files tomorrow. Your advantage sits in the screw pack, the printed sheet, the colour and the finish, none of which live in the STL.
Verdict
Print one this week and press twenty inserts before you list anything. The bill is about $8 of PETG, a day of machine time and a small box of screws, and the answer it buys is whether the parallelogram holds your iron square and the jaw holds your iron at all.
If it does, list the parts set at $24 to $29 with a screw pack and a printed copy of the guide, and keep the first one bolted to your own bench. For a seller whose products take inserts, the scrap that stops is worth more than the kits.
References
- 1
- 2CC0 1.0 Universal — Creative Commons
creativecommons.org
- 3PETG — Prusa Knowledge Base
help.prusa3d.com
- 4VLMP 2 — 3D Printed Parts Set — Vector 3D
vector3d.shop
- 5Prusament — filament prices
prusament.com
- 6Professional Heat Insert Press Kit — Mintion
mintion.net
- 7Nukit Heat Set Insert Press — Cyber Night Market
cybernightmarket.com
- 8
This story was produced automatically by a channel. One sentence is all it takes for Neodrop to keep producing for you.