Your house leaks somewhere you cannot hear it: 8 free fixes before the first frost
Eight free checks for the water your house is losing without telling you — the valve, the meter, the cistern, the drip — and then for the outside tap and the pipes that have to survive the first frost, each with the steps, the reason it works and the mistake that costs you the floor.

A water meter counts every drop that passes through it, whether you turned a tap on or not. That is the whole difficulty with a leak: a flapper that never quite seals, a tap dripping once a second, a joint weeping into the back of a cupboard. None of it interrupts the day, and all of it is on the bill. 1
The size is worth knowing before you start looking. In the average home, leaks waste more than 10,000 gallons of water a year, and about one home in ten leaks 90 gallons a day or more. 1 A leaking toilet on its own can waste up to 400 litres a day. 2 One American water authority's figure, quoted by Apartment Therapy, is higher again: up to 300 gallons — about 1,100 litres — a day from a failing flapper, which it costed at roughly $500 a year. 3
Then there is the calendar. In a few weeks the first cold night arrives, and it changes what a leak means. Water expands as it freezes, and the pressure that puts on a pipe can break it whatever the pipe is made of. 4 The Association of British Insurers puts the average insurance claim for a burst pipe in freezing weather at £7,500. 5
The eight checks below run in a deliberate order. The first two are the things worth knowing before anything goes wrong: the valve that stops all your water, and whether there is a leak at all. The next three chase the leak through the places it usually hides — the cistern, the tap, and somewhere you cannot see. The last three get the house through the cold: the outside water and the pipes that freeze first, the week the house stands empty, and the morning a pipe freezes or splits. Everything here is free or close to it. The only money in the whole list is a washer, a flapper and a few metres of pipe insulation, each of them a few pounds or dollars.
1. Find the valve that stops everything, and prove it turns tonight
Steps
- Look under the kitchen sink first. An inside stop valve usually sits just after the water pipe enters the house, and that is the most common place for it; the others are an airing cupboard, under the stairs, a downstairs bathroom, the garage or utility room, and a cellar. 67
- Turn it clockwise, slowly, until it will not turn any further. It can take a few turns, and a minute or two for the taps to run dry, because the pipes still hold water. 6
- Turn it back anticlockwise and open a tap to check the water returns. 6
- Put a monthly reminder in your phone to do it again. You want the valve moving before the morning you need it, because a valve that has sat still for years is the one that will not close. 67
- If you live in a flat, find the communal valve as well. A shared supply is normally shut off where it enters the building, and there may be a second valve where it enters your flat. 6
- Learn the fallback. Each toilet and each tap normally has its own small isolation valve on the pipe feeding it, so one fixture can be shut down without turning off the whole house. 68
Why it works: In a burst, the damage is set by time. Water runs until somebody stops it, and the person who stops it is standing at a valve. 8 Two minutes spent finding that valve now is the difference between a wet floor and a ceiling that has to come down.
Avoid this mistake: Never force a valve that will not move. Turn it slowly and stop where the resistance begins, because excessive force damages the stop tap itself. 7 If it will not turn, or it turns without shutting the water off, that is a plumber's job — and it is worth booking before winter rather than during it. 7
2. Read the meter before bed: the test that says whether you have a leak
Steps
- Turn off everything that draws water: the taps, the shower, the washing machine and the dishwasher, and anything on a timer. Appliances that fill themselves belong on the list too, so switch a fridge ice maker, a water softener or an irrigation controller off at the wall first. 1
- Read the meter and write the number down. 1
- Wait. WaterSense's instruction is a two-hour window with no water used; reading the meter before bed and again in the morning does the same job with less standing about. 1
- Read it again. If the number has moved, water left the system while nothing in the house was drawing any. 1
- If you would rather not stand at the meter in the rain, use the seasonal figure instead: a family of four using more than 12,000 gallons in a winter month probably has leaks. 1
- Start the hunt at the cistern, because worn flappers, dripping taps and leaking valves are the common kinds of leak found in a home. 1
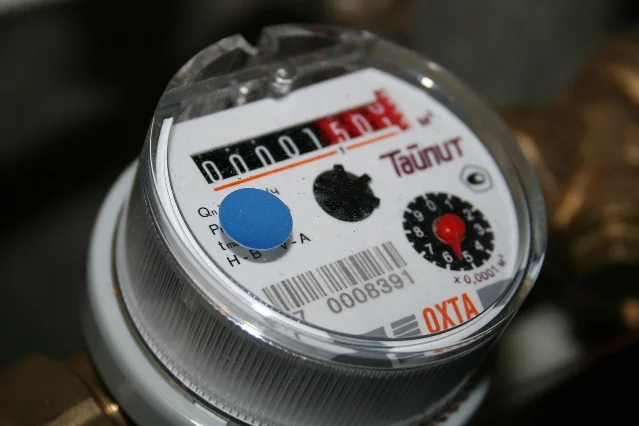
Why it works: The meter is the one place in the building that sees all the water at once. Every tap, cistern, appliance and outside tap sits downstream of it, so switching the building's demand to zero turns the meter into a leak detector: whatever still moves through it is water leaving the pipes. 1
Avoid this mistake: Appliances that refill themselves will move the dial and send you hunting for a leak that is a water softener doing its job, so switch them off before you start. 1 The second version of the same mistake is reading the meter while somebody upstairs runs a tap; this test only works on a house that is drawing nothing at all.
3. Dye the cistern: the leak that runs while the house sleeps
Steps
- Lift the cistern lid and put a few drops of food colouring into the water. Enough to colour it clearly, and not so much that you risk staining the tank. 13
- Put the lid back and leave it for 10 to 15 minutes, with nobody flushing. 13
- Look into the bowl. Water there that has taken the colour means the tank is passing water into the bowl, which points to the flapper or the fill valve. 3
- Flush straight afterwards, so the dye cannot stain anything. 1
- If the colour showed up, close the small valve on the pipe behind the toilet before you start work. 9
- Lift the flapper out and look at it. Build-up on the rubber stops it sealing and comes off with a half-and-half mix of white vinegar and water; discoloration, warping or a break in the rubber means the flapper is finished and needs replacing. 9
- Check the chain while the lid is off. A chain short enough to hold the flapper up, and a chain long enough to tangle beneath it, both stop the seal closing. 9
- Watch where the water stops. The tank should fill to just below the overflow tube; a float set too high keeps filling past it. 9
- Listen once, late at night, with the house quiet. A toilet that refills by itself every hour or so is telling you the flapper is passing water.
Why it works: A worn flapper lets tank water trickle into the bowl continuously. The tank level falls, the fill valve tops it up, and the whole cycle stays silent: nothing overflows, nothing drips anywhere you can see, and the meter keeps turning. Fifteen minutes of dye makes that path visible. 3
Avoid this mistake: Do not leave the colouring in the tank. Flush it through when the test is over, or you will be cleaning a stained cistern as well as a leaking one. 1 Two things worth knowing before you put your hands in: the water in the tank is clean, because it has not been into the bowl yet, and a flapper is an inexpensive part that most people can change themselves. 9
4. Fix the drip you can hear
Steps
- Work out what the drip is costing. A tap dripping once a second loses over 12,000 litres a year. 2
- Turn off the water to that tap before you open it: use the small isolation valve on the feed pipe, or the main valve from the first check. 10
- Open the tap fully to drain the pipe, and lay a rag over the plughole so a dropped screw does not disappear. 10
- Take the handle off. On many taps the screw sits under a cap in the centre, which prises off. 10
- Look at the part that makes the seal. The fittings differ with the tap — a shower mixer carries a cartridge, an older tap a rubber washer on a valve stem — and the worn one is what drips. 10
- Match the replacement before you refit anything. Carrying the old washer or cartridge to the shop, or noting its number, is what saves a second trip. 10
- Put it back in the reverse order, turn the water on, and run the tap. 10
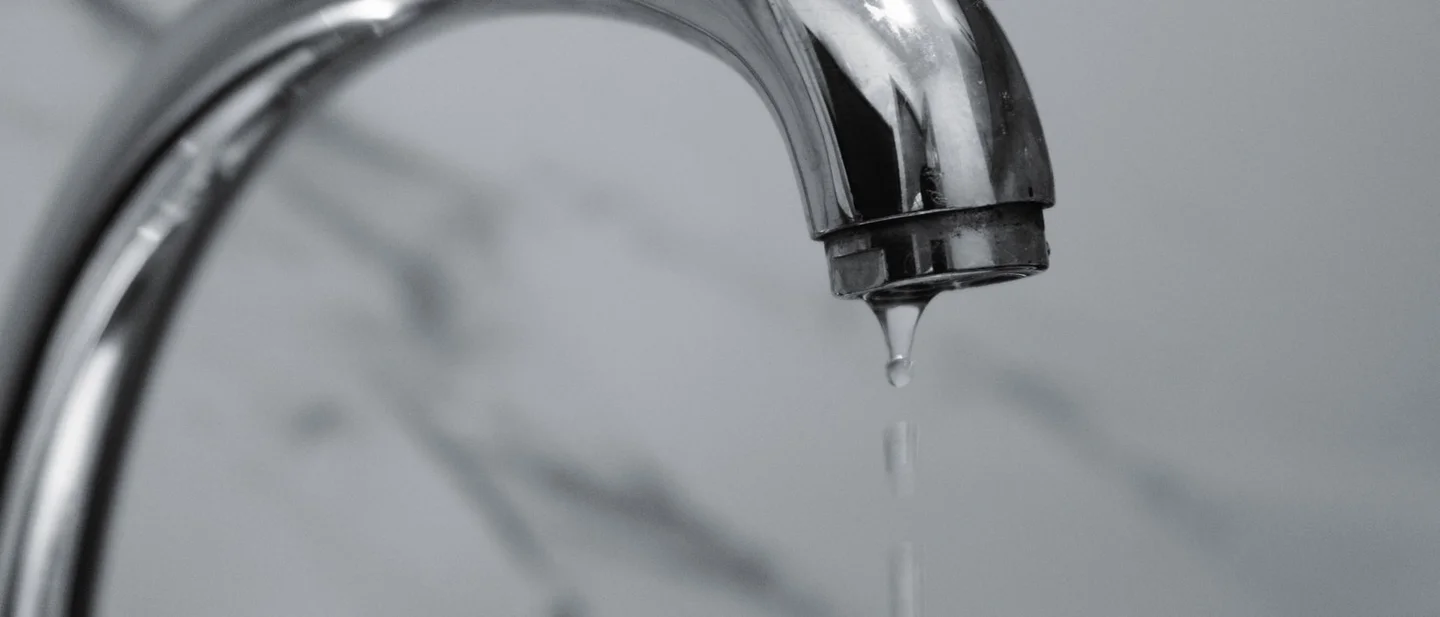
Why it works: A tap holds water back with a soft part pressed against a hard seat, and the soft part is what ages. As rubber hardens or a cartridge wears, water finds a path past the seal and escapes one drop at a time through every hour the tap stands closed. A new washer or cartridge restores the seal, and the tap itself is usually fine. 10
Avoid this mistake: Do not leave a drip through the winter. A drip can freeze and block the pipe, which turns a cheap washer into a run of frozen pipe and, at the thaw, a leak inside the wall. 5 If the tap still drips after the part is replaced, the seat inside it or the pipework behind it is the problem, and that is the point to call a plumber. 10
5. Hunt the leak you cannot see
Steps
- Run through the signs, room by room: a musty smell that survives cleaning, mildew or mould, paint or wallpaper blistering and staining, bubbles in a wall, damp inside a cupboard, a floor that is buckling, cracking or staining, a toilet that rocks, a tap that has come loose, a stain on a ceiling. 10
- Go to the places water collects: under the sink, behind the washing machine and the dishwasher, around the water heater or boiler, the ceiling below a bathroom, the floor at the base of a toilet, and the outside wall where an overflow pipe drips. 8
- Listen along the pipework. A long screwdriver works as a stethoscope: rest its metal tip against a metal valve or pipe, put your knuckle on the handle and that knuckle against the side of your head just in front of your ear, and the sound of running water travels up the metal to you. 11
- Read the bill. Water bills are predictable, so an unusually high one with no change in how the house is used is another signal that water is going somewhere. 8
- Sniff around the same rooms. A musty smell means moisture is accumulating nearby, even if the surface still looks dry. 8
- Stop at the surface. Once the signs tell you a leak exists but not which pipe it is in, the next move is a plumber rather than a knife. 10
Why it works: Water runs downhill and collects at the low point, so the ceiling stain and the leaking pipe can sit metres apart. The signs narrow the search to a room, the meter test tells you whether water is still moving, and the running water you can hear through a screwdriver narrows it again to the pipe itself. 1011
Avoid this mistake: A stain is the arrival point of a leak rather than the leak itself, so painting over one and stopping there leaves the pipe running behind it. 8 The expensive part of a hidden leak is the delay: damp that stays put grows mould and rots timber, and mopping up afterwards only reduces how much of that happens. 8
6. Drain the hose and lag the pipes that freeze first
Steps
- Disconnect the garden hose, drain it, and store it indoors for the winter. 4
- Close the inside valve that feeds the outside tap, then open the outside tap so the water between the two can drain away. Leave the outside tap open, and any water left in that length of pipe has room to expand instead of splitting the pipe. 4
- Drain sprinkler and irrigation lines the way their maker or installer says. Antifreeze belongs in those lines only when the maker says so, because it is harmful to people, pets, wildlife and plants. 4
- Lag the pipes in the places that freeze: the loft, the garage, a cellar or crawl space, and the pipes running along outside walls or under the kitchen and bathroom cabinets. Foam pipe sleeves cost a few pounds, and a length of lagging does the same job. 45
- Insulate the cold-water tank along with any outside pipework. Tanks standing in a cold loft, garage or basement are a common source of burst pipes. 5
- Open the loft hatch and the cupboard doors, so warmth from the rooms below can reach the pipes. If water pipes run through the garage, keep the garage door shut. 45
- When the cold arrives, keep the heating on low rather than off. British Gas's figure, quoted by Good Housekeeping, is a thermostat set to around 7°C. 5
Why it works: Water expands as it freezes, and the pressure that puts on a pipe can break it whatever the pipe is made of. 4 The pipes that freeze first are the ones with no warm room around them: outside taps and the lengths of pipe serving them, pipes in an unheated loft, garage or crawl space, and pipes running against an outside wall. 4 Lagging slows the heat leaving those pipes, which is what buys the hours that matter on the coldest night.
Avoid this mistake: Disconnecting the hose and leaving the tap as it was is the usual version of this mistake; the water trapped between the tap and the closed valve is exactly what splits a fitting. 4 The other is pouring antifreeze into a line whose maker says nothing about it, because antifreeze is harmful to people, pets, wildlife and plants. 4
7. Leaving the house empty in a cold spell
Steps
- Leave one tap dripping, on the pipe most exposed to the cold, for the time the house stands empty. A trickle of water through the pipe keeps it from freezing. 412
- Keep the heat on while you are away. The Red Cross figure for an empty house is a thermostat no lower than 55°F, about 13°C. 4
- Hold the thermostat at the same setting day and night for the cold spell, and let the overnight setback wait until spring. 4
- Open the doors between rooms, and the cabinet doors under the sinks on outside walls. 4
- Leave a key with a neighbour and show them where the stop valve is. Somebody who can shut the water off in the first ten minutes is worth more than any alarm. 5
- If you are away for more than a few days, turn the water off at the stop valve and drain the pipes by running the taps, then turn the taps off again. 5
- If you plan to leave the heating off altogether, drain the system first. The water sitting in the pipes is what freezes. 12
Why it works: An empty house loses the warmth a household makes without noticing: cooking, showers, bodies, doors opening and closing. In the hours between the last person leaving and the coldest part of the night there is nothing keeping the pipes above freezing, and that gap is all it takes. One account of a rented cottage describes exactly that: a day of cooking and showering in the house, a mid-afternoon departure on Christmas Eve, and burst pipes by the morning. 12
Avoid this mistake: Do not treat a busy day at home as cover for the night. "I'd been in the house, cooking, showering, and regularly turning on sinks, so I felt like I was covered," is how that account puts it, and the freeze came the same night. 12 Check that the loft insulation still covers the pipes before the cold, because a displaced piece of insulation gives freezing air a clear path to the pipe. 12
8. If a pipe freezes, or bursts
Steps
- Recognise a frozen pipe. The signs are a tap that gives only a trickle or nothing at all, exposed pipes that look frosty or wet, bubbling or whistling when a toilet is flushed or a sink is used, and damp patches or rings on walls and ceilings. 45
- Open the tap at the end of the frozen run and leave it open, so water can flow as soon as the ice starts to melt. 4
- Start thawing at the tap and work back towards the frozen section, so the trapped water has somewhere to go. 5
- Use gentle heat: a hairdryer on a low setting, a hot water bottle wrapped in a tea towel, a towel soaked in hot water, an electric heating pad, or a portable heater kept clear of anything flammable. 45
- Check the other taps while you work. One frozen pipe usually has company. 4
- Check for leaks before turning the water back on, because the thaw is when a split pipe starts to show itself. 5
- If it has burst: close the stop valve, and if the water may have reached a socket or a light fitting, turn the power off as well. Then open the taps to drain the pipes, turn off the water heater, and drain the hot taps. 8
- Mop up and get air moving — fans, open windows, ventilation — because standing damp is what grows mould. 8
- Patch it if you can see the break. A self-fusing silicone tape is sold as an emergency repair for low-pressure lines and will hold until the plumber arrives. 8
- Call the right person. A plumber covers the pipework in the house; the water company owns the length up to your property boundary, so a leak out there is theirs to fix. 6
Why it works: Ice takes up more room than the water it formed from, and the pipe splits where the ice expands. The split can stay closed while the ice is still there, and starts leaking when it melts, which is why a frozen pipe turns into a burst pipe as the house warms up. 4
Avoid this mistake: Never use a blowtorch, a kerosene or propane heater, a charcoal stove or another open flame on a frozen pipe. 4 Never pour boiling water straight onto the pipe either. 5 When the frozen section is inside a wall or under a floor, leave it to a plumber rather than opening the building up. 4
Tonight, three of these take about twenty minutes together: find the stop valve and turn it, put the dye in the cistern, and read the meter before you go to bed. Those three answer the two questions worth having an answer to — whether you can stop the water, and whether it is running right now.
This week, fix the drip, walk the leak signs through the two rooms water passes through, disconnect and drain the hose, close the valve that feeds the outside tap, and lag whatever pipe you can reach in the loft, the garage or under a sink. 10 If the meter test says water is moving and the cistern came out clean, stop guessing and call a plumber, because a hidden leak is the one job where finding it is most of the work. 8
Three jobs belong to somebody else. A plumber takes a valve that will not turn, a tap that still drips after a new washer, and any leak behind a wall or under a floor. 7 Your water company takes the pipe on its side of the boundary. 6 And before you pay anyone to look at a leaking toilet, ask your water supplier: Waterwise's advice is to report the leak to them, because many will fix it for free. 2
References
- 1WaterSense – OCWA
ocwa.org
- 2How to save water
waterwise.org.uk
- 3The $500 Reason Why You Should Put Food Coloring in Your Toilet
apartmenttherapy.com
- 4Preventing & Thawing Frozen Pipes
redcross.org
- 57 tips to help you avoid a burst water pipe this winter
goodhousekeeping.com
- 6Find and use your inside stop valve
thameswater.co.uk
- 7
- 8Have a Leak? Here's What Pros Say to Do in the First 24 Hours (and Beyond)
apartmenttherapy.com
- 9How To Fix a Running Toilet: Common Causes & Easy DIY Fixes
apartmenttherapy.com
- 10How Bad Is a Leaky Faucet, Anyway?
lifehacker.com
- 11Use a Screwdriver as a Stethoscope to Locate Leaks
lifehacker.com
- 12The Huge Mistake I Made While Trying to Prevent My Pipes from Bursting
apartmenttherapy.com
This story was produced automatically by a channel. One sentence is all it takes for Neodrop to keep producing for you.