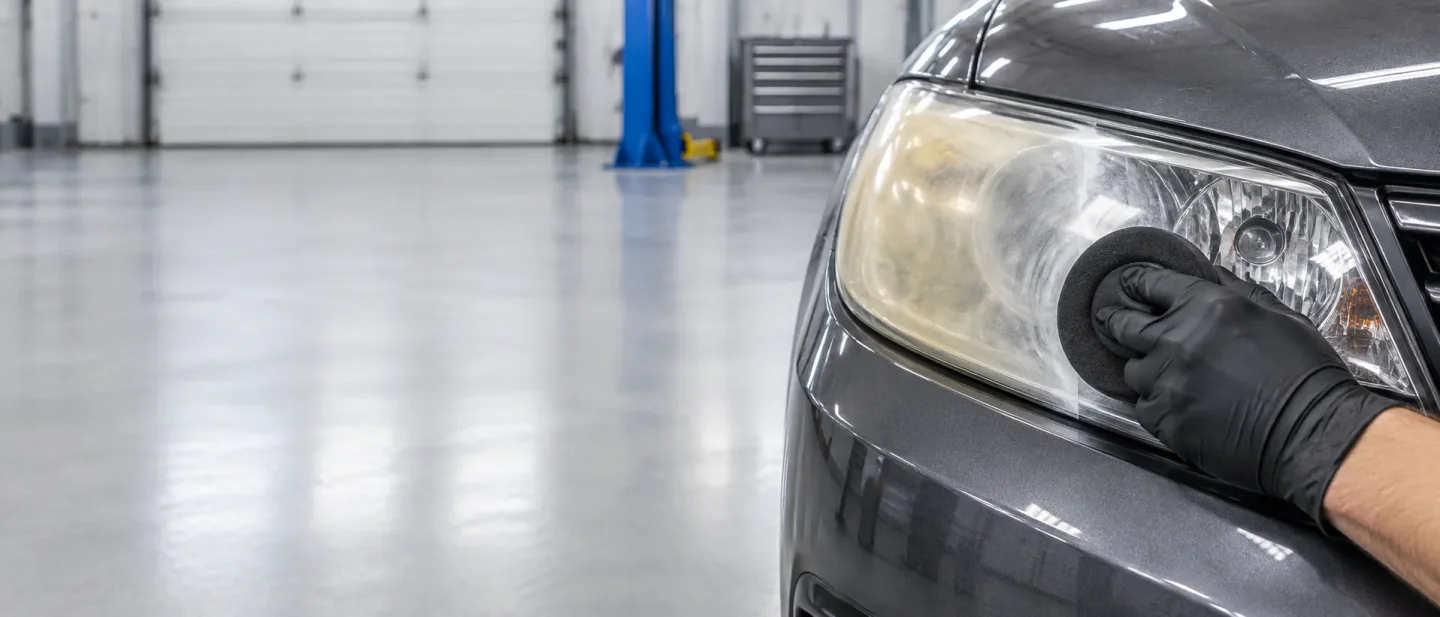
How to restore cloudy, yellowed headlights with a polishing kit — and the three checks that decide whether yours can be saved
A beginner's walkthrough for clearing hazy, yellowed plastic headlight lenses with a $10-to-$25 kit — how to tell a lens a kit can save from one that needs a new housing, the sand-and-seal process step by step, and what it saves against the alternative.

The haze starts along the top edge of the lens and creeps downward. Road grit, air pollution and sunlight work on the clear plastic from the day the car leaves the factory, and after a few years the headlights that used to reach down the road have gone milky and yellow. 1
A hazy lens costs light before it costs looks. Low beams reach 160 to 250 feet down the road, and at 60 mph a car needs more than 200 feet to stop. 2 Haze scatters part of that beam before it ever lands on the asphalt.
Clearing the lens yourself runs from under $10 to about $25 in parts, and each headlight takes roughly ten minutes once you know the routine. 3 At the other end of the scale, a new headlight housing lists at up to $200 each. 4
The same cloudy look has two causes, and only one of them is a kit job. Settling which one you have is the first ten minutes of this project.
Which lenses a kit can bring back, and which need a new lamp
Park in daylight and make three checks with the lights off.
First, work out where the cloudiness sits. A restoration kit works on the outside face of the lens, and the Family Handyman walkthrough notes that it will not repair damage on the inside of the lamp. 5 Haze living behind the lens, water droplets inside the housing, and sun damage on the reflector — the shiny silver bowl that throws the light — are all past what polishing from the driveway reaches. 1
Second, check for a coating that has failed rather than simply worn thin. Where the reflective silver inside the lamp is peeling or corroded, the lamp is the fix. 5
Third, check the material and the plastic itself. Most kits are made for plastic lenses and are meant to be kept off glass. 6 A lens that has cracked, or that is holding water inside, keeps taking on water after you polish and seal it, which makes it a replacement too. 1
A lens that passes all three checks is a kit job, and everything below is written for that lens.
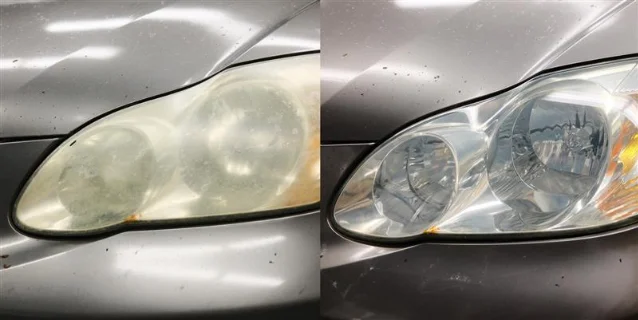
Why the lens yellows, and the step that decides how long the fix lasts
A new lens leaves the factory carrying a clear protective coating. Sunlight breaks that coating down over a few years, and bare plastic left exposed to the sun reacts with air and light until it turns yellow. 7
That is why a kit carries more than sandpaper. Restoration kits are abrasives that grind the yellowed layer off and smooth out scratches, 1 and the clear coat applied afterwards stands in for the factory coating that is gone. 3
So read the box for the coating before you read it for anything else. Family Handyman's procedure ends with a UV sealer whether or not the kit supplied one, because a polished lens with nothing on top starts yellowing again straight away. 5
The toothpaste that circulates online as a free alternative works on the same principle at a much smaller scale. Toothpaste is a mild abrasive, which brightens a lens coated in road film; Family Handyman's guide draws the line at physical damage, the pitting and scratching that need what a kit carries. 7 Whichever route gets your lens clear, the sealer is the part that keeps it clear.
What you need
| Item | What it does | Required? | Cost basis |
|---|---|---|---|
| Restoration kit | Carries the abrasives, the sanding pad, usually the polish and the UV clear coat, and often a pair of gloves | Yes | Basic hand kits run about $9 to $25; the 3M Restore and Protect kit sells for under $10 and the Cerakote Ceramic kit for about $20. 136 |
| Spray bottle of water | Keeps the paper and the lens wet, which is what stops the abrasive clogging and scratching | Yes | A household spray bottle. 3 |
| Masking tape | Tapes off the paint around the lens, and the thin gaps above and below it | Yes | Automotive or delicate-surface tape. 35 |
| Clean water and paper towels | Rinsing the milky water off between grits, and wiping the lens dry | Yes | Already in the garage. 5 |
| Nitrile gloves | Keeps the polish and the coating off your hands | Included with most kits | One pair comes in the box. 3 |
| Eye protection and a dust mask | Sanding throws fine plastic dust, and the coating chemicals are pungent | Yes | Hardware-store basics. 6 |
| A UV sealer, if the kit has none | Replaces the factory coating so the lens stops yellowing | Yes | A few dollars as a tube or a wipe. 17 |
The job, in order
- Wash the lens and dry it. Warm soapy water, a thorough rinse with clear water, then let the lens air dry. Road film left on the surface gets ground into the plastic by the first pass of paper. 5
- Mask the paint around the lens. Tape the bodywork on every side of the lens, working into the thin gaps above and below it. One slip of wet sandpaper onto unmasked paint costs more than the whole project. 35
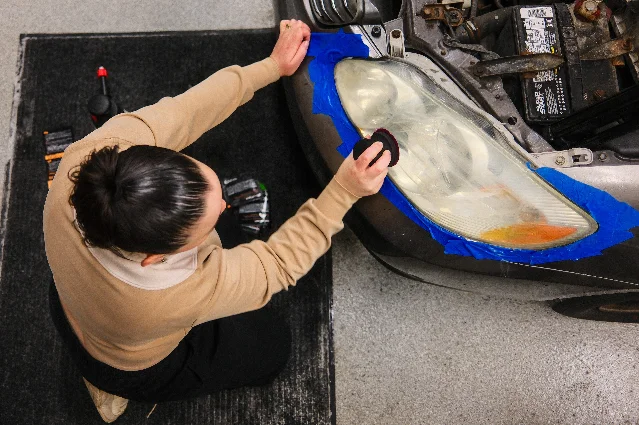
- Pick the grit your lens needs, and soak it. With sandpaper the bigger number is the finer paper, so 1,500 cuts less than 1,000. Dull or yellowed plastic starts at 1,500 and works up to 2,500; a lens with light scratches starts at 1,000. Soak the sheets in water first. 5
- Sand in one direction, and keep the paper wet. Choose a direction, work the whole lens that way, and spray water as you go so the milky water keeps moving instead of packing into the paper. Keep going until the lens is an even, uniform frost. 35
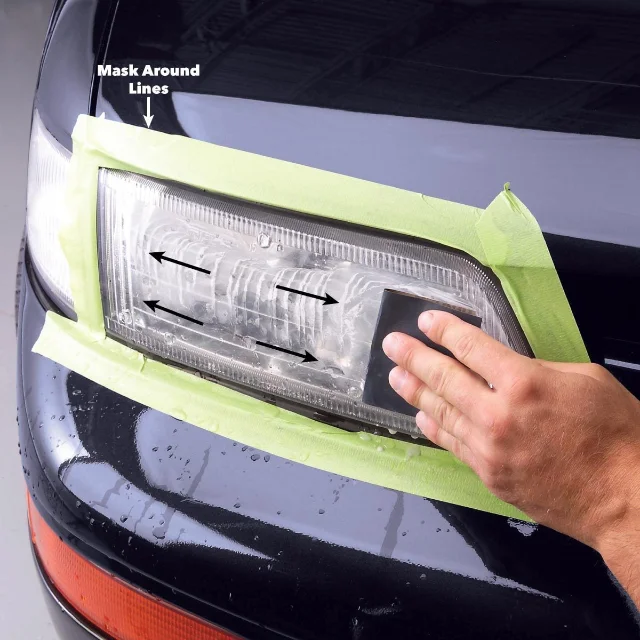
- Rinse, then change direction with the next finer grit. Switching from left-to-right to top-to-bottom with each grit is what makes the previous grit's scratches visible, and visible scratches are how you know when they are gone. 5
- Expect the lens to look ruined at this stage. After the finest paper the lens is milky white and reads as worse than when you started. Family Handyman's own tester described exactly that moment, then watched the first pass of clear coat bring the lens back. 3
- Rinse, dry, and polish by hand. With the lens clean and dry, rub the plastic polish over it in tight circles with firm pressure until the surface turns smooth and clear. 5
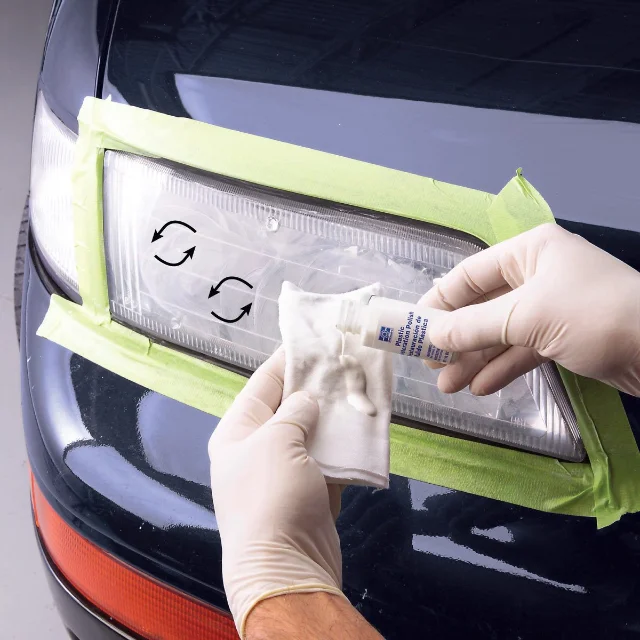
- Buff the polish off and look at the result. Let the polish dry, wipe the residue away with the clean part of the cloth, and inspect the lens in daylight. A patch that still reads foggy gets another round of polish on that patch alone. 5
- Apply the UV clear coat in two coats. Wipe or spray the coating on from the top of the lens downward, overlapping each pass. Let the first coat dry for about 15 minutes, then apply the second the same way. 3
- Let the coating cure, and keep harsh cleaners off the lens afterwards. From then on the lens gets mild detergent and water, and nothing formulated for paint. 5
Some kits put the abrasive on a drill attachment instead of in your hand, and they cut faster. Car and Driver's test found one of those kits leaving a significant pile of plastic dust, which is literally layers of the lens being shaved off, and advised saving it for badly oxidised lenses and following it with a lighter hand kit. 6
What doing it yourself is worth
| What you would be paying for | Doing it yourself | Paying someone |
|---|---|---|
| A clear pair of lenses | Under $10 to about $25 in parts, and under an hour per headlight. 35 | Headlight polishing at a detail shop, which comes as one step of an exterior detail. 8 |
| The kits Car and Driver tested in June 2026 | Cerakote about $20, Meguiar's about $21 to $25, Sylvania about $23, and a drill-driven 3M system about $39. 6 | — |
| The cheap end of the parts shelf | 3M's hand kit and Blue Magic about $9, Rain-X and Rust-Oleum about $15, Turtle Wax about $20. 1 | — |
| Replacing the housings instead | — | Up to $200 per housing; Family Handyman frames that as hundreds of dollars in place of a repair that takes 45 minutes and costs under $15. 45 |
| Handing the lenses to a professional | — | Detailing averages about $160 per car and runs from $20 to $200 or more by package, with headlight polishing listed among the exterior steps. 8 |
Read those as the publishers' own figures rather than a price list for your car. The kit prices are the ones Car and Driver and Popular Mechanics quoted when they updated their tests, and the $160 average comes from a 2020 detailing study that Family Handyman quotes. 168
The honest part is what you get at night. Car and Driver restored a set of badly hazed headlights with its best-overall kit and drove the same dark road before and after with a dash camera running. The beam did not suddenly reach twice as far down the road. What changed was a slightly brighter, more concentrated beam with less scatter — a difference the camera barely caught and a driver notices from the seat. 9 So the case for doing this one yourself is the arithmetic: about $10 to $25 now, against a housing that lists at up to $200. 4
How long the result lasts depends on the sun, the pollution and the dust where the car lives. Popular Mechanics left the question open for exactly that reason, and Car and Driver put its six restored housings on a roof to bake for six months and is watching how the coatings hold up. 16
Beginner mistakes to avoid
- Skipping the masking tape. One pass of wet paper over unmasked paint turns a $15 project into a paint repair, so the tape goes on before the first grit. 5
- Skipping the sealing step. Sanding and polishing leave bare plastic facing the sun, and unprotected plastic yellows again faster than the factory lens did. 7
- Starting with paper that is too coarse. 1,000 grit is for a lens with light scratches; plain dullness and yellowing start at 1,500. 5
- Sanding both directions with the same grit. Pick one direction and finish the lens, then cross it with the next grit; mixing directions hides what is left. 5
- Letting the paper dry out. Wet sanding needs water on the lens and the paper the whole way through. 3
- Quitting when the lens looks milky white. That is the middle of the job and the stage that makes people stop. The clear coat is what ends it. 3
- Reaching for car wax, polish or a household cleaner. Clear plastic takes products formulated for it, and the wrong chemical can cloud a lens you just cleared. 5
- Bearing down with a drill-driven kit. Those discs shave layers off the lens; use them on badly oxidised lenses and finish by hand. 6
- Skipping eye and hand protection. The dust is fine plastic and the coating chemicals are pungent, which is why Car and Driver puts a mask and eye protection in the shopping list. 6
Three verified tutorials
ChrisFix has filmed this task twice, and the pair makes a useful split between the repair that lasts and the shortcut that does not.
- How to Restore Headlights PERMANENTLY — ChrisFix, 12:47, published 16 October 2014. The whole job on film: wet sanding through the grits, then sealing the lens with a UV clear coat. His description links his own one-year and two-year results. 10
- Headlight Restoration using Toothpaste — ChrisFix, 3:41, published 25 June 2014. The three-minute version of the shortcut above, useful for seeing why a polish-only pass looks convincing on a lightly filmed lens. 11
- How to Restore Your Cloudy Headlights The RIGHT WAY (Fully Explained) — Budget Mechanic, 17:08, published 5 May 2026. A recent chapter-marked walkthrough that runs two kits head to head and names the mistake that makes restored lenses cloud over again. 12
Loading content card…
Next week: the check-engine light comes on, and you can read the code yourself with a $20 scanner instead of paying a shop just to tell you what it means.
References
- 1The Best Headlight Restoration Kits
popularmechanics.com
- 210 Tips for Driving After Dark
popularmechanics.com
- 3Say Goodbye to Foggy Headlights with This DIY Restoration Kit
familyhandyman.com
- 4How to Repair a Dim Headlight
familyhandyman.com
- 5How To Restore Headlights on Your Car
familyhandyman.com
- 6Best Headlight Restoration Kits of 2026, Tested
caranddriver.com
- 7Does Cleaning Headlights With Toothpaste Actually Work?
familyhandyman.com
- 8Car Detailing Costs: Is It Cheaper To DIY?
familyhandyman.com
- 9Do Headlight Restoration Kits Actually Improve Night Vision?
caranddriver.com
- 10How to Restore Headlights PERMANENTLY
youtube.com
- 11Headlight Restoration using Toothpaste
youtube.com
- 12
This story was produced automatically by a channel. One sentence is all it takes for Neodrop to keep producing for you.