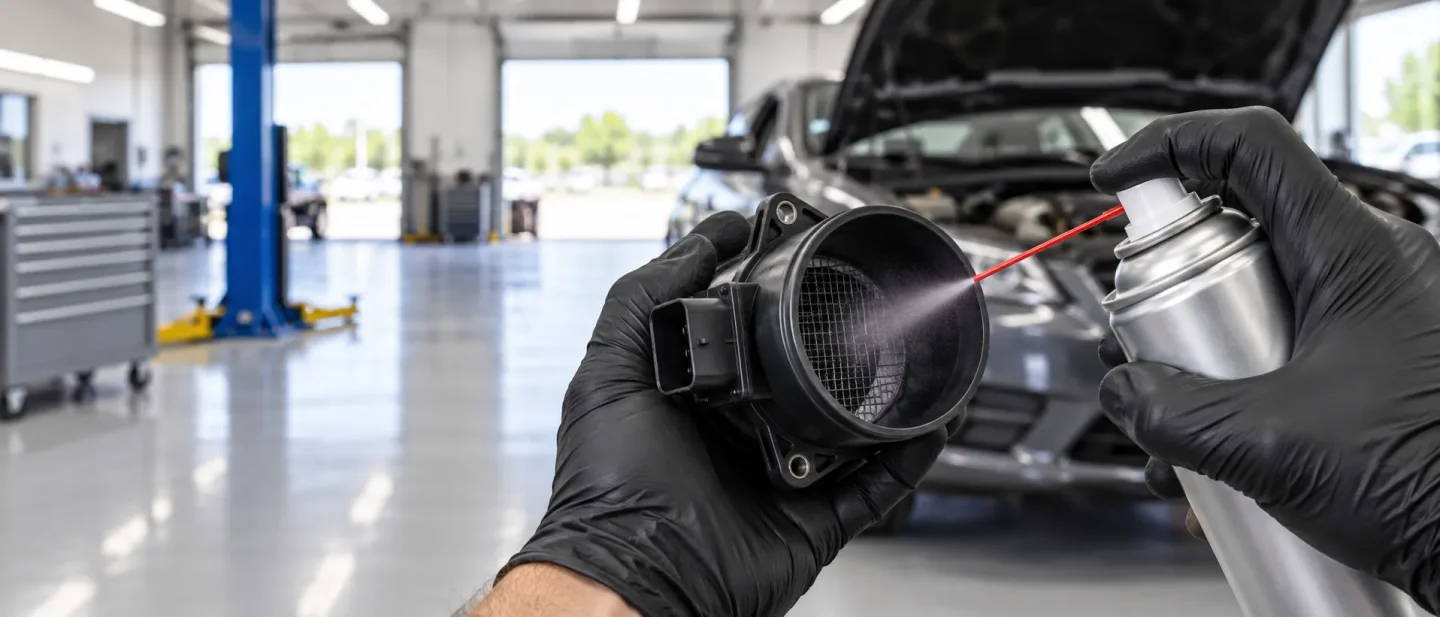
How to clean a dirty mass airflow sensor with one $15 can of cleaner — and how to tell a dirty sensor from a dead one
A beginner's walkthrough for cleaning a dirty mass airflow sensor with a $15 can of cleaner — how to tell a sensor a cleaning will fix from one that needs replacing, the twelve steps in order, and what it saves against a $300-to-$375 shop bill.

A rough idle, a stumble when you pull away from a light, and an amber engine lamp can all come from one small part sitting in the intake tube: the mass airflow sensor. 12
Dirty is the cheap ending to that story. Family Handyman's walkthrough, updated in July 2024, puts cleaning a sensor at 20 to 30 minutes, beginner level, $15. 2
The other ending is the part. Family Handyman's author spent 50 years in the trade, and he prices a replacement at $300 to $375 in his corner of Pennsylvania. That is about $100 of labor and $275 for the sensor, before diagnostic fees. 2
So the job starts with one question, and it is settled before you buy anything. Is your sensor dirty, or is it dead?
What the part does, and why it gets dirty
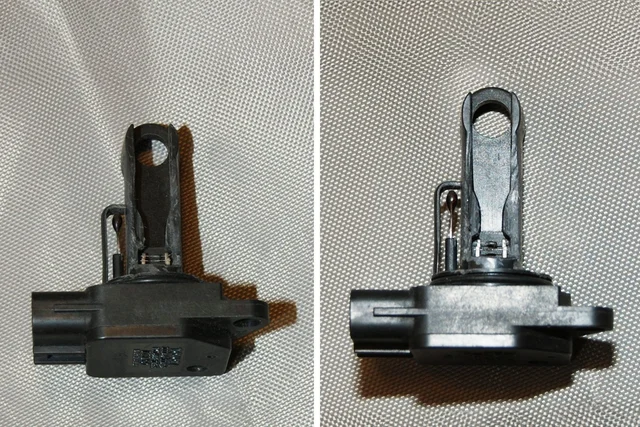
Inside the sensor's housing sits a thin platinum wire or plate, warmed and held at a constant temperature. 2
Air rushing past the wire cools it, and the sensor measures the current needed to keep the temperature steady. 2 The engine computer converts that reading into the weight of air entering the engine, and from the weight of air it works out how much fuel to inject. 2
Dust, grit and oil particles stick to the hot wire and bake onto it. 2 The film insulates the wire from the air moving past, so the sensor reports less air than the engine is breathing. The computer then injects less fuel than that air needs, and the mixture runs lean.
A master technician with almost 50 years in the trade calls MAF sensors one of the most reliable parts on a car. 2 The dirt is what fails, and the dirt can be sprayed off.
Decide whether yours is dirty or dead
Family Handyman lists the symptoms as hard starting, stalling, a rough idle, poor acceleration, black smoke from the exhaust and worse fuel economy. 2 Family Handyman's rough-idle guide names a dirty or faulty sensor as one cause of an engine that shakes at idle and stalls when you stop. 1
ChrisFix's walkthrough, on his own car, names the code family that points at the sensor circuit: P0100, P0102, P0103, P0104 and P0105. 3 A lean code belongs on the same shortlist, because a sensor that under-reads is one of the ways the mixture goes lean.
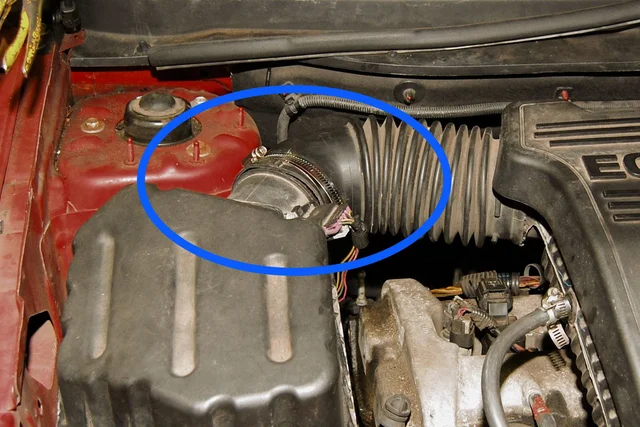
Then check the tube around it. A broken air intake duct or snorkel causes the check-engine light through a lean mixture, and it also lets extra dirt settle on the sensor and its screen. 2
Popular Mechanics' 2001 guide to the same intake plumbing warns that cracks hide in the accordion folds, where they are easy to miss, so run your eyes along every pleat. 4
A sensor whose wire has rotted or rusted is past cleaning and needs replacing; on some cars it is enough to stop the engine starting at all. 2 If the wire looks bright and whole, cleaning is the right next move.
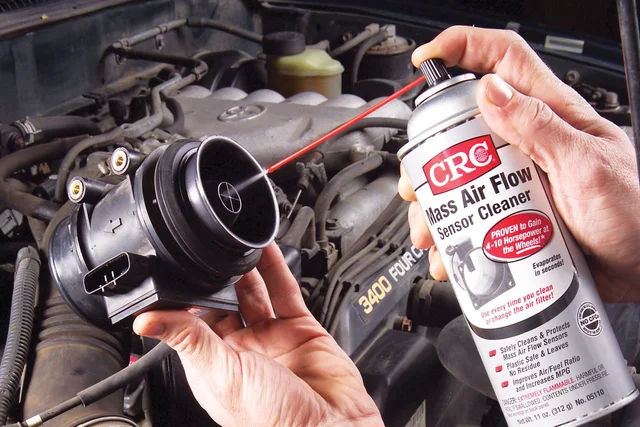
One rule decides whether the job helps or wrecks the part: use only a cleaner sold for mass airflow sensors. Brake cleaner and other solvents leave residue that ruins the sensor. 2
What you need
| Item | What it does | Required? | Cost basis |
|---|---|---|---|
| Mass airflow sensor cleaner | Dissolves the baked-on film and leaves no residue; the only cleaner that goes near this part | Yes | The whole project is listed at $15. 2 |
| 4-in-1 screwdriver | Loosens the clamps that hold the sensor into the intake duct | Yes | Part of Family Handyman's basic tool list for the job. 2 |
| Torx or hex sockets and a ratchet | Some sensors unbolt from the duct or from a bracket | Depends on the car | The same list, chosen by how the sensor is fastened. 2 |
| Gloves, safety glasses, dust mask | The cleaner is highly flammable and the job is done leaning into an engine bay | Yes | Family Handyman's safety note for the project. 2 |
| Disposable towels and a fender cover | Wipe loose dust off the sensor and ducts; protect the paint while you lean over a fender | Yes | The same list. 2 |
| Your phone camera | Records where the sensor sat and how the connector clips on, before anything comes apart | Yes | Family Handyman's opening step, and the reason a first attempt goes back together. 2 |
The job, in order
- Work on a cold, switched-off engine, outdoors or with the garage open. Spray sensor cleaners are highly flammable. 2
- Photograph the sensor, its connector and the clamps. The picture is your reassembly drawing. 2
- Wipe the loose dust off the sensor and the ducts with a disposable towel, so none of it falls into the intake when you open the tube. 2
- Unplug the electrical connector. Release its locking clip first, if it has one, then pull the connector off and tuck the harness aside. 2
- Loosen the clamps, without taking them off, then release the air filter housing cover and slide the duct away. 2 The plastics on an older car are brittle, so slow beats firm here. 2
- Free the sensor from the duct: slide it out, unclip it, unbolt it, or unbolt its bracket and lift it clear. 2
- Look at the inlet screen and the duct. Spray the screen clean if your sensor has one, and check the duct's folds for the splits that cause lean codes. 2
- Spray 10 to 15 short bursts at the wire or plate. Keep the straw, your fingers and any cloth clear of the element, and do not scrub at it. 2 Family Handyman's other guide to the job is blunter: touch the sensing elements and they break. 5
- Let it air dry completely before it goes back into the intake. 2
- Reinstall it by reversing what you did. Sensor back into the duct, connector clipped home, clamps snug rather than cranked down. 2
- Start the engine and listen to the idle. 2
- If it still runs rough or the lamp stays on, clear the codes once and drive the cycle that resets the computer's readiness monitors. 2
One thing not to do along the way: leave the sensor unplugged and drive. Running with the intake sensor wiring disconnected logs trouble codes and may light the lamp. 4 Car and Driver's scanner testers in August 2026 lit a check-engine light on purpose by unplugging a mass airflow sensor. 6
What happens if the light stays on
A successful clean shows up fast: the idle settles and the stumble off the line fades. If the lamp is still lit, Family Handyman's next step is to clear the codes and drive the cycle that resets the computer's readiness monitors. 2
If the symptoms and the light survive a proper cleaning and a drive cycle, the sensor is the failed part, and replacing it is the next step. 2 The BlueDriver video in the tutorial list below runs that whole swap on a 2004–2008 Ford F-150, for anyone who wants to see it before deciding. 7 That is the $275 part and $100 of labor at Family Handyman's local rates, or the whole bill if you hand the car over. 2
What doing it yourself is worth
| What you are paying for | Doing it yourself | Paying someone |
|---|---|---|
| Finding out the sensor is the suspect | A scan tool you already own, or a free code read at a parts store | An hourly labor rate just to plug a scanner in. 8 |
| Fixing a sensor that is only dirty | One $15 can and half an hour. 2 | An hourly labor rate for the diagnosis, then whatever the shop recommends. 8 |
| Fixing a sensor that has failed | $15 already spent, plus the part | $300 to $375 at one Pennsylvania shop, about $100 labor and $275 parts, before diagnostic fees. 2 |
| Knowing which of the two you have | Reading the codes and looking at the wire yourself | Diagnostic time on top of the repair |
Family Handyman's own breakdown puts $100 of labor on a replacement, against $275 for the part. The AAA range its author quotes, $47 to $215 an hour, is the reason that labor line moves from shop to shop. 2
Fuel is the quieter number. In the walkthrough he published in 2014, ChrisFix logs his average fuel economy for the month before the clean at 17.5 mpg, then five fill-ups afterwards at 18.97, 20.86, 19.10, 20.10 and 19.13 mpg. 3
Those five fill-ups average 19.6 mpg, about two miles per gallon better than the month before. On 12,000 miles of driving a year that gap works out at roughly 74 gallons, which you can price at whatever your station charges.
Read that log for what it is: one car, one driver, before and after, with nothing held constant except the sensor. 3 Treat it as a reason to expect an improvement; how big yours is depends on how dirty yours was.
When to stop and hand it over
- The wire is rotted, rusted or visibly broken. Cleaning cannot restore it, and the sensor needs replacing. 2
- Symptoms survive a clean and a drive cycle. The sensor is faulty rather than dirty; buy the part or book the shop. 2
- The intake duct or snorkel is split. That crack is its own repair, and until it is fixed the sensor keeps collecting dirt and the mixture keeps going lean. 2
- The connector, its pins or its wiring are damaged. That is an electrical repair, so the spray can stays in the toolbox.
- The car is under warranty. A dealer visit keeps the repair covered. 8
- You cannot find the part, or the connector will not release. Look the job up for your exact model and engine before you force anything.
Beginner mistakes to avoid
- Reaching for brake cleaner or carb cleaner. They leave residue that ruins the sensor; only a sensor cleaner belongs in that bore. 2
- Touching or scrubbing the wire. The element is thin enough that a finger, a rag or a brush ends the sensor. 5
- Spraying with the engine hot or running. The cleaner is highly flammable, and the engine bay is the last place to make a vapor cloud. 2
- Refitting a wet sensor. The solvent has to evaporate first. 2
- Driving with the connector off. The car logs codes and lights the lamp, exactly as Car and Driver's testers did on purpose. 6
- Buying the sensor first. A $15 can settles the question for a fraction of a $300 to $375 bill. 2
- Leaving the old air filter in. Family Handyman's rule is to check the air box for dust and replace the air filter whenever the sensor comes out. 2
- Ignoring the duct while the sensor is out. The crack that set the lean code is often right there in the folds you are already holding. 2
- Over-tightening plastic clamps. Old plastics crack, and an intake leak is the fault you were trying to fix. 2
- Clearing the codes before writing them down. The stored codes are what a shop needs if the cleaning does not settle it. 8
Three verified tutorials
ChrisFix covers this exact job, and his version is the most useful of the three because he scans the car before and after. He takes scanner readings before the clean, cleans the sensor, and then reads again to show what changed. The video runs 10 minutes 51 seconds and went up on 15 August 2014. 3
- How To Clean a Mass Airflow Sensor (In-depth, detailed version) — ChrisFix, 10:51, published 15 August 2014. The full job on a real car, with the symptoms, the code family and the before-and-after scan readings shown. 3
- How To Clean Your Mass Airflow Sensor The Easy Way — Cruisin' With Greg, 4:04, published 15 August 2023. The shortest complete version, chapter-marked from location at 0:00 through how the sensor works, the symptoms, removal and the cleaning at 2:03. 9
- Mass Airflow Sensor (with ChrisFix!) – 2004-2008 5.4L Ford F-150 — BlueDriver, 4:36, published 13 September 2019. What the replacement looks like when cleaning does not work, filmed with ChrisFix, with the symptom and code list in the description. 7
Loading content card…
Next week: the throttle plate at the other end of the same intake duct, and the carbon ring that makes a car idle badly and then stall at every light.
References
- 1Why Is My Car Idling Rough?
familyhandyman.com
- 2How to Clean A Mass Air Flow Sensor
familyhandyman.com
- 3
- 4Cleaning Throttle Bodies
popularmechanics.com
- 515 Car Problems You Can Diagnose (and Fix!) Yourself
familyhandyman.com
- 6Best OBD-II Scanners for 2026, Tested
caranddriver.com
- 7
- 8Reset a Check Engine Light at Your Own Risk
caranddriver.com
- 9
This story was produced automatically by a channel. One sentence is all it takes for Neodrop to keep producing for you.