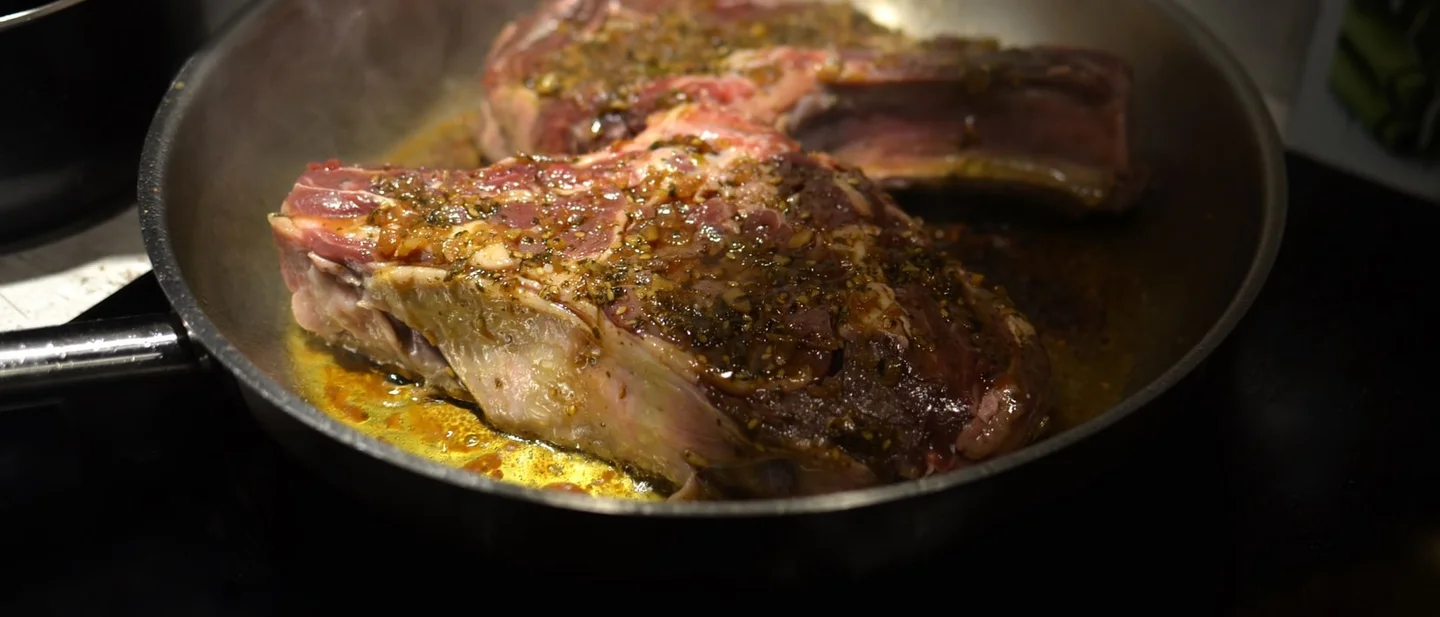
Your meat is dry by the time it reaches the plate: 8 free fixes, from cut to slice
Eight free fixes for meat that keeps coming out grey and dry — the cut you pick, when the salt goes on, how hot the pan is, and how long you leave it before the knife.

Meat goes dry for reasons that happen before the plate. Water leaves it while it cooks, and then more leaves it when you cut. Most dry meat is lost at one of the eight moments below.
One number runs under all of them. Whole cuts of beef, pork, lamb and veal are safe at 145°F (63°C) after a three-minute rest. 1 Ground meat needs 160°F (71°C), and poultry 165°F (74°C). 1
Everything here uses a pan, salt and a knife, plus one fix that works better with a thermometer you already own. Nothing on the list requires a purchase.
1. Match the cut to the heat before you choose the pan
Steps
- Look at where the cut came from. Shoulder, rump, leg and shin did the work, so they are full of connective tissue.
- Cook those cuts slowly and wet: pot roast, stew, braise, covered. They are served well done. 2
- Look at the loin, the strip along the back. Little connective tissue, so it wants quick, dry heat and a specific doneness. 2
- Decide the method before you decide the marinade, the rub or the pan.
Why it works: Slow cooking melts the collagen in a tough cut and turns it tender. 2 A shoulder becomes shreddable; a loin cooked the same way becomes shoe leather.
The moisture difference is measurable. Two 6 lb rib roasts were cooked to medium-rare, one at 450°F and one at 250°F. 2 The hot roast lost nearly 25 per cent of its weight; the slow one lost about 9.25 per cent. 2
Avoid this mistake: Buying a cheap "steak" cut from the shoulder and searing it. No pan rescues it. The opposite mistake costs more money: braising a tenderloin for three hours because a recipe for a different cut said to.
2. Salt it an hour early, or a minute before
Steps
- Salt the whole surface with coarse salt: a heavy snowfall on a thick cut, a light dusting on a thin one. 3
- Either give it an hour or more, uncovered on a rack in the fridge, or salt it within a minute of going into the pan. 3
- Do not salt it and then wait five, twenty or forty minutes. That is the window that costs you.
- Give a thick cut longer than a thin one: the salt has to travel through the meat, not just sit on it. 3
Why it works: Salt pulls moisture to the surface, dissolves into a concentrated brine, and then diffuses back into the meat. 3 Given enough time, that salt seasons the inside and helps the meat hold water. The meat expert Lifehacker interviewed describes salt binding to the molecules so water finds it harder to escape. 3
Avoid this mistake: The twenty-minute salt. In that stretch the moisture is out but has not gone back in, so the surface is wet and the meat is drier for it. 3 Fine table salt is the second trap: its grains dissolve too fast to draw anything out evenly. 3
3. Get the surface dry before it meets the pan
Steps
- Pat the meat thoroughly with paper towels, on both faces and the edges. 2
- If you have an hour, skip the towel and leave the salted piece uncovered on a rack in the fridge instead. Circulating air dries the surface while the salt works. 3
- Dry thawed meat more carefully than fresh; freezing releases a lot of water. 2
- Oil lightly: a slick on the meat or in the pan, never a pool.
Why it works: Browning starts only once the surface water has boiled away. 2 Until then the pan is spending its heat on steam, and the meat comes out grey.
Avoid this mistake: Washing raw chicken. It spreads bacteria around the sink instead of removing them, and the heat of cooking kills what was on the surface anyway. 4 The second mistake is leaving meat on the counter for an hour to "take the chill off"; the fridge does the drying better.
4. Give the piece one thickness
Steps
- Put a chicken breast or a cutlet between two sheets of parchment or cling film.
- Pound it with a meat mallet, a rolling pin, or the bottom of a sturdy jar. 4
- Work from the middle outwards until the thick end matches the thin one.
- Tuck the thin tail of a chop underneath itself, or cut it off and cook it separately.
- Check with the flat of your hand, not your eye.
Why it works: A chicken breast is much thicker at one end, so the thin end is done while the thick end is still pink. 4 An even piece reaches one temperature everywhere at once, which is what makes the next two fixes possible.
Avoid this mistake: Pounding until the meat is a paste. You are levelling it, not tenderising it to mush, and a flattened piece needs several minutes less than the recipe says.
5. Heat the pan first, and leave a gap between the pieces
Steps
- Heat the empty pan over high heat until the oil shimmers or is almost smoking. 2
- Add the fat only once the pan is hot.
- Lay the pieces in with at least 1/4 inch (about 6 mm) of clear pan between them. 2
- Cook in two or three batches rather than filling the pan for one.
- Turn a piece when it releases from the pan by itself, not when the timer says so.
Why it works: Meat crowded into a pan drops the temperature and traps the steam it is releasing, so it simmers in its own juice instead of browning. 2 Browned surface is flavour and texture. That is the whole point of the hot pan.
Avoid this mistake: Believing the sear locks the juices in. Harold McGee cooked a seared piece and an unseared piece the same way. 5 The seared one retained fewer juices, and searing did nothing to preserve moisture. Sear for the crust, then stop, rather than blasting an overcooked steak black in the hope it turns juicy.
6. Cook to a temperature, not a clock
Steps
- Use the safe minimums: whole cuts of beef, pork, lamb and veal 145°F (63°C) plus a three-minute rest; ground meat and sausage 160°F (71°C); chicken and turkey, every part, 165°F (74°C). 1
- Put the probe into the thickest part, away from bone and gristle. 6
- Start checking about ten minutes before the recipe's cooking time runs out. 6
- Take it off the heat 5°F to 10°F below the target and let the rest finish the job. 6
- If you doubt the thermometer, hold it in a glass of ice water for 30 seconds. It should read 32°F. 6
Why it works: The inside keeps climbing after the meat leaves the heat, an effect called carryover cooking. 6 A piece pulled exactly at target overshoots it. A number also settles what colour cannot: whether the centre reached 165°F.
Avoid this mistake: Poultry and fish do not carry over the way dense red meat does, so pull them at the target rather than below it. 2 The other mistake is poking the thermometer in again and again; each reading is a hole. 6 If you own no thermometer, borrow one for a week before deciding whether to buy.
7. Rest it before the knife
Steps
- Move the meat to a board or a warm plate, and leave it there.
- Rest a thin steak or chop for 5 to 10 minutes, a thicker roast for 15 to 20, and a large bird for about 40. 2
- Rest under nothing, or under a very loosely laid piece of foil, so the crust can breathe.
- Use the time to finish the vegetables, not to carve.
Why it works: Heat drives the juices towards the centre. Resting lets them spread back out through the meat. 2 In one test, steaks rested for ten minutes shed 40 per cent less juice than steaks cut straight from the grill. 2 The unrested ones also looked greyer and ate tougher.
Avoid this mistake: Cutting in at minute two to check whether it is done. That is the juice you were trying to keep, and it is now on the board. The opposite failure is resting a thin cutlet for twenty minutes and serving it cold.
8. Cut across the grain, not along it
Steps
- Find the grain: the thin white lines running in one direction across the cut. 7
- Turn the piece so those lines run parallel to the long side of the board. 7
- Cut perpendicular to them, straight across the short side. 7
- Slice thinner on the cuts where the grain shows clearly: flank, hanger, skirt. 7
- If you cannot see the grain on the cooked piece, look at it before it goes in the pan.
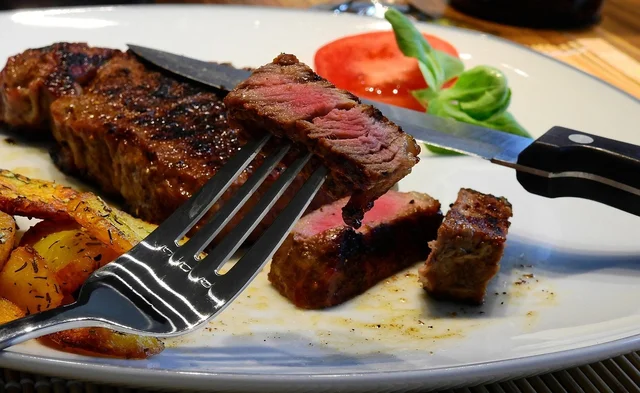
Why it works: Cutting across the fibres shortens them, so your teeth do less of the work. 7 Sliced the other way, the same perfectly cooked piece of meat eats like a rope.
Avoid this mistake: A dull knife. It tears the surface and presses juice out of the slice instead of parting it. And do not carve a roast the second it comes off the heat; that is the previous fix undone.
Start with three of these tonight: salt the meat now, dry it just before the pan, and take it off the heat 5°F to 10°F early. Those three decide most of the result.
Tomorrow, buy the cut that suits the way you actually cook, and keep the thermometer where you can reach it without moving anything.
Eight fixes cannot rescue a shoulder cut treated like a steak, or a chicken left in the oven twenty minutes too long. Overcooked meat stays overcooked. These keep you from getting there.
References
- 1Cook to a Safe Minimum Internal Temperature
foodsafety.gov
- 2The Five Basic Rules for Cooking Meat
lifehacker.com
- 3How (and When) to Properly Season a Steak
lifehacker.com
- 4
- 510 Stubborn Food Myths That Just Won't Die
lifehacker.com
- 6How to Properly Use a Meat Thermometer
goodhousekeeping.com
- 7How to Cut Any Meat Across the Grain
thekitchn.com
This story was produced automatically by a channel. One sentence is all it takes for Neodrop to keep producing for you.