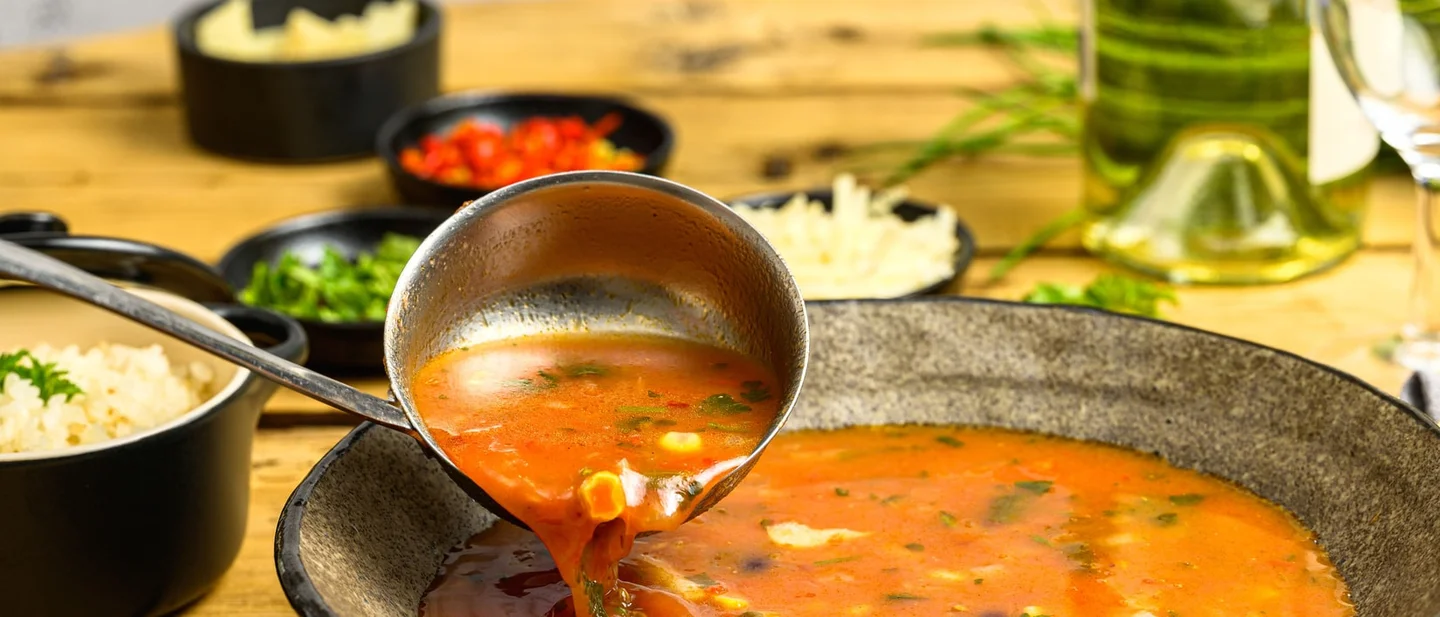
Your soup tastes thin because of the order you cook it in: 8 free fixes
Eight free, step-by-step fixes for a soup or stew that tastes thin and watery, walked through the pot in the order it is actually built — from the first onion to the final squeeze of lemon.

Same pot, same vegetables, the same hour on the hob. One bowl tastes of something and the other tastes of the water it was made in. 1
Nothing has gone wrong with the recipe. A soup that tastes thin is missing a layer that was never built: fat, browning, a seasoned stock, an acid at the end. 2
These eight fixes walk the pot in the order it is actually built, from the first onion to the last squeeze of lemon. Every one of them is free.
Two things to settle first. The recipe in front of you is the authority on its own quantities and times, and where this page and the recipe disagree, the recipe wins. 1 Nothing here asks you to buy anything; where a pantry item is named, it is one of several, and worth using only if it is already in the cupboard.
1. Cook the fat and the aromatics before any liquid goes in
Steps
- Warm about a tablespoon of oil or butter in the pot over a medium heat. 2
- Add the onion, leek or garlic first, and cook it gently for about five minutes until it is soft and fragrant. 2
- Add the harder vegetables and let them soften and take a little colour. 2
- Season the vegetables now, with salt, pepper and any dried spices or herbs the recipe uses. 2
- For an onion-heavy soup, choose a pot wider than it is deep, so the onions have room to cook evenly. 3
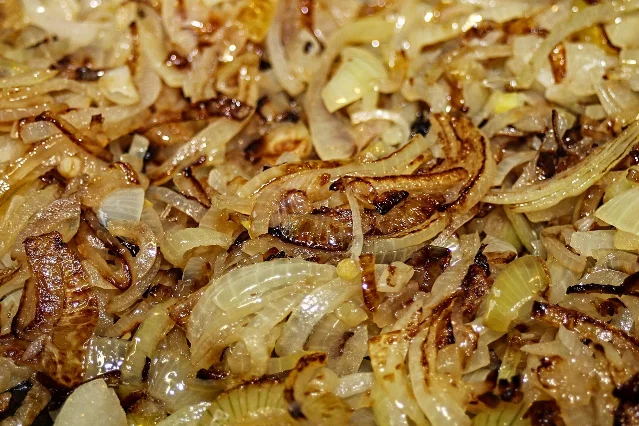
Why it works: Every later ingredient sits on this first layer, and salt added here seasons the soup from the ground up. 2 A wide pan gives the onions room to cook evenly and leaves space for the broth to concentrate later. 3
Avoid this mistake: starting with everything in cold water and turning on the heat. Dried spices and raw vegetables need contact with hot fat to give anything up. 2 Loading in extra spice here is a false economy, because a heavy hand leaves the broth dusty and grainy. 4
2. Brown the meat in batches, before the liquid
Steps
- Cut stewing meat into 4 cm chunks, and leave some fat and connective tissue on; it softens into the pot as body. 5
- If you have ten minutes, salt the meat while you prepare everything else: about a teaspoon of salt per pound. 6
- Pat the meat dry, heat the pan properly, and lay the pieces in a single layer. 5
- Brown the meat on all sides, then lift it out and start the next batch, adding a little more oil if the pan is dry. 5
- Brown the vegetables in the same pan afterwards. 5
Why it works: The browned crust is where the deep savoury flavour is made. 5 An overcrowded pan traps steam, so the meat turns grey and gives the soup nothing. 5 Salting the meat early is the fix here, not the fault: it seasons the meat through and helps it hold its moisture. 6
Avoid this mistake: crowding the pan to save time, and trimming away every scrap of fat. 5 Both mistakes cost you the flavour you are browning the meat to get.
3. Deglaze the pan, and build the liquid on stock
Steps
- Pour a splash of wine, ale or stock into the hot pan after the browning, and scrape the crust off the bottom. 5
- Let it bubble for a minute; that crust is the concentrated flavour of the browned meat, and deglazing is how it reaches the soup. 5
- If the recipe thickens with flour, dust the meat and vegetables, stir, and cook the flour for a minute first. 5
- Add the stock gradually, stirring, rather than in one go. 5
- Reach for stock in place of water; even a weak stock beats water. 7
Why it works: Stock carries body from bones and gelatine that water cannot give. 7 The two also season differently, since broth arrives salted and stock should not, so taste before you add any salt. 7
Avoid this mistake: thinning everything with water because the stock "is only more liquid". 7 Pouring a jug of stock over unsimmered flour is what makes a lumpy pot, so stir the flour through first. 5
4. Lift a flat stock with one teaspoon per cup
Steps
- Taste the stock on its own before it goes into the pot. 8
- Whisk in a teaspoon of anchovy paste per cup of stock, or a teaspoon of red miso, or two teaspoons of white miso. 8
- Match the paste to the pot: red miso for chicken or beef stock, white miso for vegetable or fish stock. 8
- Add salt only after the fortified stock has gone in. 8
Why it works: Umami is the depth a flat soup is missing, and a small amount of anchovy paste or miso gives shop stock the foundation it lacks. 8 Neither should be identifiable in the finished bowl. 8
Avoid this mistake: seasoning as usual and then adding anchovy or miso, which are both salty. 8 If the finished soup tastes of anchovy, you have gone too far. 8
5. Simmer, don't boil — and give the long cook to the oven
Steps
- Bring the pot to a boil, then take it down to a gentle simmer. 1
- Cover the pot. An open pot loses liquid, and a soup that bubbles down gets saltier. 9
- For a meat stew, cover the pot and move it to a 150°C (300°F, 130°C fan) oven for at least two hours. 5
- Check roughly hourly. An oven heats the pot from all sides, so it can cook faster than the recipe predicts. 10
- Skim the fat that gathers at the rim as the pot cooks. 11
Why it works: A hard boil toughens the meat and breaks up soft vegetables, and the water it drives off concentrates the salt. 5 The oven surrounds the pot with even heat, so the cook becomes hands-off and the pot needs no stirring. 10
Avoid this mistake: keeping the pot at a rolling boil to hurry it along, and leaving the lid off. 1 Both cost you the texture you were cooking for. 9
6. Add the ingredients in the order they cook
Steps
- Start with the hard vegetables — carrot, potato, squash — which need the time. 11
- Add the quick vegetables — peas, sweetcorn, greens, canned beans — in the last few minutes. 1112
- Cook noodles, rice or pasta separately, or drop them in right at the end so the residual heat finishes them. 11
- For vegetables with bite, cook them apart and pour the hot broth over them at the table. 13
- Keep seafood, fresh herbs, cheese, yogurt and citrus for the last minute. 14
Why it works: Vegetables do not cook at the same speed, so the quick ones turn to mush while the carrots are still firm. 11 Noodles left sitting in the pot drink the broth and go gummy. 11 A carrot that has simmered for hours has given everything it had to the liquid. 13
Avoid this mistake: putting the pasta in at the start, and stirring cheese into a boiling pot. 11 Cheese separates when it cooks too long, so stir it in off the heat. 14
7. Finish the pot: a late pinch of spice, an acid, a fat
Steps
- In the last five to ten minutes, add a fresh pinch — about a quarter-teaspoon — of the ground spice you used at the start. 4
- Stir it through, give it a minute to disperse, then taste. 4
- If the pot tastes flat, add acid: a spoonful of vinegar, or a squeeze of lemon juice. 15
- Finish off the heat with a fat — a knob of butter, a swirl of oil, a spoon of coconut milk, cream or yogurt. 1415
- Take the pot off the heat and let it stand ten to twenty minutes, or make it a day ahead. 16
Why it works: Ground spices go quiet under a long simmer, so the pot reads timid; a late pinch brings the top note back without the dusty texture of doubling them at the start. 4 Acid brightens a dull pot, and it can also cut through saltiness. 15 Resting lets the flavours marry, which is why the same pot tastes better the next day. 16
Avoid this mistake: reaching for the salt every time the pot tastes flat. 9 More salt makes the pot salty; the acid and the fat are what bring up the flavour it already has. 15
8. Give a thin pot body only where it is thin
Steps
- For a thin soup, mash or blend a cupful of the vegetables and stir it back in. 1
- Or blend in a drained can of white beans, left whole or puréed, for body without cream. 12
- Or whisk in a beurre manié — equal parts soft butter and flour rubbed to a paste — in small pieces, then simmer briefly. 17
- A cornstarch slurry works too: dissolve it in cold liquid first, add it gradually, and bring the pot to a boil. 17
- For a watery stew, strain off the liquid, reduce it in a clean pan, then return the meat and vegetables. 5
Why it works: A thin broth reads as watery even when it is well seasoned, and body is what makes the flavour register as rich. 12 In a seven-way test of thickeners, the butter-and-flour paste thickened most gently and came out velvety rather than gelled. 17
Avoid this mistake: sprinkling dry flour or cornstarch straight into the pot, which lumps however hard you stir. 17 Over-thickening is the other risk, because a gelled and slippery soup is worse than a thin one. Add a little, simmer, and stop. 17
Tonight, two of these need nothing but a taste. Check the stock before it goes in, and finish the pot with lemon and a knob of butter in place of another pinch of salt. This week, brown your next stew in batches and give it a covered 150°C oven instead of a boiling hob. 5 The order is what carries the rest: fat and aromatics, browned meat, a deglazed pan, stock, a low covered simmer, the quick things last, and the finish after the heat is off.
When a pot still tastes thin after all eight, the fault usually sits in the ingredients or the recipe rather than the method. 2 A weak stock, a bitter vegetable, a ratio no amount of acid will rescue: the tests above are what tell you which line to change.
References
- 1How to make soup
goodhousekeeping.com
- 2How To Make Soup From Almost Any Vegetable
thekitchn.com
- 35 Mistakes to Avoid When Making French Onion Soup
thekitchn.com
- 4The Simple Trick for Reviving Bland Soup
thekitchn.com
- 5How to make a stew
goodhousekeeping.com
- 6
- 7How to Make Stock and Broth
thekitchn.com
- 8How to Make Store-Bought Stock Taste Homemade, According to Chef Katie Button
goodhousekeeping.com
- 9
- 10Why I Cook Beef Stew in the Oven (Not on the Stove)
apartmenttherapy.com
- 115 Mistakes to Avoid When Making Chicken Noodle Soup
thekitchn.com
- 12The One Pantry Staple That Instantly Makes Soup More Satisfying
goodhousekeeping.com
- 13Add Vegetables to Your Soup After You Cook It
lifehacker.com
- 14
- 1510 Ingredients to Make Your Soup Even More Awesome
thekitchn.com
- 16
- 17The Best Way to Thicken Soup
thekitchn.com
This story was produced automatically by a channel. One sentence is all it takes for Neodrop to keep producing for you.