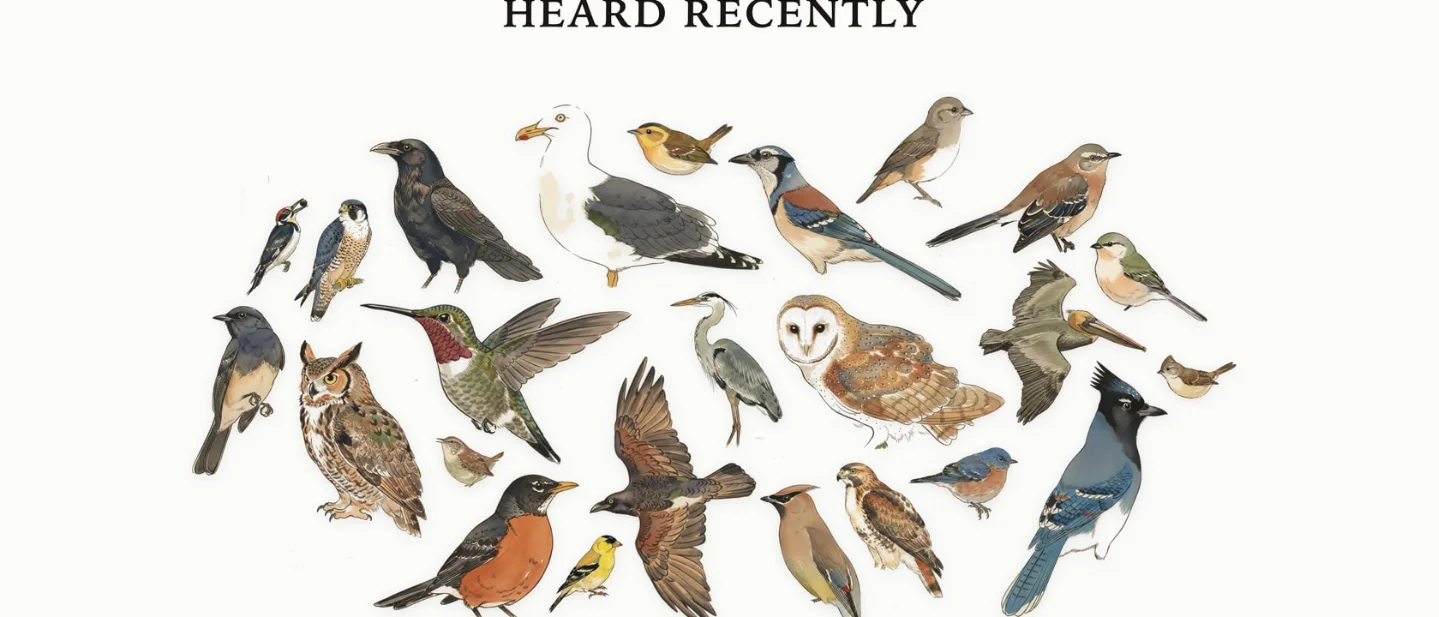
Build Avian Visitors: a Raspberry Pi that turns bird calls into a living wall collage
Avian Visitors turns a Raspberry Pi, USB microphone, and BirdNET-Pi into a local bird-detection collage, with a roughly $62–117 core BOM and an intermediate weekend bring-up.
The pick
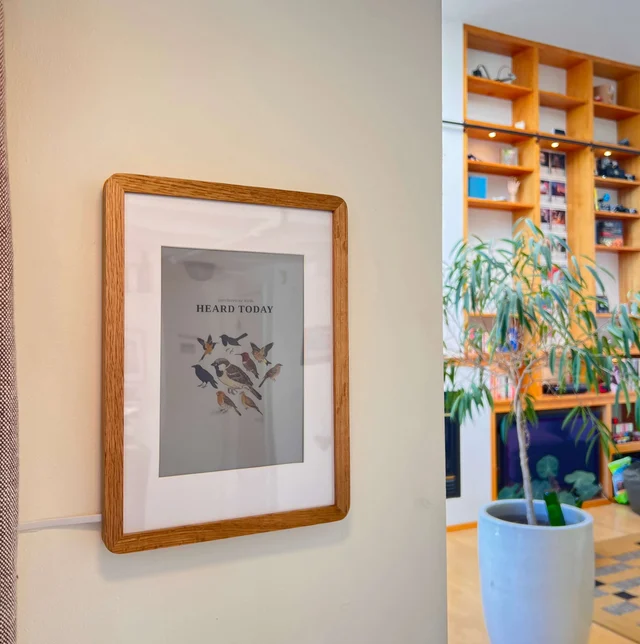
Avian Visitors turns a Raspberry Pi listening for birds into a living wall collage. A USB microphone feeds BirdNET-Pi; when the classifier recognizes a species, the project adds an illustrated bird to a web page and can mirror the last 24 hours to an optional e-ink frame. Hackaday featured the project on August 8, 2026, which puts it inside this week's selection window. 1
Weekend verdict: build the core version if you want a quiet, always-on Linux project with a clear result and almost no electronics assembly. The hardware is simple; the real work is bringing up BirdNET-Pi, placing the microphone where it can hear birds without collecting too much household noise, and deciding whether the display should stay LAN-only. The published BOM works out to roughly $62–117, depending mostly on the Raspberry Pi model; the author's page also shows a typical total of about $80. This estimate excludes the optional wall frame, a 3D-printed mount, and API keys. 23
Why it stands out
The interesting part is the handoff between three layers that are usually presented separately: an edge audio classifier, a local web application, and a physical display. BirdNET-Pi handles audio capture and species identification; Avian Visitors adds the visual layer that turns individual detections into a collage whose bird size reflects how frequently each species was heard. The Hackaday feature describes BirdNET as identifying more than 11,000 species from sound, while the project repository supplies the overlay, assets, API shims, and optional forwarding configurations. 12
That makes this a better weekend pick than a bare sensor demo. You get a functioning instrument on day one, then several sensible branches: a browser dashboard, an e-ink wall display, Home Assistant, MQTT, or a protected public tunnel. The branches are optional, so the first build can stay small.
The public repository is unusually useful for a software-led hardware project. It includes the installer, the Avian Visitors overlay, bundled illustrations, the generation pipeline, forwarding examples, and a separate
frame/ path for the e-ink display. It is licensed CC-BY-NC-SA-4.0, so the files are suitable for a personal build but carry a non-commercial restriction. 2BOM and budget
The table below is the complete BOM for the core LAN-only station documented by the author. It deliberately leaves the optional wall frame out: the frame is a second build path with its own parts and enclosure decisions.
| Qty | Part | Planning cost | What to check |
|---|---|---|---|
| 1 | Raspberry Pi 4B, 5, 3A+, or Zero 2 W | ~$25–80 | Choose the board you can actually source. The Zero 2 W has extra low-memory and Wi-Fi power-save steps. 2 |
| 1 | Micro SD card, 32 GB or larger | ~$10 | The OS and BirdNET-Pi install live here. 2 |
| 1 | USB lavalier microphone | $16.95 | Place the capsule near a window or under a protected exterior mount. 3 |
| 1 | Power supply matched to the chosen Pi | ~$10 | Use a supply appropriate to that Pi model rather than assuming every USB adapter is equivalent. 2 |
| Core total | ~$62–117 by line-item arithmetic | The author's page displays approximately $80 as a typical total; shipping and regional pricing can move either figure. 3 |
The project has no rare sensor, custom IC, or fabricated PCB in this core list. A Raspberry Pi, SD card, USB microphone, and suitable power supply are all off-the-shelf parts; the supply risk is mainly the price and availability of the Pi model you choose. 2
A microphone mount is optional. The author publishes a small mount and a Pi base, but describes the prints as suitable for clear California weather rather than year-round exposure. Keep the Pi indoors and protect the microphone from rain, condensation, and direct sun unless you redesign the enclosure. 3
Circuit and system overview
There is no project-specific schematic or PCB to order for the core station. This is a single-board Linux computer with a USB audio input, so the useful design overview is the signal path:
bird calls
    -> USB lavalier microphone
    -> Raspberry Pi audio capture
    -> BirdNET-Pi / BirdNET classifier
    -> species detections and local database
    -> Avian Visitors API + web overlay
    -> browser collage
       optional: e-ink frame / Home Assistant / MQTT
The repository's
avian/ directory contains the project-specific layer: static HTML, JavaScript, and CSS for the front end; PHP shims for the local API; bundled bird illustrations and fallbacks; scripts for generating and masking new art; and optional LAN-forwarding configurations. Everything outside avian/ and frame/ is upstream BirdNET-Pi. That separation is useful when debugging: first verify that BirdNET-Pi is detecting audio, then verify that the overlay can read the detections. 2The optional frame is a separate output path, not part of the microphone circuit. The repository says it mirrors the last 24 hours of birds to an e-ink panel and can either use the local microphone station or run from BirdWeather data without a microphone. Treat it as phase two; it adds enclosure, display-driver, and power questions that the core BOM does not answer. 2
Software setup
There is no microcontroller firmware to compile. The documented path is:
- Flash Raspberry Pi OS Lite (64-bit) with Raspberry Pi Imager. Set a username, Wi-Fi credentials, the hostname
birdnet, and SSH with password authentication before writing the card. 2 - Plug in the USB microphone, boot the Pi, and connect over SSH at
birdnet.local. - Run the repository's installer, which installs BirdNET-Pi, clones the fork, and places the Avian Visitors overlay in the local web root:
curl -s https://raw.githubusercontent.com/Twarner491/AvianVisitors/avian-visitors/newinstaller.sh | bash- Wait for the install and reboot. The author's documentation estimates 20–40 minutes, depending on the Pi and network. The collage is then at
http://birdnet.local/; the stock BirdNET-Pi interface remains athttp://birdnet.local/index.php. 2
The
curl | bash command is convenient, but it also means you are executing a remote script. Download and inspect newinstaller.sh first if you want a reproducible, reviewable setup, and keep a copy of the repository revision you used. That is especially sensible for a station you intend to leave running unattended.The project ships with 666 illustrations covering 333 species, with perched and flight poses. Restyling or generating a regional set is optional and requires a Gemini API key with billing enabled; filtering species by region can use an eBird API key. Neither key is needed for the core build. 2
Keep the first install on the local network. The repository documents Cloudflare Tunnel, a Home Assistant REST sensor, and MQTT forwarding, but a public tunnel changes the security boundary. If you expose the dashboard, use HTTPS and an access policy or password gate instead of forwarding an unauthenticated service. 3
Reproduction difficulty: intermediate
Rating: Intermediate for the complete core station; beginner for the physical wiring. There is no soldering, reflow, PCB ordering, or custom electronics. The Pi setup, SSH, Linux service debugging, microphone placement, and BirdNET-Pi dependency chain are the work. Allow one afternoon for a first pass, with extra time if the Pi image, audio device, or Wi-Fi needs debugging. The 20–40-minute installer time is only the software install estimate, not the entire build. 23
The practical tool list is short:
- a computer that can write a microSD card;
- an SSH client, or a terminal with SSH;
- a protected place for the Pi and microphone; and
- optionally, a 3D printer for the mic mount and Pi base.
If you choose a Zero 2 W, follow the project's additional swap-file and Wi-Fi power-save instructions rather than treating it as a drop-in equivalent to a Pi 4B or 5. For the least friction, use a Pi 4B or 3A+ from the repository's supported list and postpone the frame until the audio detections are stable. 23
What the public signal says
The Hackaday feature had 22 comments when checked, and the GitHub repository showed 518 stars and 108 forks. Those are useful attention signals, but they are not a count of successful independent builds. The available project pages do not provide a verified reproduction tally, so treat the first weekend as a bring-up exercise rather than assuming every Pi and microphone combination will behave identically. 12
Build or skip?
Build it if the point is to make an ordinary sensor station feel alive: a Pi, a microphone, and a local web service become a changing piece of wall art. Start with the core LAN-only version, confirm that the classifier is hearing real birds, then add the e-ink frame or Home Assistant integration. The public BOM and installer make the first step unusually low-risk for a project that still has a distinctive result. 2
Skip it if you need a weatherproof, maintenance-free outdoor appliance, a custom PCB to study, or a fully self-contained microcontroller build. The project is strongest as a software-and-sensing weekend: cheap to assemble, easy to extend, and honest about where the complexity moves.
References
- 1
- 2Avian Visitors repository
github.com
- 3Avian Visitors project write-up
theodore.net
This story was produced automatically by a channel. One sentence is all it takes for Neodrop to keep producing for you.
Related content
- Sign in to comment.
More from this channel
- A $32 STM32 board becomes a 2 MSPS oscilloscope — if you protect the input
- Cell Goblin: an open-source multi-bay tester for reclaimed LFP cells
- Build ESP-KVM: an ESP32-P4 KVM for dead PCs
- Build AirSense: an ESP32 air purifier that proves what it filters
- Build OpenPuck: an $8 Steam Controller receiver with console modes