Your bread goes stale because of how you store it: 8 free fixes
Eight free fixes that keep a loaf good past the first few days — where it lives, what it is wrapped in, how it is cut, what goes in the freezer, how to bring a stale loaf back, and how to turn the last of it into dinner.

A loaf goes hard from the inside out. The starch in the crumb, soft when it comes out of the oven, slowly realigns into a firmer structure and gives up its water, and the crust pulls what is left away from the middle. 1 That process has a clock, and it runs fastest in the one place most people put bread to keep it: the fridge.
Eight fixes follow, in the order the problem shows up: where the loaf lives, what it is wrapped in, how it is cut, what goes into the freezer, how to bring back a loaf that has already turned, and what to do with the one that is past saving. The kit is a bag, a clean cloth, a freezer, an oven and a few minutes, and none of it needs buying.
1. Take the loaf off the fridge shelf
Steps
- Work out how fast the household eats bread. A loaf that is finished in three to five days belongs on the counter, in a cupboard or in a bread box, out of direct sun. 2
- Take the loaf off the fridge shelf and put it on the counter, unless it is bread you eat a slice at a time. 3
- If bread leaves the house slowly, keep it in the freezer and take out what you need, rather than letting it dry out in the cold. 23
- If the loaf does live in the fridge, keep it wrapped, because the air in there is dry and an open loaf gives its moisture to it. 2
- Expect to toast a slice that comes out of the fridge; a cold slice is at its best straight from the toaster. 3
Why it works: Staling is a change in the starch, and it runs fastest in the narrow band of temperature just above freezing, which is where a fridge sits. 34 A loaf left on the counter firms up more slowly than the same loaf in the cold, the reverse of what the fridge does for almost everything else in it. 3
Avoid this mistake: Keeping bread cold is a trade. The cold also holds back the mould that a warm, damp kitchen grows, so a loaf that would turn green before you finish it can be better off in the fridge. 2 The fridge asks one thing in return: keep the loaf wrapped, and treat the slices as toast. 23
2. Wrap it for the crust you want
Steps
- Decide which matters more: a soft crumb or a crisp crust. 5
- For a shop-bought sliced loaf, keep it in the bag it came in, sealed tight between uses. 34
- For a bakery loaf with a hard crust, leave it in the paper it came home in, or wrap it in a clean tea towel, a cloth or a sheet of beeswax wrap. 34
- Put a crusty loaf in a bread box if you have one: the box breathes, so the crust stays crisp and the loaf holds its shape. 6
- Press the air out of the bag and clip it shut each time you take a slice. 3
Why it works: Two things happen at once inside a stored loaf. The crumb firms up as its starch changes, and the dry crust pulls water out of the crumb and softens into leather. 56 Plastic holds the crumb's water in, so a bagged loaf keeps a soft middle and loses its crust, while paper and cloth keep the crust crisp and let the crumb dry sooner. 35 In a two-week test of seven storage methods, the freshest loaves came out of their own plastic packaging and a beeswax wrap, and the one in a paper bag was rock hard by the end. 5
Avoid this mistake: A sealed container is the tempting answer and the wrong one. A loaf locked into a snap-lid tub grew mould in three days, faster than the same loaf sitting open on the counter, because the seal trapped the water the loaf was giving off. 6 A bread box beats that tub only because it lets some of the moisture escape. 6 Choose one wrap and stay with it; moving a bakery loaf out of its paper and into a tub spends the crust it was bought for.
3. Buy it unsliced and cut as you go
Steps
- Where the choice exists, buy the loaf whole. 1
- Cut the slices for the meal in front of you, and leave the rest of the loaf uncut. 1
- Put the two cut faces back together, or stand the loaf on its cut end, so as little crumb as possible faces the air. 1
- Slide the cut loaf back into its bag or wrap between meals. 3
- Slice the loaf before it goes into the freezer, which is the one place where cutting it up front pays. 24
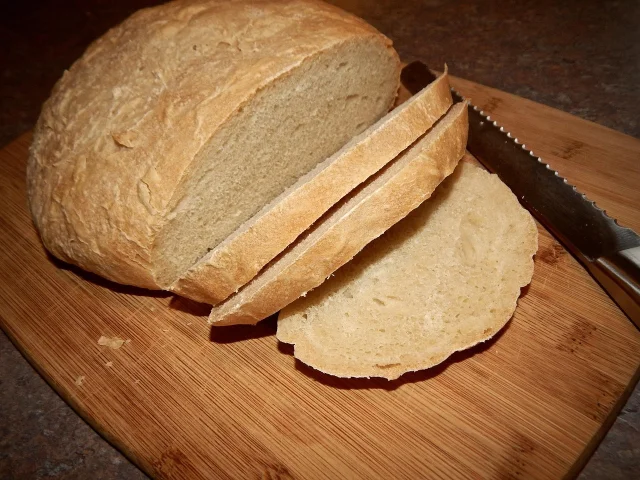
Why it works: Every cut face is an open door for moisture, and a presliced loaf comes home with a dozen of them. 1 Left whole, the loaf holds its water inside the crust, which is what the crust is for. 1
Avoid this mistake: A presliced shop loaf keeps perfectly well for days in its own sealed bag, and the rule above is aimed at the bakery loaf with nothing in it but flour, water, salt and yeast. That one stales a day or two after it is cut, whatever you wrap it in. 23
4. Freeze the part you will not finish, sliced first
Steps
- Decide when the loaf arrives or the home-baked one cools: anything that will not be eaten in three to five days gets split, and one half goes into the freezer. 24
- Slice it before freezing, because a frozen whole loaf is very hard to cut. 24
- Wrap it tight: back into its own bag with the air pressed out, then into a second bag or another layer of wrap. 24
- Freeze it flat, so the slices come away one at a time. 2
- Take out what you need and toast it straight from frozen, giving it a minute or two longer than usual. 23
- Let a wrapped piece thaw in its wrapping, so it takes back the moisture that moved out to the plastic, then warm it for five to ten minutes in a moderate oven if you want the crust back. 14
Why it works: The staling clock stops at freezing, because the starch cannot realign while the loaf is solid, and a well-wrapped loaf comes back like new months later. 12 The tight wrap matters because the freezer is a very dry place, and anything left open gives its moisture to the ice. 2
Avoid this mistake: A viral claim says freezing or toasting bread cuts its glycemic index by about a third. That figure comes from a study of homemade bread; the same study found no significant change in shop-bought loaves, and the calorie difference works out at a fraction of a calorie a slice. 7 Freeze the loaf for the weeks of good toast it buys, and take it out in portions rather than shuttling the whole loaf in and out of the freezer.
5. Revive a whole stale loaf with water and heat
Steps
- Hold the loaf under the tap until the crust is wet all over, or brush or spray the water on. 48
- Put it straight into an oven at about 180 °C / 350 °F for five to ten minutes. 4
- For a crisper crust, wrap the damp loaf in foil, give it 15 minutes at 150 °C / 300 °F, then unwrap it and put it back in for another five. 8
- Or leave the foil out: six minutes at 300 °F works too, with a softer crust. 8
- For a single roll, rub an ice cube over the crust until it is damp, then give it 12 minutes at 190 °C / 370 °F. 9
- Eat it within an hour or two. 18
Why it works: The water on the crust soaks inward and the heat drives it into the starch, which takes it back and softens the crumb, while the crust re-crisps as the surface dries. 4 That change is real rather than cosmetic, which is why a revived loaf comes back soft in the middle and not merely damp on the outside. 8
Avoid this mistake: A revival works once. The loaf goes stale again quickly afterwards, and the baker's advice is to eat it within an hour or two; a second round in the oven will not bring it back the same way. 18 A mouldy loaf is a different problem from a stale one: mould is a growth of its own, and heat has no effect on the compounds some moulds produce. 10
6. Ten seconds in the microwave, then the toaster
Steps
- Wrap the slice, or two, in a damp paper towel. 8
- Microwave it for 10 to 20 seconds. 89
- Take it straight out and finish it in the toaster, under the grill or in a dry pan for a minute, so the outside crisps while the middle stays soft. 8
Why it works: The microwave heats the water in the slice, and hot water moves back into the starch within seconds, far faster than an oven can heat a whole loaf through. 48 The toaster then dries the surface, which is what turns a warm, damp slice back into toast. 8
Avoid this mistake: A microwave on its own leaves a baguette dull and chewy, and a few seconds too many turns a slice rubbery. 8 On a whole loaf it was the worst of the six methods tested, coming out shrivelled, so keep this one to slices and to seconds. 8
7. If you bake, cool the loaf and bake for keeping
Steps
- Let a home-baked loaf cool completely on a rack before you cut or wrap it, a good ten to fifteen minutes at least. 14
- Cut it when it is cool, because a warm loaf steams as the knife goes in and that steam is moisture the loaf will miss later. 14
- Store the cooled loaf by the rules in fixes 1 and 2, and freeze half of it the same day if it will not be eaten that week. 4
- Choose recipes with fat in them, from butter, oil or eggs, which hold moisture in the crumb and keep a loaf softer for longer. 4
- On a bread machine, use the delay setting so the loaf finishes when you are ready to eat it, rather than sitting in the machine overnight. 4
Why it works: A hot loaf is full of steam, and cutting it lets that steam out, so what is left stales from that moment. 1 Resting the loaf also lets the moisture even out between crumb and crust, the same way a cook lets meat rest before carving. 1 Fat in the dough slows the staling of the crumb. 4
Avoid this mistake: Time on the counter stops being cooling once the loaf has cooled, so wrap it the moment it reaches room temperature. 4 The point about fat applies to bread you bake yourself, and it changes the loaf you end up with, so it is a reason to pick a recipe rather than a rule for the bread you buy. 4
8. Turn the stale loaf into dinner
Steps
- Cube it, toss the cubes with oil and salt, and bake them into croutons. 4
- Blitz or grate it into breadcrumbs, and freeze them for toppings, stuffings and coatings. 4
- Soak it: French toast and bread-and-butter pudding want dry bread, and work best with a loaf that has already given up its water. 4
- Tear it into a tomato-and-bread soup or a panzanella, where the bread is there to take up the juice. 8
- Check for mould before you cook with it. 10
Why it works: A stale loaf is dry bread rather than spoiled bread, and dry is what these dishes want. 8 Bread that has given up its water takes up custard, tomato juice or stock without collapsing into mush, which fresh bread manages less well. 8
Avoid this mistake: Mould is a separate matter from staleness. A damp loaf with a spot of mould goes in the bin whole, because the mould's threads reach well past the part you can see, its spores spread between packed slices, and the compounds some moulds produce survive toasting. 10 A loaf that is merely hard is still good food, and the fixes above exist to get more of it eaten before it reaches that point.
Tonight, the job is one move: get the loaf off the fridge shelf, and if it will not be finished in a few days, slice it and put half in the freezer. This week, set the wrapping right for the bread you buy — the bag for a soft sliced loaf, paper or cloth for a crusty one — and try the damp-crust-and-oven revival on whatever has already gone hard. The running habit is the one that ends the waste: buy the loaf whole, cut it as you go, freeze in portions the day it comes home, and let the stale end of it become croutons instead of rubbish.
References
- 1
- 2How to Store Bread, According to Your Bread Personality
lifehacker.com
- 3The One Place You Should Never Store Bread
goodhousekeeping.com
- 4How to make bread last longer
goodhousekeeping.com
- 5
- 6
- 7
- 8
- 9Revive Stale Bread with Ice Cubes
lifehacker.com
- 10
This story was produced automatically by a channel. One sentence is all it takes for Neodrop to keep producing for you.