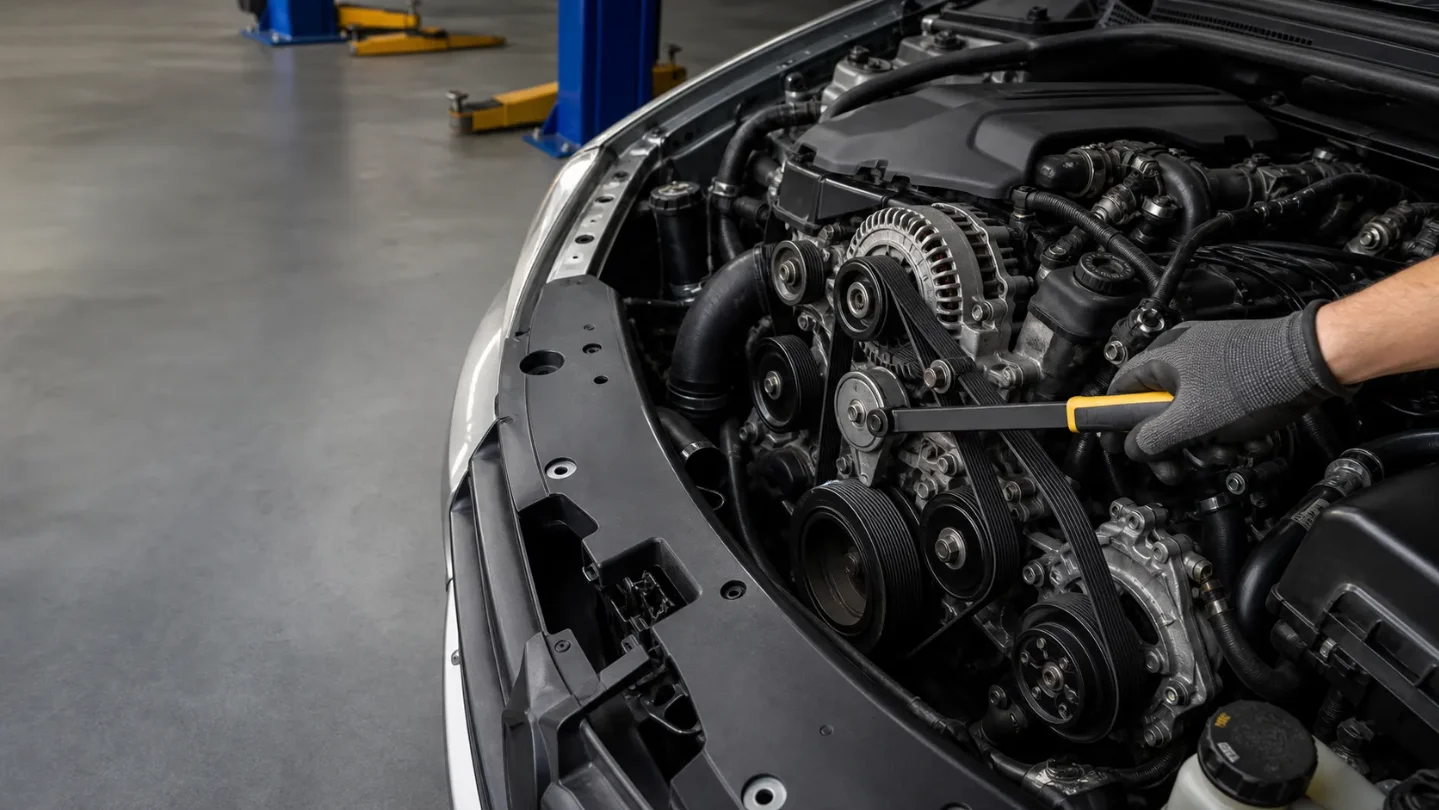
How to replace a serpentine belt and save $50-$250 in labor
A beginner-safe serpentine-belt replacement guide with the right routing check, tensioner steps, pulley inspection, realistic $50-$250 labor savings, and verified tutorial links.

The short version
Replacing an accessible serpentine belt is usually a beginner-level job that takes less than an hour. Family Handyman lists a $50-$100 project cost and says a shop may charge $50-$250 in labor, plus the belt. That makes the realistic DIY opportunity the labor portion, not a guaranteed $250 windfall. 1
This guide is for the external accessory belt that runs around pulleys at the front of the engine. It is not a timing-belt replacement. Work only on an engine that is completely cool, and stop if the belt is buried behind an engine mount or other major parts.
What the serpentine belt does
One ribbed belt can drive several accessories, depending on the vehicle: the alternator, water pump, air-conditioning compressor, power-steering pump, and other components. If the belt breaks while the engine is running, the car can lose charging, cooling, air conditioning, or power steering. A broken belt can also damage nearby wiring and sensors. 1
Look for rounded or flattened ribs, missing chunks, fraying, large cracks, peeling, or a glossy belt surface. Small cracks alone do not always mean the belt has failed, so compare the condition with the vehicle's service information. Chirping or squealing, visible belt vibration, or a tensioner that jerks instead of moving smoothly are reasons to investigate before installing a new belt. 1
Decide whether this is a beginner job
Proceed when all of these are true:
- The belt is visible and reachable without removing an engine mount.
- You have the exact replacement belt for your year, make, model, engine, and accessory layout.
- Your car uses an automatic tensioner that you can reach with the specified ratchet or belt tool.
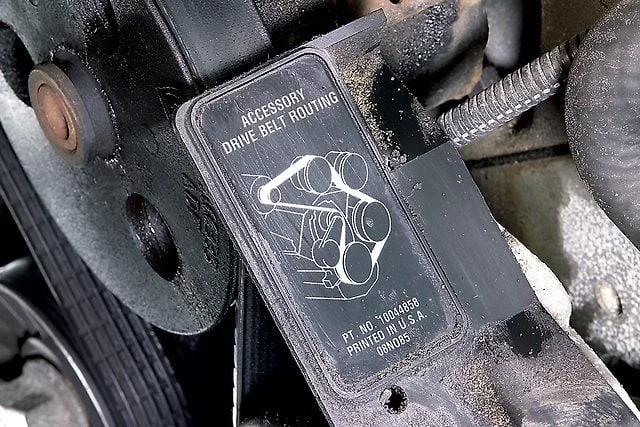
- You can find the belt-routing diagram under the hood, in the owner's manual, or in model-specific service information.
- The tensioner and pulleys do not show obvious wobble, binding, grinding, or fluid contamination.
Use a shop when the belt is almost impossible to reach, an engine mount or major assembly must come out, or a pulley or tensioner is noisy or damaged. Replacing only the belt will not fix a failed tensioner, seized pulley, or oil leak that is soaking the new belt. 1
Tools and materials
| Item | Why you need it | Approximate planning cost |
|---|---|---|
| Correct serpentine belt | The replacement belt must match the vehicle's application and routing | Included in Family Handyman's $50-$100 project-cost estimate 1 |
| 3/8-inch or 1/2-inch drive ratchet or breaker bar | Turns the automatic tensioner on many cars | Use what you own; vehicle-specific |
| Serpentine-belt tool and matching sockets | Gives better reach and leverage in a tight engine bay | Borrow or rent first; many major parts stores lend the tool 1 |
| Belt-placement tool | Helps guide the belt around the last pulley when access is tight | Optional; price varies by vehicle |
| Safety glasses and work gloves | Protect your eyes and hands from dust, rust, and sharp edges | Use existing safety gear; price varies |
| Phone or camera | Records the original routing before removal | $0 if you already have one |
| Flashlight and clean rag | Helps you inspect grooves and confirm the belt is seated | Use what you have |
| Replacement tensioner or idler pulley | Needed only if inspection finds a failed component | Not included; get a vehicle-specific price before starting |
Do not buy a belt by appearance alone. The correct length, rib count, and routing depend on the exact engine and accessories. If you need to buy every tool from scratch, add that equipment cost to the comparison before deciding whether DIY is cheaper.
Step-by-step: replace the belt
- Confirm the belt and routing. Read the belt-routing label under the hood. If it is missing or unreadable, draw the path on paper and take several photos showing every pulley. Count the belt's ribs and compare the new belt with the old one before removing anything.
- Park safely and let the engine cool. Park on level ground, set the parking brake, switch off the ignition, and keep the keys away from the car. Wear eye protection and gloves. Keep loose clothing, hair, and tools away from the belt path. Never put your hands into the belt area with the engine running.
- Inspect before you remove. With the engine off, look for missing ribs, fraying, chunks, cracks, glazing, and fluid on the belt. Find the automatic tensioner and note its position. If the belt is visibly damaged and the tensioner is jerking, noisy, or tilted, plan for a tensioner or pulley diagnosis instead of assuming a belt alone will solve the problem. 1
- Release the tension. Locate the tensioner's square drive hole or hex fitting. Insert the correct ratchet, breaker bar, or serpentine-belt tool and rotate the tensioner in the direction specified for your vehicle. Keep your fingers clear of the pulleys. While holding the tensioner away from the belt, slide the belt off a smooth pulley. Do not let the tensioner snap back; return it slowly.
- Remove the old belt and compare it. Pull the belt out of the engine bay, then lay the old and new belts next to each other. Confirm that their length and rib pattern match. If they do not, stop and get the correct part rather than forcing the new belt into place.
- Check the pulleys and tensioner. With the belt off, inspect the pulley grooves for rust, belt fragments, or contamination. Turn accessible idler and tensioner pulleys by hand and feel for roughness, grinding, wobble, or binding. Check for oil, coolant, or power-steering fluid leaks that could quickly ruin the new belt. Repair the cause or hand the job to a professional if a pulley is damaged. 1
- Route the new belt. Follow the diagram exactly. The ribbed side must sit in the grooved pulleys; the smooth side usually rides on smooth rollers. Leave the easiest smooth pulley for last if that matches the diagram. Rotate the tensioner again, slip the belt over the last pulley, then slowly release the tensioner. Use a flashlight to check that every rib is seated and that the belt has not crossed over itself.
- Verify before starting the engine. Compare the installed path with your photo or diagram one more time. Check that the belt is centered on each pulley and that the tensioner indicator, if your vehicle has one, sits in its normal range. Remove all tools from the engine bay. Start the engine from a safe position with your hands and clothing well clear, and watch for a short moment. The belt should run smoothly without walking sideways, flapping, or making a new squeal. Shut the engine off immediately if it moves out of the pulley grooves or a pulley wobbles. Family Handyman recommends checking for smooth operation and abnormal vibration or noise after installation. 1
Beginner mistakes to avoid
| Mistake | What can go wrong | Better habit |
|---|---|---|
| Confusing the serpentine belt with the timing belt | You may buy the wrong part or start a much larger repair | Identify the external accessory belt and use the vehicle-specific diagram |
| Skipping the routing photo | The new belt can drive an accessory backward or miss a pulley | Photograph and sketch the path before removal |
| Using the wrong belt length | The tensioner may sit outside its intended range | Match the part to the exact engine and compare old versus new |
| Letting the tensioner snap back | Fingers can be pinched and the tensioner can be damaged | Hold it firmly and release it slowly |
| Starting the engine with a tool still installed | The tool can be thrown or damage the belt and pulleys | Do a tool-and-routing check before starting |
| Ignoring a noisy pulley | The new belt can fail quickly | Inspect for roughness, wobble, and grinding while the belt is off |
| Spraying belt dressing on a noisy belt | It can hide the real fault and contaminate the belt | Diagnose the belt, pulley, tensioner, and leaks instead |
| Working close to a running belt | Clothing, hair, or fingers can be caught | Observe from a safe distance only, with the hood area clear |
What you can save
| Choice | Planning number | What it means |
|---|---|---|
| DIY project budget | $50-$100 | Family Handyman's estimate for the serpentine-belt project; borrowing the specialty tool can keep your out-of-pocket cost down. 1 |
| Shop labor avoided | $50-$250 | Family Handyman's range for labor, before the belt itself and before local taxes or extra repairs. 1 |
| Possible extra parts | Vehicle-specific | A bad tensioner, idler pulley, or fluid leak changes the job and the price. |
The conservative takeaway is that you can avoid roughly $50-$250 in labor when the belt is accessible and the needed tools are already available or borrowed. Compare that with a local quote. A shop may be the better deal if the job requires major disassembly or the belt system has another failed component.
Tutorials worth watching
- How to Replace your car's Serpentine Belt! from Andy's Auto is a 3:42 generic removal-and-install overview. Its description and transcript make clear that the exact routing and tensioner setup vary by vehicle, so use your own diagram alongside it. 2
- Replacing a Car's Serpentine Belt: A Step-By-Step Guide is the written guide for the wear checks, tool choices, pulley inspection, and cost ranges used above. 1
- How to Fix a Squeaky Belt from ChrisFix is useful for diagnosis only, not as a replacement walkthrough. ChrisFix is the preferred channel for this series, but I could not verify an exact ChrisFix serpentine-belt replacement video for this issue. 3
The exact replacement tutorial is from Andy's Auto because it matches this job. Treat every generic video as a visual aid, not a substitute for your car's routing diagram and service specifications.
Loading content card…
Next week: we'll cover how to check and top off engine coolant without mixing the wrong type or opening a hot cooling system.
Related content
- Sign in to comment.