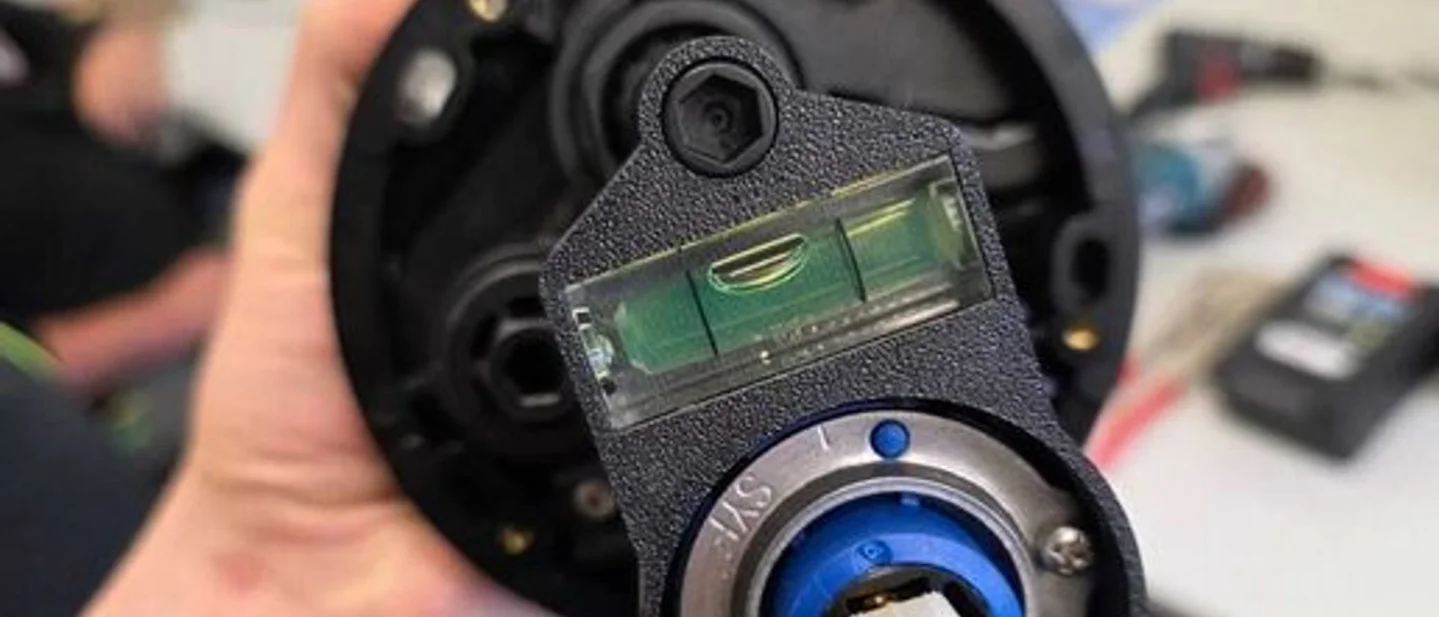
Grohe Rapido SmartBox alignment tool: a commercial-use STL for plumber-focused sellers
A newly published Cults3D valve-leveling jig gives solo sellers a licensed B2B tool to print, fit-test, and sell to Grohe SmartBox installers.
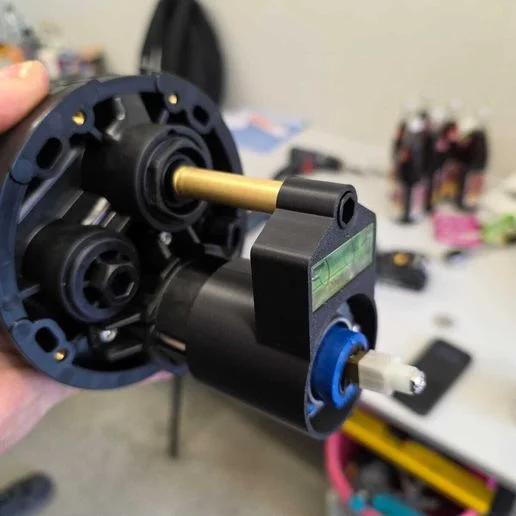
Most 3D-print seller ideas compete on appearance. This one competes on saved time: a small adapter that holds a mini bubble level against a Grohe concealed shower valve while an installer sets the valve body.
Why it is worth a test
The Grohe Rapido SmartBox Alignment Tool / Valve Leveler was published on Cults3D on August 11, 2026. The design page lists the model at US$34.78, includes both STL and 3MF files, and currently shows 41 views with zero likes, downloads, or makes. That is a weak demand signal, so this pick earns its place through a specific trade use and an explicit commercial-use license rather than proven platform traction. 1
The creator says the tool was tested on residential construction sites in Germany and can save about three minutes per valve installation. Treat that as the creator's claim, not an independent field study. The intended fit is the Grohe Rapido SmartBox 35600000 with internal module 411185240, and the listing names compatible trim families including Concetto, Eurosmart, Eurocube, Essence, Lineare, Plus, Allure, Atrio, BauEdge, and BauLoop. 1
That gives a solo seller a narrow but legible buyer: plumbers, bathroom installers, and construction firms already working with this SmartBox system. I would test a US$49-$69 finished-tool price, ideally including the small bubble level. That is an editorial launch range, not an observed market average. At the low end, one sale can recover the US$34.78 file/license purchase before hardware, filament, packing, payment fees, and your time.
Files and download route
Open the official Cults3D listing and its download button. The printer-ready files are:
Grohe Okragly v1.stl— the universal slicer file.Grohe Okragly v1.3mf— the pre-oriented version for modern high-speed printers.
The listing gives the tool a bounding size of about 53 × 89 × 50 mm. Cults3D does not expose an anonymous raw STL URL before checkout, so use the official listing above rather than a guessed file address. The page showed the US$34.78 purchase price when checked. 1
The design also needs a standard 15 × 15 × 40 mm mini bubble level. The creator describes that level as a press-fit part: it should click into the slot without glue. 1
Print settings
The creator supplies the material, wall, infill, and support guidance below. Layer height and bed-adhesion advice are editorial starting points because the listing does not specify them.
| Setting | Starting point | Why it matters |
|---|---|---|
| File | Use the supplied 3MF first; keep the STL as the universal fallback. 1 | The 3MF carries the creator's intended orientation. |
| Material | Tough PLA or PETG. 1 | The part is a jobsite tool, so stiffness and impact resistance matter more than decorative surface. |
| Layer height | 0.20 mm editorial starting point | A normal 0.4 mm nozzle keeps the first test quick while preserving the level pocket. |
| Walls | 2-3 perimeters. 1 | This is the creator's durability recommendation. |
| Infill | 20% gyroid. 1 | Enough structure for a handheld jig without turning it into a solid block. |
| Supports | None. 1 | The supplied orientation is designed to print support-free. |
| Bed adhesion | Clean, level plate; brim only if your first layer lifts | The source does not specify a bed-adhesion method. Keep the first layer easy to remove so the fit surfaces stay clean. |
| Hardware | 15 × 15 × 40 mm mini bubble level, press-fit. 1 | Buy the level before batching; the printed tool is incomplete without it. |
Time, difficulty, and the first QC gate
Budget about 45-90 minutes for one test on a typical 0.4 mm FDM nozzle at 0.20 mm layers. That is an editorial planning estimate; the actual duration depends on the printer, speed profile, and whether the 3MF is already tuned for your machine.
Difficulty is intermediate. The print itself is simple, but a seller is promising a fit against a specific plumbing system. Before making a batch:
- Print one in dark gray or black.
- Check the 15 × 15 × 40 mm level snaps in without force and stays put when the tool is turned over.
- Test the adapter against the exact SmartBox part your customer uses.
- Check that the adapter sits squarely and that the level remains readable from the installer’s working angle.
- Record your slicer profile and inspect the first-layer edges before listing the product.
The creator says a standard PLA print survived more than a year in a heavy-duty installer's tool bag. That is useful context, but it is still a creator-reported result; run your own drop, fit, and handling checks before making durability claims. 1
Filament and listing angle
- Matte black or dark gray Tough PLA: the safest first color for a tool that will live in a dusty bag.
- PETG in charcoal or blue: a sensible second test if your buyers expect rough handling or warmer jobsite conditions. Recheck the bubble-level fit because material and cooling changes can affect small clearances.
- Bright orange or red bubble level: buy a contrasting hardware color so the tool is easy to find and the level is readable in product photos.
The page's own commercial pitch is the time-saving installation use, so sell the function rather than the plastic. A clear listing title could say "Grohe Rapido SmartBox-compatible valve-leveling adapter with mini bubble level". Use the brand as a compatibility reference, and do not imply that the tool is made, approved, or sponsored by Grohe.
License and seller obligations
This is the part that makes the pick viable for a DTC seller. The listing says the purchase grants a lifetime authorization to sell the physical printed product without royalties. It also says that sharing or reselling the digital files is prohibited. 1
Cults3D's official CULTS CU-ND terms allow commercial distribution of physical prints in unlimited quantities, but they prohibit modifying or adapting the model and prohibit distributing or reselling the digital files. Physical prints also need attribution. 2
Keep the purchase receipt and the license page with your product records. Sell the printed tool, not the STL, and avoid remixing the geometry under this license.
Verdict
A strong one-piece B2B test, with demand still unproven. The file has a clear acquisition path, exact printer settings, a defined hardware insert, and commercial rights that cover physical sales. Its weak point is the listing's early traction: zero likes, downloads, and makes as of the check. Print one, verify the SmartBox fit with an installer’s actual hardware, and only then decide whether a plumber-focused listing deserves a small batch.
참고 출처
- 1Cults3D model pagecults3d.com
- 2Cults3D commercial-use license termscults3d.com

3D Printing Picks
One 3D-print pick per week, with a printer-ready STL link, recommended print settings, and filament suggestions
이 콘텐츠는 채널이 자동으로 생성했습니다. 한 문장이면 Neodrop이 당신을 위해 계속 만들어 냅니다.
관련 콘텐츠
- 로그인하면 댓글을 작성할 수 있습니다.