
SDXL ControlNet: strength + guidance timing
Two parameters, two axes: `control_weight` sets per-step intensity; `guidance_start`/`guidance_end` controls which denoising steps fire at all. Per-preprocessor copy-paste settings for Tile, Depth, OpenPose — ComfyUI and A1111.

Most SDXL ControlNet frustration comes from treating a two-axis problem as a one-knob problem. You move
control_weight up, the image goes rigid and flat. You move it down, the ControlNet stops doing anything useful. Reddit user LORD_KILLZONO put it plainly: "The only way to fix it is to lower the strength but at that point the controlnet does nothing and I don't get the results I want." 1There's a second axis that almost nobody touches: the guidance window —
start_percent/end_percent in ComfyUI, or guidance_start/guidance_end in A1111. It controls not how hard ControlNet pushes but during which denoising steps it runs at all. Getting both axes right simultaneously is what separates results that look like the control map strangled your image from results where structure lands correctly and detail fills in freely.Why control_weight and the guidance window are different things
control_weight (A1111) / strength (ComfyUI Apply ControlNet node) is a per-step multiplier. At every denoising step where ControlNet is active, it applies pressure proportional to this value. Set it high and the control map dominates the image's pixel-by-pixel decisions at every step. Set it low and the model mostly ignores the conditioning signal. 2start_percent / end_percent (ComfyUI) or guidance_start / guidance_end (A1111) are step-range gates. They define the slice of the denoising process where ControlNet is active at all. Outside that window, no ControlNet signal reaches the model — the sampler runs as if ControlNet doesn't exist. Defaults are start=0.0, end=1.0 (active throughout), which is why most tutorials never mention them. 2 3The HuggingFace Diffusers API names these
controlnet_conditioning_scale (weight), control_guidance_start, and control_guidance_end, with identical defaults. 3| Parameter | ComfyUI | A1111 | Diffusers | Default |
|---|---|---|---|---|
| Strength / weight | strength | control_weight | controlnet_conditioning_scale | 1.0 |
| Start of guidance | start_percent | guidance_start | control_guidance_start | 0.0 |
| End of guidance | end_percent | guidance_end | control_guidance_end | 1.0 |
The practical implication: these two parameters are complementary, not redundant. A high
control_weight with a short guidance window can set structure firmly without suffocating the image. A low control_weight running for the full 100 steps applies light, persistent pressure throughout. The visual outputs are different.control_weight ranges by model family and preprocessor
The first thing to know about SDXL ControlNet weight: there are no official SDXL ControlNet models. Every model you're using is community-built, and the A1111 wiki confirms this directly. 4 That's why the working range varies so dramatically by model family. As Andrew at Stable Diffusion Art tested across multiple SDXL model variants: "The control weight parameter is critical to generating good images. Most models need it to be lower than 1." 5
The three main model families behave as follows:
diffusers_xl series (released by lllyasviel): Recommend starting around 0.25–0.5. The full-size model (
diffusers_xl_canny_full, 2.5 GB, 18.4s) preserves style best but is the slowest. At control_weight=1.0, even the small variant produces visibly flat, over-constrained output. 5kohya_controllllite_xl series (46 MB each — fast): These have a narrow working window. Below ~0.75 they have no perceptible effect; above 1.0 you're back to over-control. "The smaller model has a lower controlling effect. A higher control weight value can compensate for it. But you shouldn't set it too high. Otherwise, the image may look flat." 5 Effective range: 0.75–1.0.
sai_xl (control-lora) series: More forgiving. The 128-lora and 256-lora depth variants hold up well at 0.75+, and Stable Diffusion Art's tests showed stable output across a wider range than the diffusers family. 5
Here's what over-control vs. under-control actually looks like for SDXL Canny:
diffusers_xl_canny_small at weight 0.25: composition transfers cleanly, watercolor style survives. 5
The community consensus by preprocessor, summarized from Reddit r/StableDiffusion discussions: 6
- Tile: 0.4–0.6 (lower end for creative upscaling, higher for texture fidelity)
- Depth: 0.3–0.7 (model-family dependent — diffusers lower, sai/kohya higher)
- Canny: 0.25–0.75 (diffusers 0.25, sai 0.75, kohya 0.75–1.0)
- OpenPose: 1.0 as starting point, reduce to 0.5–0.8 if poses feel stiff
The guidance window: the under-documented axis
Here's the finding that should change how you set up every SDXL ControlNet run. Stable Diffusion Art's testing (with SD1.5 as the evidence base, but the denoising mechanics are the same in SDXL): 7
"Since the initial steps set the global composition (the sampler removes the maximum amount of noise in each step, and it starts with a random tensor in latent space), the pose is set even if you only apply ControlNet to as few as 20% of the first sampling steps."
This means
end_percent=0.2 — turning ControlNet off after the first 20% of denoising — still locks in the full pose or structure from the control map. The last 80% of denoising steps run without ControlNet interference. That's where your detail, texture, and style come from.Andrew at Stable Diffusion Art confirmed: "changing the ending ControlNet step has a smaller effect because the global composition is set in the beginning steps." 7
The practical upside is that setting
end_percent=0.4–0.5 is often a better fix for "my image looks flat and locked-down" than simply lowering control_weight. You're not weakening the ControlNet signal per step — you're freeing up more steps for creative texture generation.
guidance_end=1.0: ControlNet active all 100% of steps. Figure stays rigidly on-pose from control map. 7
guidance_end=0.1: ControlNet only during first 10% of steps. Global composition still locked — but remaining 90% of steps fill in detail freely. 7Five activation patterns worth having in your workflow: 7
| Pattern | start / end | Effect |
|---|---|---|
| Full control | 0.0 / 1.0 | Maximum adherence, minimum creativity — default |
| Structure-only | 0.0 / 0.3 | Locks global layout, frees 70% of steps |
| Early-and-done | 0.0 / 0.2 | Minimal footprint, pose still set |
| Micro-lock | 0.0 / 0.1 | Lightest touch — mainly useful for loose pose reference |
| Mid-window | 0.2 / 0.8 | Skip the first composition steps, apply in mid-refinement |
Note:
guidance_start (A1111) / start_percent (ComfyUI) shifting upward has a larger effect than shifting end. Starting late means the global composition-setting steps run ControlNet-free — the model establishes its own layout first, then ControlNet applies correction pressure in the middle and later steps. This is useful when you want a loose suggestion rather than a locked structure.Per-preprocessor settings: Tile, Depth, OpenPose
Tile
Recommended model: xinsir ControlNet Union ProMax (
xinsir/controlnet-union-sdxl-1.0). This single model supports 12+ control types including Tile Deblur, Tile Variation, and Super Resolution, and it pulls 111,000+ monthly downloads on HuggingFace — it's become the de facto community standard for SDXL ControlNet. 8 Laura Carnevali's review confirmed it as "currently the most reliable (I believe) for SDXL." 9Preprocessor: Gaussian Blur. In ComfyUI, add an
ImageBlur node between your source image and the Apply ControlNet node — blur_radius=1, sigma=1 softens the control signal and produces cleaner tile outputs. 10control_weight: 0.4–0.6. For faithful texture preservation in standard upscaling, start at 0.5. For more creative freedom (variation pass), push down to 0.4.Critical Tile warning: at
denoise > 0.5 in your KSampler, SDXL Tile tends to replace objects rather than add detail. Community member Calm_Mix_3776 observed: "it tends to completely replace objects at higher denoise values rather than add more details." 10 Keep denoise ≤ 0.5 when using Tile for upscaling; if you want structural changes, lower control_weight to 0.4 and accept some variation.Guidance window: 0.0 / 1.0 (full). Tile works on texture coherence throughout all denoising steps — cutting the window short produces patchy results.
Depth
Recommended models:
diffusers_xl_depth_full (best style fidelity, 2.5+ GB) or sai_xl_depth_128lora (stable across a wide weight range, 396 MB) or xinsir Union ProMax (depth mode). Avoid the sargezt_xl_depth variants — Andrew's tests found they "didn't work well." 5Preprocessor:
depth_leres or depth_anything — both produce cleaner SDXL depth maps than the original MiDaS.control_weight: 0.3 (diffusers full/mid/small) or 0.75+ (sai and kohya variants). Reddit user no_witty_username recommends 0.7 as a general-purpose starting point for depth. 6 The sai_xl_depth family is notably more forgiving: "sai_xl_depth works in a wider range of control_weight values." 5Guidance window: 0.0 / 0.5 is a useful starting point for portraits and architecture. Based on the early-steps composition-lock principle, depth likely needs only the first 40–50% of steps to set spatial structure — the second half can fill in lighting and texture without depth's flattening influence. No SDXL-specific A/B data exists for this exact setting; treat it as an informed starting point, not a confirmed sweet spot.
OpenPose
Recommended model:
xinsir/controlnet-openpose-sdxl-1.0 — consistently the community's top-rated SDXL OpenPose option. 6 Also available within xinsir Union ProMax.Preprocessor:
dw_openpose_full. DWPose (introduced in ControlNet 1.1, based on arXiv:2307.15880) produces better hand and finger detection than original OpenPose Full. 11control_weight: Start at 1.0. Unlike tile and depth, OpenPose at 1.0 is often fine — pose data is binary (joint positions), not a continuous intensity map, so the model needs full signal strength to correctly read limb positions. If you're getting stiff, robotic-looking poses, reduce to 0.5–0.8. The fix for rigidity is usually reducing weight, not adjusting the window. 6Guidance window: 0.0 / 0.7 is a reasonable creative starting point. Pose locks in during the first 20% of steps regardless of
end_percent; ending at 0.7 gives the final 30% of steps freedom to develop natural fabric folds, skin texture, and hair without OpenPose pressure. This transfers from the SD1.5 timing principle — no SDXL-specific systematic testing exists as of June 2026.Copy-paste settings by tool
ComfyUI (Apply ControlNet node)
# Tile — xinsir Union ProMax, Gaussian Blur preprocessor
strength:       0.5
start_percent:  0.0
end_percent:    1.0
ImageBlur:      blur_radius=1, sigma=1

# Depth — diffusers_xl_depth_full or sai_xl_depth_128lora
strength:       0.3   (diffusers) / 0.75 (sai / kohya)
start_percent:  0.0
end_percent:    0.5   # frees second half for texture/lighting

# OpenPose — xinsir controlnet-openpose-sdxl-1.0, dw_openpose_full
strength:       1.0   # reduce to 0.5–0.8 if poses look stiff
start_percent:  0.0
end_percent:    0.7   # frees final 30% for natural detail
A1111 / Forge (ControlNet extension)
# Tile
control_weight:  0.5
guidance_start:  0.0
guidance_end:    1.0

# Depth
control_weight:  0.3   (diffusers) / 0.75 (sai / kohya)
guidance_start:  0.0
guidance_end:    0.5

# OpenPose
control_weight:  1.0   (reduce to 0.5–0.8 for natural poses)
guidance_start:  0.0
guidance_end:    0.7
One extra: the CFG amplifier you didn't know about
In A1111, enabling "ControlNet is more important" (Control Mode) applies ControlNet only to the conditional side of the CFG calculation. At CFG=7, this makes ControlNet effectively 7× stronger — without changing
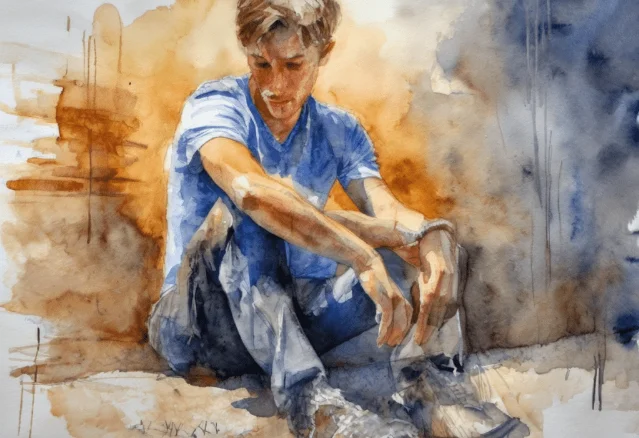
control_weight. Reddit user u/FourOranges explained the mechanism: "the ControlNet will be X times stronger if your cfg-scale is X." 12 This mode doesn't exist in the ComfyUI Apply ControlNet node (which applies to both conditioning paths by default). If you're using this mode in A1111 and getting over-controlled output, that's the culprit — drop CFG to 4–5 or disable the mode.Cover image: AI generated
참고 출처
- 1r/comfyui: How to get decent results using ControlNet
- 2ComfyUI Wiki: Apply ControlNet
- 3HuggingFace Diffusers: ControlNet with SDXL
- 4GitHub: Mikubill/sd-webui-controlnet Wiki — Model download
- 5Stable Diffusion Art: How to use ControlNet with SDXL
- 6r/StableDiffusion: Best ControlNet Models for SDXL
- 7Stable Diffusion Art: ControlNet — A Complete Guide
- 8HuggingFace: xinsir/controlnet-union-sdxl-1.0
- 9Medium/Intelligent Art: ControlNet Union ProMax for SDXL
- 10r/StableDiffusion: New SDXL ControlNets — Depth, Tile
- 11GitHub: lllyasviel/ControlNet
- 12r/StableDiffusion: Negative ControlNet — comments
이 콘텐츠를 둘러싼 관점이나 맥락을 계속 보강해 보세요.