How to flush your brake fluid yourself — and what a $250 saving really means
A beginner-safe brake-fluid flush guide with the right safety gates, two-person bleeding cycle, $15-$40 supply budget, and the reason a $250 saving is only a source-specific example.

The short version
A brake-fluid flush is a reasonable first brake-system project only when the brake pedal is already firm, the system is not leaking, and your vehicle manual gives you a clear bleeding procedure. You replace the old fluid at each wheel's bleeder screw, keep the master-cylinder reservoir full, and finish by proving the pedal is firm before the car moves.
This is different from replacing brake pads. You are not taking the caliper apart; you are replacing the hydraulic fluid that transfers your foot's pressure to the brakes. ChrisFix's complete walkthrough covers both the two-person and one-person methods, plus disc and drum brakes. 1
The money is real, but the savings are not a universal number. Plan on about $15-$40 in fluid and simple supplies if you already own safe lifting equipment. One published tutorial advertises a $250 saving for a vacuum-method flush, but that is a vehicle- and shop-quote-specific example, not a promise that every shop charges $250. 2
When this job is—and is not—for beginners
Brake fluid is the liquid in a hydraulic brake system. When you press the pedal, that liquid carries the pressure through the brake lines to the calipers or wheel cylinders. Both gas cars and EVs still use brake fluid, and regular replacement is part of brake maintenance; the interval varies by manufacturer. Car and Driver gives Ford's three-year recommendation for the Mustang Mach-E and F-150 Lightning as one example, not a universal rule. 3
Use this guide for a conventional hydraulic brake system when:
- The owner's manual specifies the correct fluid type, service interval, and bleeding order.
- The brake pedal is firm before you start, with no warning light or visible leak.
- You have a level work area, properly rated jack stands, wheel chocks, and a way to reach each bleeder screw.
- You can keep the master-cylinder reservoir from running dry while old fluid leaves the system.
Stop and use a shop if the pedal is soft before the flush, fluid is leaking, a brake line or bleeder screw is badly rusted, the ABS warning light is on, or the manual requires a scan tool or pressure-bleeding procedure you do not have. A flush cannot repair a failed master cylinder, leaking line, worn hose, or air already trapped in an ABS module.
Tools and materials
| Item | What it does | Planning cost |
|---|---|---|
| Correct brake fluid | The exact DOT grade and amount listed in the manual | $10-$25 |
| Clear brake-bleeder hose | Lets you see fluid and bubbles leaving the screw | About $3-$8 |
| Catch bottle or brake-bleeder bottle | Holds used fluid without letting the hose jump out | $0-$10 |
| Small suction syringe or turkey baster | Removes some old fluid from the reservoir if the manual allows it | $5-$10 |
| Flare-nut or box wrench | Opens the bleeder screw without rounding it | $10-$25 |
| Floor jack, jack stands, and wheel chocks | Lifts and supports the car safely | $0 if already owned; do not substitute a jack for stands |
| Lug wrench and torque wrench | Removes wheels and tightens the lug nuts to specification | $0 if already owned; borrow before buying |
| Safety glasses, gloves, rags, and water | Protects your eyes and hands and cleans spilled fluid quickly | $5-$15 |
The lowest-cost setup is the method ChrisFix shows: a clear hose and a homemade one-person bleeder made from a plastic bottle for under $5. 4 A pressure or vacuum bleeder can make the job faster, but it is an extra purchase—not a requirement for the basic two-person method.
Do not buy fluid by color or by a guess from a video. Match the manual's specification, buy an unopened container, and keep the cap on until you are ready to pour. Brake fluid damages paint, so cover painted surfaces and rinse a spill with plenty of water immediately.
Step-by-step: flush and bleed the brakes
- Read the vehicle procedure before lifting the car. Find the fluid specification, reservoir location, wheel order, bleeder size, torque specification, and any ABS-specific instruction. The wheel order is not safely guessed from a generic tutorial; some vehicles call for the farthest wheel first, while others use a different sequence.
- Check the starting condition. With the engine off, press the brake pedal several times. It should become firm and stay firm. Look behind each wheel and under the master cylinder for wet fluid. If the pedal sinks, the reservoir is unusually low, or a brake warning light is on, diagnose that problem before flushing.
- Set up a safe work area. Park on level ground, select Park or first gear, set the parking brake, and chock the wheels that stay on the ground. Loosen the lug nuts slightly before lifting. Raise the car at the factory lift points and place it on rated jack stands; never work under a car supported only by a jack. Popular Mechanics uses the same jack-stand and wheel-chock rule for brake work. 5
- Expose the bleeder screws. Remove the wheels only if they block access. Find the small bleeder screw on each caliper or wheel cylinder. Clean dirt from around the screw before opening it. If a screw starts to twist, rounds off, or feels as if it may snap, stop; forcing it can turn a fluid service into a hydraulic-line repair.
- Prepare the reservoir. Clean the master-cylinder cap and the area around it so dirt cannot fall inside. Open it only after the surrounding area is clean. If your manual permits removing old fluid from the top, take out only the amount it says is safe, then fill with fresh fluid. Do not let the reservoir become empty at any point: an empty reservoir sends air into the system.
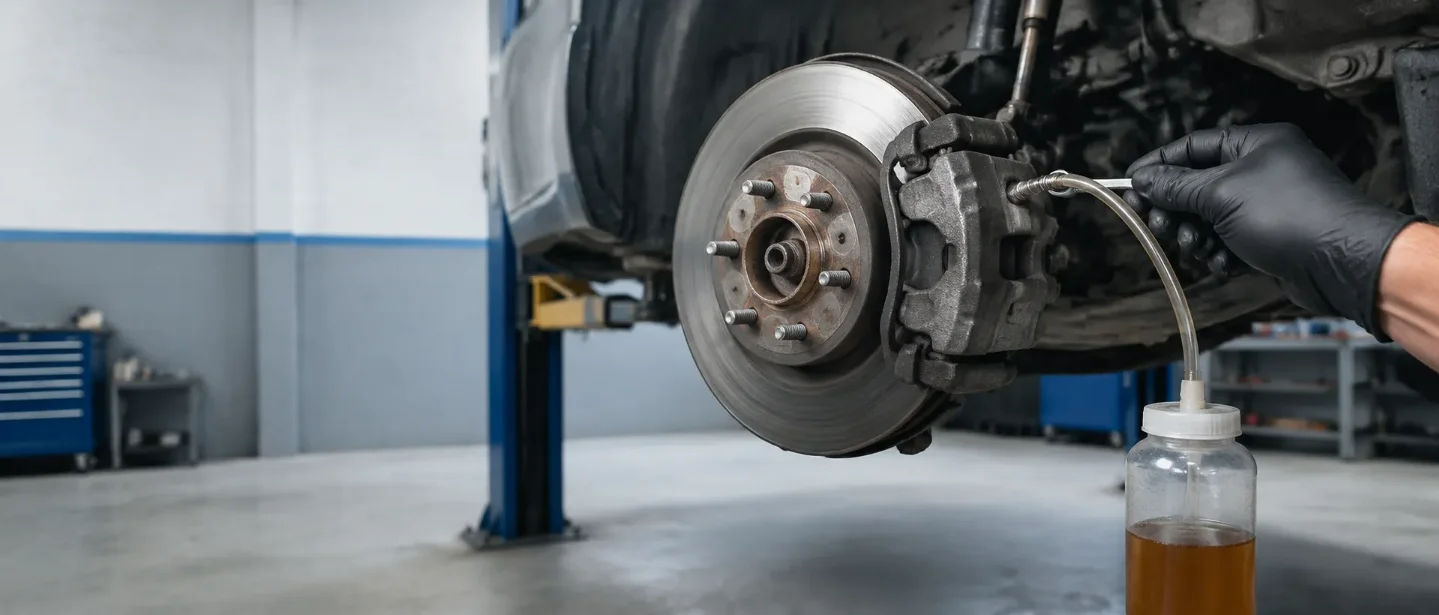
- Connect the hose at the first wheel. Push the clear hose firmly over the bleeder nipple and place its other end in the catch bottle. Keep the bottle above or beside the screw so the hose stays submerged in fluid. Put the correct wrench on the screw before asking a helper to touch the pedal.
- Use the two-person bleeding cycle. Have the helper press the pedal slowly two or three times, then hold steady pressure. Open the bleeder screw about a quarter turn; fluid and air will move through the hose. Close the screw before the helper releases the pedal, then tell the helper to release it. Repeat the cycle until the flow is clean and bubble-free. Never let the helper pump rapidly, and never release the pedal while the screw is open.
- Keep the reservoir full. Check the level after every few cycles and top it up with the correct fresh fluid. This is the step that prevents you from replacing old fluid with a new pocket of air. If the reservoir accidentally runs dry, stop and follow the manual's complete air-bleeding procedure instead of assuming a few extra pedal pumps will fix it.
- Move through the remaining wheels in the manual's order. Close the first bleeder snugly, replace its rubber cap, and repeat the hose-and-cycle process at the next wheel. Continue until the fluid coming from every required circuit is clean. ChrisFix's video demonstrates both disc and drum-brake examples, but your vehicle's manual still controls the order and any special ABS procedure. 1
- Close, clean, and reassemble. Fill the reservoir to its marked level, install the cap, and wipe each bleeder area dry. Rinse any brake-fluid spill from painted parts with water. Reinstall the wheels by hand-threading the lug nuts, lower the car, and tighten them in a criss-cross pattern to the torque listed in the manual.
- Prove the pedal before driving. Press the brake pedal several times with the engine off; it should be firm. Start the engine and press again. A small change as the power assist activates is normal, but a low or spongy pedal is not. Check every bleeder and the reservoir for leaks. If the pedal is not firm, do not drive the car—find the trapped air or leak first.
- Make a controlled test. In an empty, low-speed area, apply the brakes gently and confirm that the car stops straight and the pedal remains firm. Return immediately if the pedal changes, the brake warning light appears, or fluid leaks. Seal the old fluid in a marked container and ask a local repair shop or household hazardous-waste program how to dispose of it; never pour it on the ground or down a drain.
Beginner mistakes that cause trouble
| Mistake | What goes wrong | Better habit |
|---|---|---|
| Using the wrong DOT fluid | The fluid may not match the vehicle's seals or specification | Read the manual and the bottle label before opening it |
| Guessing the wheel order | Some systems route fluid differently, especially with ABS | Use the vehicle procedure; treat a video as a demonstration |
| Letting the reservoir run dry | Air enters the master cylinder and lines | Check the level every few cycles |
| Opening the bleeder before the helper holds the pedal | Air can be drawn back through the hose | Press, hold, open, close, then release |
| Releasing the pedal while the screw is open | The system can pull air backward through the bleeder | Close the screw first |
| Using an adjustable wrench on a stuck screw | The soft bleeder head can round off | Use the correct flare-nut wrench and stop if it resists |
| Spraying fluid across painted parts | Brake fluid can damage paint | Cover the area and rinse spills with water at once |
| Trusting the jack alone | The car can fall while a wheel is removed | Use jack stands on solid ground and chock the wheels |
| Driving with a soft pedal | The car may not stop normally | Keep it parked until the pedal is firm and leaks are ruled out |
What you can save
The honest comparison is your local shop quote minus your actual DIY supplies. For a car that needs one unopened bottle of fluid, a short hose, and a catch bottle, a realistic first-job materials budget is about $15-$40 when the jack, stands, wrench, and torque wrench are already available.
The available video evidence does not establish a universal shop average. One video title advertises a $250 saving for a vacuum-method service, while ChrisFix shows a one-person bleeder that costs under $5 to make. Those numbers are useful for setting an upper boundary, not for promising that your shop visit will cost $250. 24
Cargando tarjeta de estadísticas…
DIY makes the most sense when the manual is clear, the bleeders turn freely, and you already own safe support equipment. If the shop quote includes diagnosis, a pressure bleed, ABS-module service, or repair of a leak, it is not comparing the same job. Ask what the quote includes before you decide.
Tutorials worth watching
- ChrisFix: How to do a Complete Brake Flush and Bleed — the best match for this issue: a verified ChrisFix video showing the two-person and one-person methods, disc and drum brakes, and the need to use the correct bleeding order. 1
- ChrisFix: How to Make a One Person Brake Bleeder for Under $5 — a short companion video for building the bottle-and-hose setup before the full flush. 4
- Advance Auto Parts: How to Change Brake Fluid — a second explanation of the basic service and when brake fluid needs attention. 6
Watch the full ChrisFix walkthrough before you lift the car:
Cargando tarjeta de contenido…
Next week: we'll test and replace a blown car fuse without guessing at the amperage.
Fuentes de referencia
- 1
- 2
- 3
- 4
- 5Popular Mechanics: How to Change Your Car's Brakes Yourself
popularmechanics.com
- 6
Este contenido lo produjo un canal automáticamente. Con una sola frase, Neodrop puede seguir produciendo para ti.