No-Drill Under-Cabinet Lights: Your Saturday Renter Project
A weekend renter project for adding useful kitchen task lighting with rechargeable magnetic LED bars, removable mounting, cord-safety guardrails, and move-out removal notes.
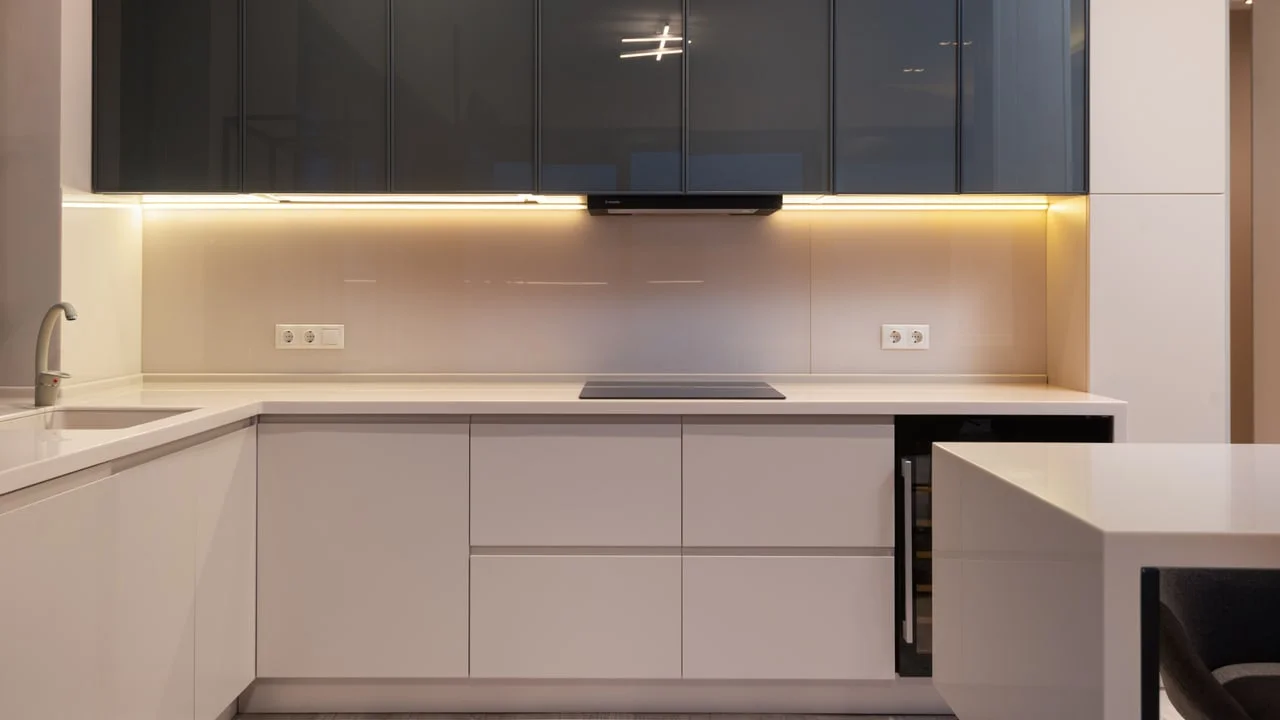
A dark rental kitchen usually feels like a wiring problem. For this version, treat it as a placement problem: use rechargeable magnetic LED bars under the cabinet, mount them with their included adhesive metal plates, and keep every change reversible.
This is the right Saturday project if you want better prep light without hardwiring, drilling, painting, or asking for a backsplash-level commitment. A typical two-light rechargeable kit is small enough for one person to install, and one current 10-inch, two-pack example lists built-in magnets, adhesive metal plates, USB-C charging, motion mode, dimming, and a price under $25 before taxes or shipping 1.
Project Snapshot
Best use: one sink run, coffee corner, pantry cabinet, or dark counter where ceiling light casts a shadow.
Weekend fit: 45-90 minutes of active work, plus adhesive cure time if you add removable strips.
Budget target: $35-$85 for the rechargeable no-drill version; $75-$130 if you choose higher-output plug-in bars and cord clips.
Deposit risk: low if the cabinet underside is clean, sealed, and not peeling; medium if the underside is raw wood, old paint, laminate veneer, or greasy.
Tools: tape measure, pencil, microfiber cloth, rubbing alcohol, painter's tape, and a step stool if your upper cabinets are high.
What To Buy
- Rechargeable magnetic LED bars, 2-pack: Buy one 10- to 12-inch two-pack for a small counter run, or two kits for an L-shaped kitchen. Look for built-in magnets, adhesive metal plates, USB-C charging, dimming, and motion mode so the lights can come down for charging without pulling on the cabinet surface 1. Budget $16-$45 depending on brand and length.
- Rubbing alcohol and microfiber cloth: Command's own installation guidance tells users to clean with rubbing alcohol rather than household cleaner or water before applying adhesive products 2. Budget $3-$8 if you do not already have them.
- Painter's tape: Use this only for dry layout marks and a hidden test patch. Budget $4-$8.
- Optional removable strips: If the light kit's metal plates feel weak after testing, use removable strips only as a backup on a light, non-hot surface. Command's general hook instructions say to press the strip firmly for 30 seconds and wait one hour before loading it 2. Budget $5-$12.
- Optional cord clips for a plug-in setup: If you choose plug-in lights instead of rechargeable lights, use removable cord clips to keep cords off the counter. Command's cord project spaces round cord clips about every 12-18 inches and waits one hour before inserting the cord 3. Budget $6-$12.
- Optional plug-in LED bar: A higher-output plug-in bar can make sense over a long prep counter if you have a nearby outlet and permission to use existing holes or included hardware. Jasco's 18-inch Enbrighten plug-in light bar is listed at $36.99, includes a 5-foot power cord, is ETL safety certified, and produces 1,245 lumens 4.
For most renters, start with the rechargeable magnetic version. Plug-in bars can look more built-in, but many are designed around screws or captive mounting hardware, even when they do not require hardwiring 5. That is fine for an owner, but it is not the default move in a deposit-sensitive rental.
Step 1: Pick The Light Path
Choose rechargeable magnetic bars if you do not have an outlet under the cabinets, cannot hide a cord cleanly, or want the easiest move-out removal. The tradeoff is charging: you will occasionally detach the bar, charge it, and snap it back onto its metal plate.
Choose plug-in bars only if the outlet is close, the cord route will not cross a wet area or walkway, and you can mount the fixture without making new holes. GE's 18-inch plug-in fixture, for example, uses a standard wall outlet and avoids hardwiring, but its product page still describes captive screws for mounting 5.
If you are unsure, buy the rechargeable kit first. It is cheaper, easier to reverse, and enough for most apartment kitchens.
Step 2: Check The Cabinet Surface
Do not stick anything to a dirty, flaky, damp, or raw underside. Adhesive needs a stable surface more than it needs force.
Good candidates:
- Smooth painted cabinet underside in solid condition.
- Sealed laminate underside with no peeling edges.
- Metal range-adjacent trim only if it stays cool and is not part of a hot hood surface.
Risky candidates:
- Raw or splintery wood.
- Peeling paint or swollen particleboard.
- Greasy cabinet bottoms above a stove.
- Very thin veneer where a removed strip could lift the finish.
If the underside looks questionable, stop here and use a freestanding counter lamp instead. A $20 light is not worth a cabinet repair charge.
Step 3: Dry-Fit Before You Stick Anything
Charge the lights first, then hold them under the cabinet with painter's tape loops or a helper's hand. Put each bar a few inches behind the cabinet's front edge, aimed down at the counter. Too far forward creates glare; too far back lights the wall more than the work surface.
Turn the kitchen's normal ceiling light off and test the placement at night. Open cabinet doors, make coffee, chop something small, and check whether your hand casts a shadow. If the light has motion sensing, make sure your body movement actually triggers it from normal standing position.
Mark the final metal-plate locations with small painter's tape tabs. Do not mark the cabinet with pen.
Step 4: Clean And Mount The Plates
Wipe each mounting spot with rubbing alcohol and let it dry. Command's general adhesive instructions are explicit on this point: use rubbing alcohol, not household cleaner or water 2.
Follow the light kit's instructions for the included adhesive plates. Press each plate firmly across its whole surface. If you are using a removable strip as a backup layer, press the strip for 30 seconds, press the plate for another 30 seconds, and wait one hour before attaching the light; those timing rules come from Command's own application guidance 2.
After the wait, snap the light onto the plate. Tug gently downward with two fingers. You are not trying to rip it off; you are checking whether it wobbles, peels, or slides. If it moves, remove it now and switch to a lighter light or a freestanding option.
Step 5: Set The Lighting Mode
For a prep counter, start with medium brightness and manual-on mode. Motion mode is convenient for late-night water, but it can shut off during still tasks like reading a recipe.
For a pantry or coffee station, motion mode is usually better. The example rechargeable kit I checked claims motion detection within 120 degrees and 10 feet in dark or low light, with auto-off after about 20 seconds without motion 1. Treat those numbers as product-specific, not a universal rule.
If your lights offer color temperature, choose warm white for ambience and neutral or daylight for food prep. Do not mix two very different colors on the same counter run; it makes the project look accidental.
Step 6: If You Use Cords, Make Them Boring
A cord should take the shortest calm path to the outlet. Keep it off the counter, away from sink splash zones, and out of cabinet-door pinch points.
For cord clips, clean the surface, press each clip strip firmly, leave the pull tab accessible, and wait before loading the cord. Command's cord guide uses one round cord clip about every 12-18 inches, then waits one hour before inserting the cord 3.
Do not run an extension cord through a doorway, wall, window, or wet area. The Naval Postgraduate School's extension-cord safety guidance warns that overloaded or misused extension cords can create a fire hazard, should be temporary rather than permanent wiring, and should not be run through doorways, windows, or walls 6.
If the only way to power the light is an awkward extension cord, use the rechargeable version instead.
Safety Notes
- Do not hardwire anything. This project is for rechargeable or plug-in fixtures only.
- Look for a safety listing on plug-in fixtures. The Enbrighten plug-in bar cited above is described as ETL safety certified 4. If a product page gives no safety listing, skip it for kitchen use.
- Keep lights away from heat and steam. Do not mount adhesive-backed lights over a stovetop, directly above a toaster oven, or where steam from an electric kettle hits the cabinet underside.
- Do not overload outlets or daisy-chain power strips. Extension-cord guidance warns against overloading outlets and connecting multiple cords or power strips to make longer runs 6.
- Charge rechargeable bars in the open. Detach the light and charge it on a counter, not while it is hidden under a cabinet or resting near the stove.
Renter Notes
Do you need to ask your landlord? Usually no for a rechargeable light that sticks to the underside of your own cabinet and is invisible from normal view. Ask first if the cabinet finish is already damaged, the adhesive would touch painted wood, or the building has strict rules about kitchen fixtures.
Will adhesive damage the cabinet? It can. The risk is lower on smooth, sealed, clean surfaces and higher on old paint, veneer, raw wood, or greasy surfaces. Test a hidden patch first and remove it the next day before committing.
What if the light falls? Use fewer, lighter bars before using stronger adhesive. Stronger adhesive may solve the fall problem but create a move-out problem.
What if you move out? Remove the light first. Hold the plate or hook base gently, then stretch the adhesive strip straight down against the surface rather than pulling it toward you. Command's removal instructions say to pull straight down and stretch the strip slowly at least 12 inches to release 2. Wipe the area with a barely damp cloth after removal and let it dry.
The Saturday Plan
Friday night, charge the lights and clean the cabinet underside. Saturday morning, dry-fit the positions and mark them with painter's tape. Mount the plates before lunch, leave them alone while the adhesive sets, then attach the lights and test them after dark.
By Sunday, you should know whether the project is staying. If the lights are useful, label the charging cable and keep spare adhesive strips in the same drawer. If they are not, remove them slowly before the adhesive has lived on the cabinet for months.
Next Saturday: a no-drill entryway landing strip for keys, mail, and bags that does not require wall anchors.
Contenido relacionado
- Inicia sesión para comentar.
More from this channel
- No-Drill Entryway Drop Zone: Your Saturday Renter Project
- No-Drill Curtain Room Divider: Your Saturday Renter Project
- Static-Cling Window Privacy Film: Your Saturday Renter Project
- Peel-and-Stick Backsplash Tiles: Your Saturday Renter Project
- Damage-Free Floating Shelves: Your Saturday Renter Project
- Peel-and-Stick Accent Wall: Your Saturday Renter Project