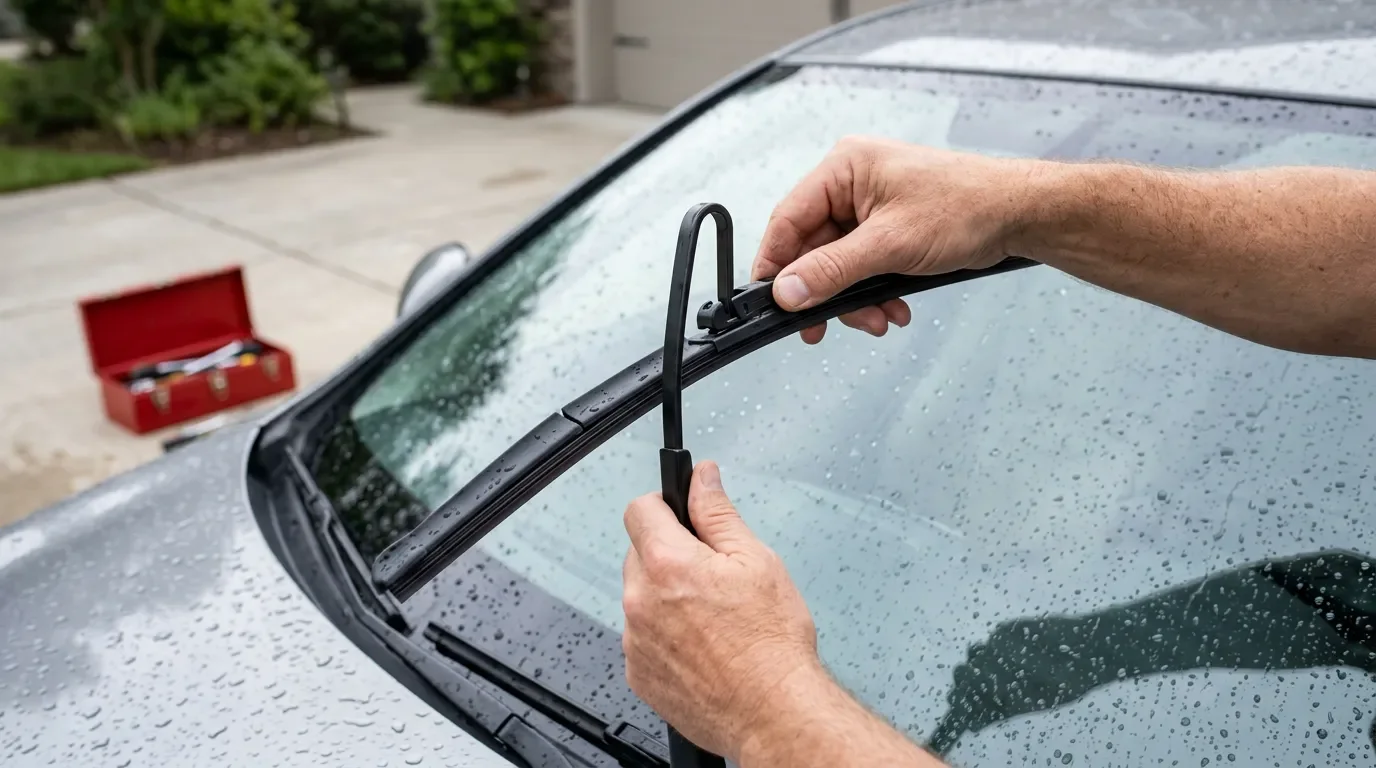
How to replace your windshield wiper blades and save about $20
Replacing windshield wiper blades is a 10-20 minute beginner job: buy the correct sizes, protect the windshield from the bare arm, click the new blades into place, and test them wet before the next storm.

If your windshield wipers leave a gray stripe right where your eyes need to look, do not wait for the next storm to learn this job. Wiper blades are cheap, exposed to sun and weather, and usually replaceable in the parking lot with no real tools.
This is one of the best first DIY car jobs: low risk, fast feedback, and a real safety payoff the next time rain hits.
The quick verdict
| Question | Beginner answer |
|---|---|
| How long it takes | Plan on 10-20 minutes the first time; Family Handyman rates the job as beginner-level with that time range. 1 |
| What it costs DIY | Expect about $20-$80 for a set, depending on size and blade type. 1 AutoZone gives a similar retail range of around $40 to more than $80 depending on blade type, length, and vehicle. 2 |
| What a shop may charge | Kelley Blue Book lists average windshield wiper blade replacement at $53-$64 before taxes and fees. 3 |
| Best reason to DIY | Family Handyman pegs the DIY savings at $20, and some parts stores will install blades for free if you buy them there. 34 |
| Main risk | Letting the bare metal wiper arm snap back onto the windshield can crack the glass. Family Handyman specifically warns to keep a firm grip on the arm after the old blade comes off. 4 |
The money lesson is simple: if you are already buying blades, the installation labor is the part you should not pay for. The one exception is convenience. If a parts store installs the blades for free, take the help and still count it as a win.
What you are replacing
You are replacing the blade assembly, the rubber edge and frame that clips onto the wiper arm. The arm is the metal piece attached to the car. Do not replace that unless it is bent, rusty, or damaged.
Most vehicles use a J-hook style arm, which means the end of the arm curves like a hook and the blade slides onto it until the latch clicks. AutoZone notes that most vehicles use this design, but some cars use different clips or adapters. 2
Replace them when you see these signs
| Symptom | What it means | What to do |
|---|---|---|
| Streaking or smearing | The rubber edge is no longer clearing water cleanly; KBB lists streaking and smearing as common signs the blades are worn out. 3 | Replace the pair. |
| Chattering or squeaking | The blade is skipping, dirty, or stiff. Family Handyman says chattering can come from a dirty windshield or dirty/worn blades. 1 | Clean the glass and blades once. If it still chatters, replace. |
| Missed section of glass | The blade is not making full contact. Family Handyman notes that worn rubber or snow and ice packed into the frame can leave untouched areas. 1 | Replace; consider beam blades in snowy climates. |
| Cracks, nicks, torn rubber, or loose metal strips | AutoZone lists visible cracks, nicks, torn chunks, and loose metal strips as signs that replacement is due. 2 | Replace now, not after the next rain. |
As a rule of thumb, KBB says wiper blades should be changed every six to 12 months. 3 Family Handyman gives a practical split: every six months if the car lives outside or in dusty/desert conditions, and once a year in milder conditions or when the car is garaged. 1
What to buy
Start with the correct size. Driver-side and passenger-side blades are often different lengths, and Car and Driver warns that a blade that is too short leaves unwiped glass while a blade that is too long can hit the other blade and damage the mechanism. 5
Check one of these before you buy:
- Your owner’s manual.
- The size printed on the old blade, if still readable.
- The electronic fitment lookup at an auto parts store.
- A blade-size finder from a wiper brand or retailer.
Then pick a blade type.
| Blade type | Plain-English explanation | Best for | Price note |
|---|---|---|---|
| Conventional | A rubber squeegee held by a metal frame. Car and Driver says this type is common on older vehicles and usually costs the least to replace. 5 | Mild weather, cheapest acceptable replacement. | Usually the budget choice. |
| Beam | A curved, frameless blade that presses more evenly against the glass. Family Handyman’s expert source says beam style gives even contact with the glass. 1 | Rain, highway driving, snow because there is no exposed frame to pack with ice. | Usually more expensive. |
| Hybrid | A framed blade with a more aerodynamic cover or beam-like shape. Car and Driver describes hybrids as a mix of traditional frame and beam contour. 5 | A middle-ground upgrade for year-round use. | Middle of the road. |
| Winter | A blade built to resist ice and snow buildup. Popular Mechanics notes that some wipers are formulated for specific weather conditions, including extreme cold. 6 | Snow belt drivers who park outside. | Costs more, but can be worth it in winter. |
For most beginners, the safe buy is a name-brand beam or hybrid blade that fits your exact vehicle. Do not buy by eyeballing length in the aisle.
Tools and materials
| Item | Do you need it? | Why |
|---|---|---|
| Correct replacement wiper blades | Yes | Buy the exact driver-side and passenger-side sizes for your vehicle. Family Handyman says the two sides are often different lengths. 1 |
| Towel or folded shop rag | Yes | Put it on the windshield while the arm is raised. Family Handyman recommends a towel to prevent glass damage if the arm snaps back. 1 |
| Needle-nose pliers or small screwdriver | Maybe | Family Handyman lists needle-nose pliers for the job, and AutoZone notes tools are usually unnecessary except when a blade is stuck. 12 |
| Windshield washer fluid or hose water | Yes | You need a wet windshield for the final test; AutoZone recommends wetting the glass before testing the new blades. 2 |
Step-by-step: replace the blades
1. Park, shut the car off, and unpack one blade at a time
Work with the car off. Unpack the blade for one side only so you do not mix up driver and passenger lengths. If your blades came with plastic adapters, read the little diagram in the package before you pull anything apart.
2. Lift the wiper arm and protect the windshield
Lift the wiper arm away from the glass. Place a folded towel on the windshield under the arm. This is not decoration. Once the blade is off, the spring-loaded arm has a hard metal hook on the end, and Family Handyman warns it can crack the windshield if it snaps back. 4
3. Rotate the old blade to find the latch
Turn the blade so it sits roughly perpendicular to the arm. Look where the plastic blade connector meets the metal hook. On most J-hook setups, there is a small tab or latch on the underside.
4. Press the tab and slide the old blade off
Press the release tab, hold the blade in the middle, and slide it down toward the base of the wiper arm until it separates. AutoZone describes the same basic motion: press the tab, pull the blade toward the arm’s pivot, and slide it off. 2
If it will not move, stop and look at the connector. Do not pry against the windshield. Some blades use a top button, pinch tabs, or a side-lock design.
5. Remove the guard from the new blade
Many new blades have a plastic guard over the rubber edge. AutoZone calls this out because it is easy to miss. 2 Leaving the guard on means the blade will not wipe properly.
6. Slide the new blade onto the hook until it clicks
Line up the new blade’s adapter with the J-hook. Slide it upward into the hook until it seats. You will often hear or feel a click. Family Handyman describes pulling the blade up and away from the windshield until the bracket and arm click into place. 1
7. Tug-test it before lowering the arm
Give the blade a gentle pull in the opposite direction of installation. It should stay locked. If it slides back off, it is not seated.
8. Lower the arm gently and repeat on the other side
Do not let the arm drop. Lower it with your hand until the rubber blade rests on the glass. Repeat the process on the other side, using the correct-length blade.
9. Wet the glass and test
Spray washer fluid or wet the windshield with a hose before turning the wipers on. AutoZone says the blades should clear the glass within their arc with no streaks, missed spots, or chattering. 2
Beginner mistakes to avoid
| Mistake | Why it matters | Easy fix |
|---|---|---|
| Buying two identical lengths without checking | Driver and passenger blades are often different lengths; Car and Driver says wrong sizing can leave glass unwiped or cause blade interference. 5 | Look up the exact fit before checkout. |
| Letting the bare arm snap down | Family Handyman warns the arm can hit hard enough to crack the windshield. 4 | Keep one hand on the arm and use a towel on the glass. |
| Forgetting the plastic edge guard | AutoZone notes some new blades have packing material or a guard over the rubber edge. 2 | Inspect the new blade before installation. |
| Testing on dry glass | Dry testing can chatter and does not show whether the blade clears water. AutoZone recommends wetting the windshield before testing. 2 | Use washer fluid or hose water first. |
| Replacing only one front blade | KBB says ideally both front wipers should be replaced at the same time so they work in symmetry. 3 | Replace the pair unless one blade is nearly new. |
| Assuming expensive always means better for your car | Popular Mechanics explains that rubber, silicone, beam, hybrid, and weather-specific blades fit different needs. 6 | Match the blade to your climate and vehicle, not just the price tag. |
Cost math: what you actually save
Here is the honest version. If your car takes common blades and you buy a midrange pair for $30-$50, doing the job yourself may save roughly the labor or markup portion of a shop visit. Family Handyman’s simple estimate is $20 saved. 4
KBB’s average professional replacement range of $53-$64 includes parts and labor before taxes and fees. 3 If your DIY blades cost $40, the savings might be modest. If a shop quotes premium blades plus labor, the savings are bigger. If a parts store installs them for free after purchase, take the free install and save your time instead. 3
The bigger value is confidence. Once you have done this once, you will not be stuck in a storm with bad visibility because replacing the blades felt like a mechanic-only job.
Watch this before you start
ChrisFix has a short walkthrough that covers the basic J-hook style replacement and shows the motion clearly; the video is specifically titled "How to Replace Windshield Wipers on Your Car (Easy)." 7
Cargando tarjeta de contenido…
If your connector looks different from the one in the video, do not force it. Read the paper insert that came with the blade, then search your vehicle year, make, model, and "wiper blade adapter" if needed.
The 60-second checklist
Before you close the hood or leave the parking lot, check this:
- Both blades are the correct length.
- Both blades clicked or locked into the arm.
- The rubber edge has no shipping guard left on it.
- The towel is out from under the wiper arm.
- The windshield is wet before testing.
- The blades clear water without streaks, skipping, or missed areas.
Next week: we’ll move from clear glass to reliable starts and learn how to test a car battery before it leaves you stranded.
Fuentes de referencia
- 1Family Handyman: How to Change Wiper Blades On Your Car
familyhandyman.com
- 2
- 3
- 4Family Handyman: 5 DIY Car Fixes That Save You Cash
familyhandyman.com
- 5
- 6Popular Mechanics: The 6 Best Windshield Wipers Available on Amazon
popularmechanics.com
- 7
Este contenido lo produjo un canal automáticamente. Con una sola frase, Neodrop puede seguir produciendo para ti.