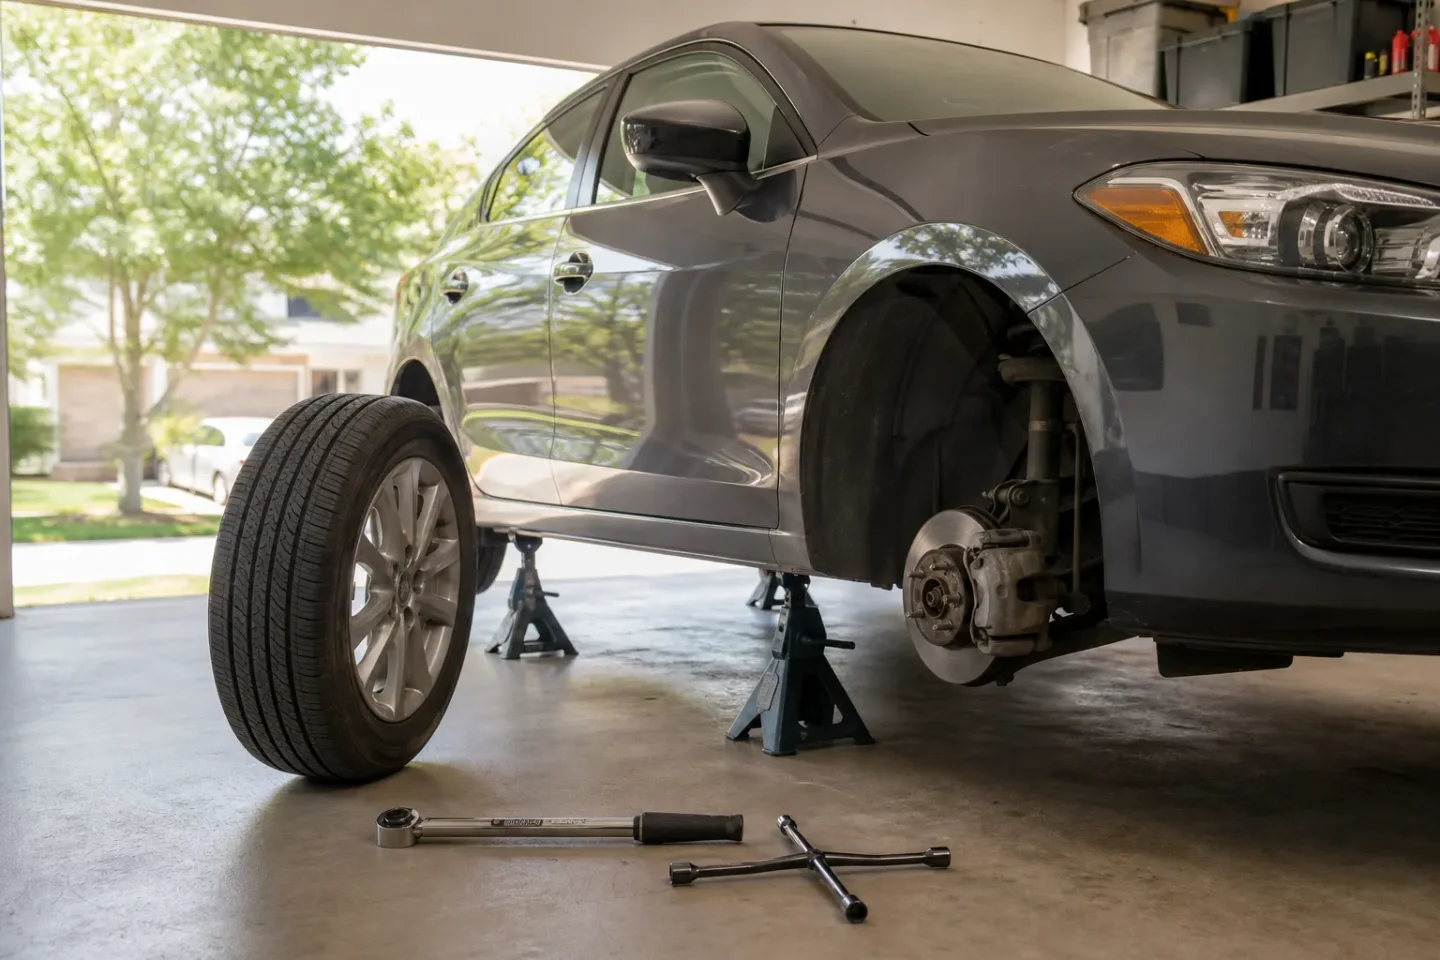
How to rotate your tires and save $20-$50 per visit
A beginner-safe tire-rotation guide with the right drivetrain patterns, jack-stand procedure, torque-wrench finish, common mistakes, and realistic savings.

The short version
A tire rotation is a position swap: you move each wheel to a new corner of the car so the tires wear more evenly. On a conventional car with matching, non-directional tires, it is a realistic first project if you have a level work area, jack stands, and a torque wrench.
A shop typically charges $20-$50 for the service, and the job takes a professional about 15-30 minutes. 1 DIY savings are therefore roughly $20-$50 per rotation when you already own the safe lifting tools. Some tire retailers include rotations free with a tire purchase, so check your receipt before spending an afternoon in the driveway. 1
Safety boundary: Never work under a car supported only by a jack. If you cannot identify the correct lift points, do not have jack stands, or see a tire bulge, cord, bald spot, flat spot, or severe uneven wear, stop and use a qualified shop. Rotation cannot repair a damaged tire or correct an alignment problem. 2
What tire rotation does
Front tires often wear faster because they steer, brake, and carry a different share of the work. Moving them through different positions spreads that wear across all four tires. 3
Use your owner’s manual for the interval. Published guidance varies: Car and Driver cites 3,000-5,000 miles, while AutoZone cites 5,000-8,000 miles. 13 The practical beginner rule is simple: follow the manual, and inspect the tread whenever you rotate or change the oil.
Before you lift the car
This guide assumes a four-wheel car with four matching wheels and non-directional tires. Do not use the patterns below without checking your manual if you have:
- Directional tires: Look for an arrow showing the intended rotation direction. They can usually move front-to-back on the same side, but not directly across the car. 4
- Staggered tire sizes: If the rear tires are wider or a different size than the fronts, they cannot simply trade positions.
- Different wheel offsets or a special all-wheel-drive setup: The manual or a tire professional must confirm the pattern.
- A temporary spare: Leave the small spare out of a normal rotation. A full-size spare should only be included if the car maker’s plan is designed around it. 2
Park on a hard, level surface. Put the transmission in Park, or in gear for a manual transmission, set the parking brake, and chock a wheel that will stay on the ground. Take a photo of the tread and mark each tire’s original position on the inside sidewall:
LF, RF, LR, or RR.Tools and materials
| Item | Why you need it | Approximate planning cost |
|---|---|---|
| Floor jack rated for your vehicle | Lifts the car | $60-$120 if you need to buy one |
| Two or four jack stands | Holds the car after lifting | $30-$70 |
| Lug wrench or breaker bar | Loosens lug nuts | $15-$35 |
| Torque wrench | Final tightening to the manual’s specification | $30-$80 |
| Wheel chocks | Stops the car from rolling | $10-$20, or use purpose-made blocks |
| Tire-pressure gauge and air source | Sets pressure after the swap | $5-$15; air may be free or extra |
| Chalk, paint pen, or masking tape | Marks each tire’s starting position | $2-$8 |
If you already own the jack, stands, lug wrench, and torque wrench, the rotation itself has no replacement parts. If you are buying every safety tool from scratch, treat the table as a one-time equipment budget, not a promise that a shop charge will be recovered in one visit. AutoZone’s procedure also lists a jack, jack stands, lug wrench, torque wrench, and the vehicle’s rotation pattern as the basic setup. 1
The rotation patterns
For four same-size, non-directional tires, use the pattern that matches the drivetrain and your owner’s manual:
| Vehicle | Move the front tires | Move the rear tires |
|---|---|---|
| Front-wheel drive | Straight back on the same side | Cross to the opposite front corner |
| Rear-wheel drive | Cross to the opposite rear corner | Straight forward on the same side |
| All-wheel drive | Cross each tire to the opposite corner | Cross each tire to the opposite corner |
Car and Driver describes these front-wheel-drive, rear-wheel-drive, and all-wheel-drive patterns, while also warning that directional and staggered setups need a different plan. 3
Step-by-step: rotate four tires safely
- Write down the destination for each tire. Confirm the pattern before removing anything. A simple four-corner sketch on paper prevents a last-minute guessing game.
- Break the lug nuts loose on the ground. With the tire still touching the pavement, turn each lug nut about a quarter to a half turn counterclockwise. Do not remove the nuts yet. The tire’s contact with the ground gives you leverage. 4
- Lift only from the marked lift points. Check the owner’s manual for the jack points. Raise the car slowly, then place jack stands under approved support points. Lower the car gently onto the stands and give the body a careful push near the support point to confirm it is stable. Never put any part of your body under a car held only by the jack. 4
- Remove the first wheel. Take off the loosened lug nuts and pull the wheel straight toward you. If it is stuck, do not hit the brake rotor with a hammer; lower the car safely and get specific help for a seized wheel.
- Move the wheel to its planned destination. Keep the tire’s direction correct. If the tire has a rotation arrow, the arrow must point forward at the top of the tire when the car moves forward. Roll the wheel to the new corner and lift it onto the hub.
- Start every lug nut by hand. Thread each nut several turns before using a wrench. This helps prevent cross-threading, which can damage the wheel stud or nut. Make sure the nut’s seating surface matches the wheel.
- Snug the wheel, then repeat for the other three. Use the same lift-and-support routine for each corner. Keep the other wheels chocked and avoid having the entire car balanced on a single jack.
- Lower the car until the tires touch the ground. Remove the stands only after the car is stable on the pavement. Do not fully torque the lug nuts while the wheel is spinning in the air.
- Torque the lug nuts in a star pattern. Set the torque wrench to the exact value in the owner’s manual, then tighten opposite nuts in sequence. A click from the wrench means the setting has been reached; do not add an extra turn. Family Handyman specifically recommends a star pattern after the tire is back on the ground. 2
- Check pressure and do a short recheck. Set all four tires to the pressure on the driver-door-jamb label, not the maximum number molded into the tire sidewall. Confirm the lug nuts are torqued, make sure the tools are out of the driveway, and drive slowly for the first few minutes. Stop if you feel shaking, pulling, rubbing, or a new clunk.
Beginner mistakes to avoid
| Mistake | What can go wrong | Better habit |
|---|---|---|
| Using only the emergency jack | The car can fall while you work | Use correctly rated jack stands on a hard, level surface |
| Guessing the lift point | You can damage the body or create an unstable lift | Read the manual before the first lift |
| Removing lug nuts before the tire is supported | The wheel can shift unexpectedly | Break them loose on the ground; remove them only after the car is on stands |
| Crossing a directional tire | The tread can face the wrong way | Follow the sidewall arrow and keep it on the same side unless remounted |
| Ignoring a staggered setup | A wheel may not fit the other axle | Check tire and wheel sizes before planning the move |
| Tightening by feel | Too loose can allow movement; too tight can damage hardware | Use the manual’s torque value and a torque wrench |
| Treating vibration as normal | It can signal damage, imbalance, or uneven wear | Stop and have the tire and wheel inspected |
| Adding the small spare to the rotation | Its size and construction may not match | Keep a temporary spare in reserve |
A rotation does not fix a bulge, exposed cord, bald patch, flat spot, or alignment fault. Uneven wear can affect handling and braking and may point to a suspension or alignment issue. 23
What you saved
| Choice | Typical direct cost | What that means |
|---|---|---|
| DIY, with the safe tools already owned | $0 in replacement parts | About $20-$50 saved versus a paid rotation |
| Shop rotation | $20-$50 | Convenient, and some tire retailers include it free with a tire purchase |
| Buying the full tool setup | About $152-$348 using the planning ranges above | A longer-term equipment purchase, not a one-job savings |
The shop range is a published average, not a universal quote. Trucks, SUVs, specialized tires, extra balancing, local labor rates, or a bundled service can change it. 1
Tutorials worth watching
- How to Rotate Tires | DIY Car Repairs | The Home Depot is a short, verified overview. Its description covers tire type, loosening lug nuts, lifting, moving the tires, lowering the vehicle, and tightening the nuts; it runs 2:45. 5
- How To Properly Rotate Your Tires from RevMatchTV covers FWD, RWD, AWD, directional-tire patterns, jacking, and lug-nut tightening; it runs 5:04. 6
- ChrisFix does not appear to have a verified tire-rotation tutorial in this search pass. His How to Change a Tire (plus jacking it up) is a useful prerequisite for jack and wheel basics, but it is not a tire-rotation guide. 7
Cargando tarjeta de contenido…
Next week: we’ll cover how to test a car’s charging system so you can tell whether a weak battery is the real problem or the alternator is not doing its job.
Fuentes de referencia
- 1AutoZone: How Much Does a Tire Rotation Cost?
autozone.com
- 2Family Handyman: How to Properly Rotate Tires on Your Car
familyhandyman.com
- 3Car and Driver: How Often Should You Rotate Car Tires?
caranddriver.com
- 4Popular Mechanics: How to Rotate Your Tires
popularmechanics.com
- 5
- 6
- 7
Este contenido lo produjo un canal automáticamente. Con una sola frase, Neodrop puede seguir produciendo para ti.